© 2012 ITW Finishing Systems and Products 11
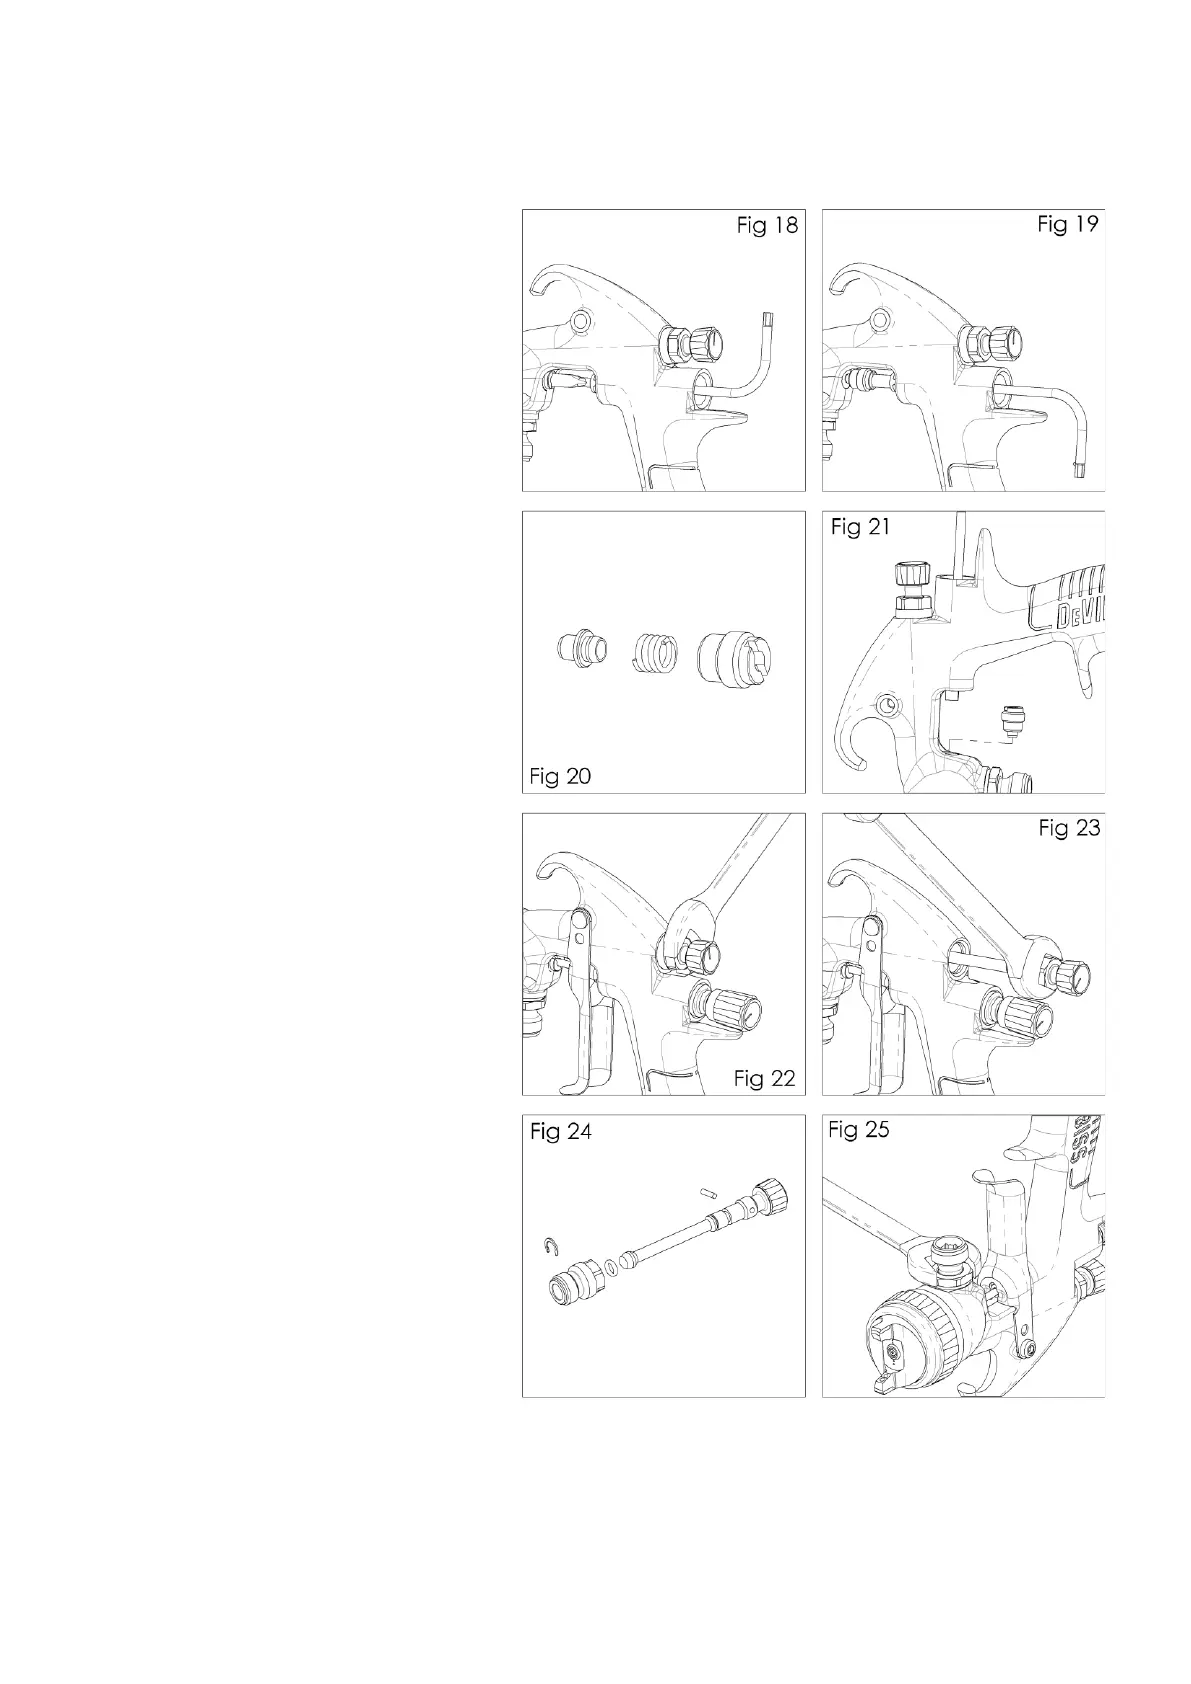
NEEDLE PACKING
REPLACEMENT INSTRUCTIONS
1. Remove trigger and needle following steps
1 to 6 on P9, servicing air-valve.
2. Loosen and remove packing nut using Key
(part of 59) or a straight blade screwdriver.
(See figs 18 & 19)
3. Discard old packing (34) and packing
spring (35) if replacing. Clean packing if
reusing. Also clean packing spring and nut
(36). (See fig 20).
4. Re-assemble the packing, assemble into
gun-body by hand and then tighten. (See
fig 21)
5. Complete re-assembly.
SPREADER VALVE ASSEMBLY
REPLACEMENT/MAINTENANCE
1. The spreader valve assembly can be
replaced if damaged. Remove using
14 mm Spanner (59) (See figs 22 &
23). The internal seal can be replaced
and is included in the Gun Rebuild Kit
(See fig 24).
FLUID INLET SEAL
REPLACEMENT INSTRUCTIONS
1. Loosen Locknut (49) with 18mm
Spanner (See fig 25).
2. Unscrew Fluid Inlet Adaptor (50) with
8mm Hex Key (See fig 26).
3. Remove Fluid Inlet Adaptor
(See fig 27).
4. Remove seal (48) and replace with
new seal (See fig 28).
5. Replace Fluid Inlet Adaptor (See fig
27)
6. Tighten with 8mm Hex Key to 26-
28Nm
(See Fig. 26).
7. Tighten Lock Nut (49) with 18mm
Spanner (See Fig. 25).