31
ENGLISH
A2
13
Trigger switch (mitre saw mode)
14
Fixed upper blade guard
15
Dust extraction adapter
16
Bevel clamp knob (Fig. A3)
17
Leg
18
Foot
19
Wheel
A3
20
Height adjuster
21
Saw bench table
22
Riving knife
23
Upper blade guard
24
Parallel fence
25
Push stick
Optional accessories
For use in mitre saw mode:
A4
26
Adjustable stand 760 mm (max. height) (DE3474)
27
Support guide rails 1000 mm (DE3494)
28
Support guide rails 500 mm (DE3491)
29
Inclinable support (DE3495)
30
Support with removable stop (DE3495)
31
Support with stop removed (DE3495)
32
Material clamp
For use in saw bench mode:
A5
33
Extension table (D271058)
A6
34
Sliding table (D271055)
Push sticks
25
(not shown)
For use in all modes:
A7
35
Three way dust extraction kit (D271054)
A8
36
LED Worklight System (available on XPS version only)
Intended Use
Your
D27107 flip-over saw has been designed to operate as a mitre saw or a saw
bench to perform the four main sawing operations of ripping, cross-cutting, bevelling and
mitring easily, accurately andsafely.
This unit is designed for use with a nominal blade diameter 305 mm carbide tip blade for
professional cutting wood, wood products andplastics.
DO NOT use under wet conditions or in the presence of flammable liquids orgases.
These flip over saws are professional powertools.
DO NOT let children come into contact with the tool. Supervision is required when
inexperienced operators use thistool.
WARNING: Do not use the machine for purposes other thanintended.
• Young children and the infirm. This appliance is not intended for use by young children
or infirm persons without supervision.
• This product is not intended for use by persons (including children) suffering from
diminished physical, sensory or mental abilities; lack of experience, knowledge or skills
unless they are supervised by a person responsible for their safety. Children should never
be left alone with thisproduct.
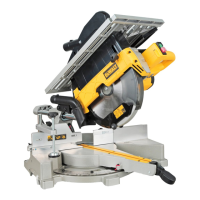
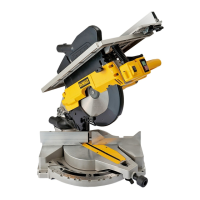
Mitre saw mode
In mitre saw mode, the sawing machine is used in vertical, mitre or bevelposition.
Bench saw mode
Turned over on its central axis, the sawing machine is used to perform the standard ripping
operation and for sawing wide pieces by manually feeding the workpiece into theblade.
ASSEMBLY AND ADJUSTMENTS
WARNING: To reduce the risk of serious personal injury, turn tool off and
disconnect tool from power source before making any adjustments or removing/
installing attachments or accessories. An accidental start-up can causeinjury.
Unpacking the Machine and Its Parts
WARNING: To reduce the risk of injury, always seek assistance when moving themachine.
• Remove the loose packaging material from thebox.
• Lift the machine out of thebox.
• Remove the parts box from the interior of themachine.
• Remove any remaining packing material from themachine.
Mounting the Feet (Fig. A2, B, B1)
With the feet and legs mounted, alternatively the machine is suitable for placement on a
workbench. To ensure a safe operation, the machine must be fastened to theworkbench.
WARNING: Never operate this machine when it is not fastened to the workbench. The
feed force will make the saw unstable if not fastened to theworkbench.
1. Turn the machine upsidedown.
2. Place a foot
18
on each of the mounting locations
38
on thebase.
3. Slide a nut
39
into the slots
40
located above the mountinglocations.
4. Insert a bolt
41
fitted with a washer
42
into thefeet.
5. Tighten thebolts.
6. Mount the legs as describedbelow.
7. Fold the legs as described below .
8. Turn the machine straightup.
9. Insert a bolt of 8mm and 120mm minimum length
37
into the feet on each mounting
location (Fig. B1).
10. Tighten thebolts.
Mounting the Legs (Fig. C1, C2)
WARNING: Follow the mounting instructions carefully. Fasten the legs to the saw
securely as instructed. Proper assembly is important to prevent the risk of a collapse of the
sawstand.
WARNING: Ensure all leg fasteners are securely fastened and that all stand
mechanisms are in proper working order before mounting or operating the table
saw. Proper assembly is important to prevent the risk of a collapse of the sawstand.
With the legs mounted, the machine is suitable for stand-aloneplacement.
1. Turn the machine upsidedown.
2. Mount the legs as described below. Beware that the front legs and the rear legs have
different lengths. The rear legs are slightly longer than the front legs. Make sure to mount
the legs in the correctplace.
3. Turn the machine straight up. Make sure it is level; adjust the leg clamping height
ifrequired.
Rear Legs
1. Present a leg
17
to each of the mounting points
43
located at the lower edges on the
inside of the base (Fig. C1).
2. Pass a coach bolt
44
from the outside through the holes into the frame and thelegs.
3. Place a bracket
45
and a lock knob
46
onto thebolts.
4. Tighten the lockknobs.
Front Legs
1. Present a leg
17
to each of the mounting points
43
located at the upper edges on the
inside of the base (Fig. C2).
2. Place a bracket
45
over thelegs.
3. Pass a coach bolt
44
from the inside through the holes into the brackets, the legs
andframe.
4. Place a lock knob
46
onto thebolts.
5. Tighten the lockknobs.
Folding the Legs (Fig. C3, C4)/Bench Mounting (Fig. B1)
WARNING: Keep your fingers clear of the hinge points while folding the legs of
the saw stand. Danger of fingers being crushed orcontused.
The legs can be folded into the base to make the machine suitable for use on aworkbench.
1. Turn the machine upside down
2. Loosen the lock knob
46
of the first leg
17
3. Fold the leg inwards
4. Tighten the lock knob
5. Repeat as for the other legs
6. Turn the machine straight up
7. Use both holes
37
in the legs and secure the machine with bolts with a diameter of 8mm
and minimum 150mmlength.
To prevent binding and inaccuracy, be sure the mounting surface is not warped or
otherwiseuneven.
Mounting the Wheels (Fig. D)
1. Place a wheel
19
onto the axles
48
on each side of themachine.
2. Place a flat washer
49
and a nut
50
onto the threaded end of theaxles.
3. Tighten thenuts.
Assembly for Mitre Saw Mode
Mounting the Under-Table Guard (Fig. E)
The under-table guard
51
is fitted to the top of the saw benchtable.
1. Place the two fasteners on the left of the guard into the slots
52
on the left of the blade
slot
53
. Turn the plastic screwscounterclockwise.
2. Place the guard flat on the table and press the fastener in the slot
54
on the right of the
blade slot. Turn the plastic screwcounterclockwise.
3. To remove, turn the screws clockwise and remove theguard.
 Loading...