ENGLISH
10
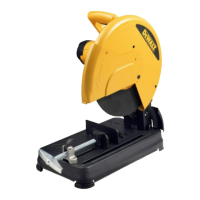
– Turn the depth stop bolt (f) in or out as to
achieve the required cutting depth.
– Tighten the lock nut (g).
WARNING: Always adjust the depth
stop to its original position when
replacing the cutting disc.
Clamping the Workpiece in Position
(fi g. 1, 3)
The tool is equipped with a material clamp (j) (fig. 1).
1. Pull the lever (n) toward the handle (m) (fig. 3A).
2. Push the clamp shaft (cc) forward until the jaw
(dd) is almost touching the workpiece.
3. Press the lever (n) toward the jaw (dd) until it
engages with the clamp shaft (cc).
4. Rotate the handle (m) clockwise and clamp the
workpiece securely.
5. To release the workpiece, rotate the handle (m)
counterclockwise.
WARNING:
• To increase the cutting capacity,
place a spacer block (ee) under the
workpiece (ff). The spacer block
should be slightly narrower than the
workpiece (fig. 3B).
• Support long workpieces using a
piece of wood (gg) (fig. 3C). Do not
clamp the cut off end (hh).
QUICK TRAVEL FEATURE (FIG. 3A)
The clamp has a quick travel feature.
To release the clamp, rotate the handle (m) one or
two turns counterclockwise and pull the lever (n)
toward the handle (m).
SETTING THE CLAMPING POSITION (FIG. 3D)
The clamping position can be set to match the
cutting disc.
1. Remove the fence bolts (ii) using the hex key (l).
2. Move the fence (i) as required.
3. Re-fit the fence bolts (ii) and tighten them to
lock the fence (i).
Adjusting the Angle of Cut (fi g. 4)
The tool can be used for mitre cuts up to 45°.
1. Loosen the fence bolts (ii) to release the fence (i).
2. Set the fence (i) to the required angle. The angle
can be read on the scale (jj).
3. Tighten the fence bolts (ii) to lock the fence (i).
Checking and Adjusting the Mitre
Scale (fi g. 1, 4)
1. Loosen the fence bolts (ii) to release the fence (i)
(fig. 4).
2. Pull down the arm and lock it in this position
using the lock-down chain (u) (fig. 1).
3. Place a square (kk) against the fence (i) and the
left side of the cutting disc creating a perfect 90°
(fig. 4). Check that the 0° marking on the scale
(jj) aligns with the marking on the table (ll).
4. Tighten the fence bolts (ii) to lock the fence (i).
5. Release the lock-down chain (u) and return the
arm to its upper rest position (fig. 1).
Adjusting the Spark Defl ector (fi g. 1)
1. Loosen the screw (t).
2. Set the spark deflector (s) as appropriate.
3. Tighten the screw (t).
Mounting (fi g. 6, 7)
CAUTION: Tool must be supported on
stable, level, non-skid surface to prevent
unexpected movement when operating.
PROCEDURE FOR PERMANENT MOUNTING
1. Drill two holes 8 mm (5/16") through the work
surface (fig. 6).
2. Insert 1/4-20 screws down through the holes
in the base and through holes in mounting
surface. The approximate length of the screws
should be the thickness of the mounting surface
plus 102mm (4").
3. Tighten both screws securely.
CRADLE MOUNTING
1. Cut two boards approximately 508 x 50.8 x
101.6 mm (20" long x 2" high x 4") wide.
2. Place chop saw at desired work location.
3. Place boards tightly along side, and nail to work
surface (fig. 7).
Prior to Operation
• Install the appropriate cutting disc. Do not use
excessively worn discs. The maximum rotation
speed of the tool must not exceed that of the
cutting disc.
• Make sure the disc rotates in the direction of the
arrows on the accessory and the tool.

 Loading...