4
ENGLISH
ASSEMBLY AND ADJUSTMENTS
WARNING: To reduce the risk of serious personal
injury, turn tool off and disconnect tool from power
source before making any adjustments or removing/
installing attachments or accessories. An accidental
start-up can causeinjury.
Description (Fig. A)
WARNING: Never modify the power tool or any part of it.
Damage or personal injury couldresult.
1
Screw guide
2
Screw length adjustment
3
Fine depth adjustment knob
4
Fine depth adjustment indicator
5
Advancing mechanism
6
Collated housing
7
Shoe
8
Release buttons
9
Collated screwdriver bit
Intended Use
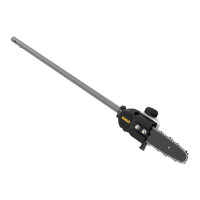
This collated drywall magazine is a professional attachment
designed to be used with the DCF620 DeWALT screwdriver for
professional driving of collatedscrews.
DO NOT use under wet conditions or in the presence of
flammable liquids orgases.
DO NOT let children come into contact with the tool.
Supervision is required when inexperienced operators use
thistool.
• Young children and the infirm. This appliance is not
intended for use by young children or infirm persons
withoutsupervision.
• This product is not intended for use by persons (including
children) suffering from diminished physical, sensory or
mental abilities; lack of experience, knowledge or skills
unless they are supervised by a person responsible for their
safety. Children should never be left alone with thisproduct.
Setting Magazine Screw Length (Fig.C)
This magazine is designed for 25–57mm screw lengths. Failure
to set the correct screw length can cause screws to not be
driven accurately which can result in the failure to advance to
the next screw or screws not being driven properly. The shoe
has marked specific slots for each of the most common screws,
however this attachment can still drive any size screw between
25–57mm. To accommodate for less common screws adjust to
the next longestslot.
CAUTION: Do not adjust while a screw strip is in
themagazine.
1. Slide screw length adjustment tab
2
to theleft.
2. Holding the screw length adjustment tab in place, adjust
the shoe
7
to the desiredlength.
3. Release the screw length adjustment tab. Make sure that the
locking pin has fully returned and is in the correctposition.
OPERATION
Instructions for Use
WARNING: Always observe the safety instructions and
applicableregulations.
WARNING: To reduce the risk of serious personal
injury, turn tool off and disconnect tool from power
source before making any adjustments or removing/
installing attachments or accessories. An accidental
start-up can cause injury.
Date Code Position (Fig. A)
The date code
10
, which also includes the year of manufacture,
is printed into thehousing.
Example:
2019 XX XX
Year of Manufacture
Fitting the Collated Screwdriver Bit (Fig. A, B)
NOTICE: For proper operation only use a DeWALT collated
screwdriverbit.
1. Remove the nose cone from thescrewdriver.
2. Remove the mounted bit and bit holder from
thescrewdriver.
NOTE: Refer to and follow all instructions on changing bits
and holders in your screwdrivermanual.
3. Insert the provided collated screwdriving bit
9
into the bit
holder until it clicks intoplace.
Installing and Removing the Magazine from
the Screwdriver (Fig.B)
With the the nose cone removed and provided driver bit
9
installed, push the magazine over the bit onto the screwdriver
until the magazine clicks into place and ensure that it does
notdisengage.
NOTE: If necessary, rotate the attachment to locate properly
onmount.
NOTE: Make sure the screwdriver control lever is set to forward
rotation beforeuse.
To remove the magazine, press and hold the release buttons
8
on both sides of the accessory and pull accessory off
thescrewdriver.
Markings on Tool
The following pictograms are shown on the tool:
Read instruction manual beforeuse.
Wear earprotection.
Wear eyeprotection.

 Loading...