ENGLISH
10
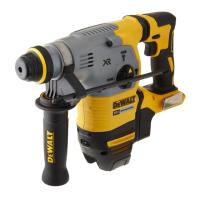
Fuel Gauge Battery Packs (Fig. B)
Some DeWALT battery packs include a fuel gauge which
consists of three green LED lights that indicate the level of
charge remaining in the batterypack.
To actuate the fuel gauge, press and hold the fuel gauge button.
A combination of the three green LED lights will illuminate
designating the level of charge left. When the level of charge
in the battery is below the usable limit, the fuel gauge will not
illuminate and the battery will need to berecharged.
NOTE: The fuel gauge is only an indication of the charge left on
the battery pack. It does not indicate tool functionality and is
subject to variation based on product components, temperature
and end-userapplication.
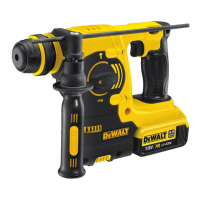
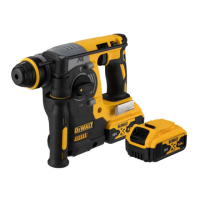
Belt Hook (Optional Accessory) (Fig.H)
WARNING: To reduce the risk of serious personal
injury, ONLY use the tool's belt hook to hang the
tool from a work belt. DO NOT use the belt hook for
tethering or securing the tool to a person or object
during use. DO NOT suspend tool overhead or
suspend objects from the belt tool.
WARNING: To reduce the rish of serious personal injury,
ensure the screw holding the belt hook is secure.
IMPORTANT: When attaching or replacing the belt hook, use
only the screw
16
that is provided. Be sure to securely tighten
the screw.
The belt hook
15
can be attached to either side of the tool
using only the screw
16
provided, to accommodate left-or
right- handed users. If the hook or magnetic bit holder is not
desired at all, it can be removed from the tool.
To move belt hook, remove the screw
16
that holds it in place
then reassemble on the opposite side. Be sure to securely
tighten the screw.
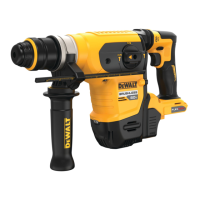
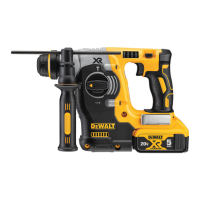
Side Handle and Depth Rod (Fig.A, C)
WARNING: To reduce the risk of personal injury, ALWAYS
operate the tool with the side handle properly installed.
Failure to do so may result in the side handle slipping
during tool operation and subsequent loss of control. Hold
tool with both hands to maximizecontrol.
The side handle
3
clamps to the front of the gear case and
may be rotated 360˚ to permit right- or left-hand use. The side
handle must be tightened sufficiently to resist the twisting
action of the tool if the accessory binds or stalls. Be sure to grip
the side handle at the far end to control the tool during astall.
To loosen side handle, rotatecounterclockwise.
To Adjust the Depth Rod (Fig. C)
1. Push in and hold the depth rod release button
9
on the
side handle.
2. Move the depth rod
8
so the distance between the
end of the rod and the end of the bit equals the desired
drilling depth.
3. Release the button to lock rod into position. When drilling
with the depth rod, stop when end of rod reaches surface
of material.
Bit and Bit Holder
WARNING: Burn Hazard. ALWAYS wear gloves when
changing bits. Accessible metal parts on the tool and bits
may get extremely hot during operation. Small bits of
broken material may damage barehands.
The hammerdrill can be fitted with different bits depending on
the desired application. Use sharp drill bits only.
Bit Reccomendations
• For wood, use twist bits, spade bits, power auger bits or
hole saws.
• For metal, use high-speed steel twist drill bits or holesaws.
Use a cutting lubricant when drilling metals. The exceptions
are cast iron and brass which should be drilleddry.
SDS-Plus Bit Holder (Fig. D)
NOTE: Special adapters are needed to use the SDS-Plus bit
holder with straight shank bits and hexagonal screwdriver bits.
Refer to Optional Accessories.
To insert a drill bit or other accessory:
1. Insert the shank of the bit about 19mm into SDS-Plus tool
holder
11
.
2. Push and rotate bit until it locks in place. The bit will be
securelyheld.
3. To release bit, pull the sleeve
14
back and remove thebit.
OPERATION
Instructions for Use
WARNING: Always observe the safety instructions and
applicableregulations.
WARNING: To reduce the risk of serious personal
injury, turn tool off and disconnect battery pack
before making any adjustments or removing/
installing attachments or accessories. An accidental
start-up can causeinjury.
Proper Hand Position (Fig. E)
WARNING: To reduce the risk of serious personal injury,
ALWAYS use proper hand position asshown.
WARNING: To reduce the risk of serious personal
injury, ALWAYS hold securely in anticipation of a
suddenreaction.
Proper hand position requires one hand on the side handle,
with the other hand on the mainhandle. Hold tool firmly with
both hands to control the twisting action of the drill.
Overload Clutch
In case of jamming of a drill bit, the drive to the drill spindle
is interrupted by the overload clutch. Due to the resulting
forces, always hold the tool with both hands and take a
firmstance. After the overload, release and depress the trigger
to re-engagedrive.
 Loading...