34
ENGLISH
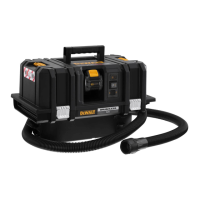
Cleaning/Emptying the Dust Bowl and Filter
(Fig.D, E, I, J)
WARNING : To reduce the risk of serious personal injury,
turn appliance off and remove battery pack before
cleaning, making any adjustments or removing/installing
attachments or accessories. An accidental start-up can
cause injury.
WARNING: Wear approved dust mask when performing
cleaning and emptying dust bowl and filter.
WARNING: Projectile/Respiratory Hazard: Never use the
vac without filter or with damagedfilter.
WARNING:
• Do not wash the inside of the filter.
• Let the filter dry thoroughly if the inside becomes wet.
• Do not use a brush to clean the filter.
Vacuuming
WARNING: Always operate the tool with the dust filter
in place.
1. Empty and clean the dust bowl
2
before use.
2. Select the appropriate accessory (switch off the vacuum
cleaner when changing the accessory).
3. Move the vacuum nozzle
10
over the surface to be cleaned. If
necessary, the hose
12
can be utilized for confined spaces.
Switching on and off (Fig. H)
• To switch the tool on, set the on/off switch
1
to position I.
• To switch the tool off, set the on/off switch
1
to position O.
OPERATION
Instructions for Use
WARNING: Always observe the safety instructions and
applicableregulations.
WARNING: To reduce the risk of serious personal
injury, turn tool off and disconnect battery pack
before making any adjustments or removing/
installing attachments or accessories. An accidental
start-up can causeinjury.
from the belt hook. ONLY hang tool’s belt hook from a
workbelt.
WARNING: To reduce the risk of serious personal
injury, ensure the screw holding the belt hook issecure.
IMPORTANT: When attaching or replacing the belt hook, use
only the belt hook screw
9
that is provided. Be sure to securely
tighten thescrew.
The belt hook
8
can be be attached to either side of the tool
using only the screw provided, to accommodate left- or right-
handed users. If the hook is not desired at all, it can be removed
from thetool.
To move belt hook, remove the screw that holds it in place then
reassemble on the opposite side. Be sure to securely tighten thescrew.
Belt Hook (Fig.G)
WARNING: To reduce the risk of serious personal
injury, turn tool off and disconnect battery pack
before making any adjustments or removing/
installing attachments oraccessories.
WARNING: To reduce the risk of serious personal
injury, DO NOT suspend tool overhead or suspend objects
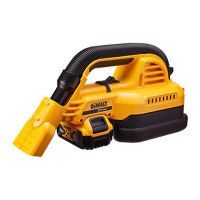
Installing Accessories (Fig.F)
NOTE: Ensure accessories are securely in place prior to use.
• Slide accessories onto the nozzle
10
.
• For longer reach, attach extension
11
or hose
12
to the
nozzle.
• Accessories may also be attached to the end of the hose or
extension.
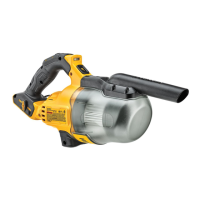
Extension: Reach farther to clean
overhead, under objects, and out-
of-reach places.
Flexible Hose: Flexible for reaching
more hidden-away areas that the
straight extension can’t reach.
Crevice nozzle: Gets in narrow
spaces around the house, jobsite,
and vehicles.
Round brush: Knocks dust and
debris out of tiny places so the
vacuum can pick it up.
Gulper with removable brush:
Cleans a wider area and helps
dislodge dust and debris on larger
items around the work area.
Floor nozzle: Pair with the
extension to get dirt and debris
from the floor.
Removing Dust Bowl (Fig.D)
1. Remove the dust bowl
2
by pressing the dust bowl release
button
3
and pulling the dust bowl down andout.
Installing Dust Bowl (Fig.E)
NOTE: It is very important that the filter is correctly positioned
beforeuse.
1. Line up the rib
21
on the motor housing
20
with the slot
19
of the dust bowl.
2. Install the dust bowl onto the unit and listen for an audible
click. Ensure the dust bowl is secured in place beforeusing.
illuminate designating the level of charge left. When the level of
charge in the battery is below the usable limit, the fuel gauge
will not illuminate and the battery will need to berecharged.
NOTE: The fuel gauge is only an indication of the charge left on
the battery pack. It does not indicate tool functionality and is
subject to variation based on product components, temperature
and end-userapplication.