ENGLISH
5
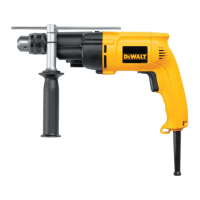
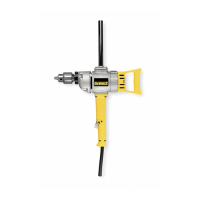
Forward/Reverse Button
The forward/reverse button
3
is used to reverse the
hammerdrill for backing out screws or jammed bits. It is
located above the trigger, shown in FigureB. To reverse the
hammerdrill, turn it off and push the reversing lever to the
left (when viewed from the chuckend).
To position the lever for forward operation, turn the
hammerdrill off and push the lever to the right (when
viewed from the chuckend).
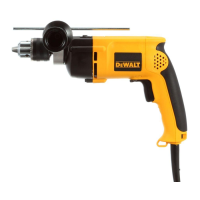
High/Low Speed Operation (Fig. C)
The two speed gear drive in the dual range hammerdrill
permits effective operation over an extended range of
applications with greater selection ofaccessories.
For LOW SPEED operation, the shift knob
9
located on the
underside of the hammerdrill should be rotated so the low
speed setting is toward the front of thetool.
For HIGH SPEED operation, the shift knob should be
rotated so the high speed setting is toward the front of
thetool.
The gear train has been designed for shifting only when
the unit is off. It may be necessary however, to rotate the
chuck slightly by hand to align the gears while turning the
shiftknob.
NOTICE: DO NOT ATTEMPT TO CHANGE SPEEDS by
turning the shift knob when the tool is running. Doing
so will damage the geartrain.
Front of tool
HIGH SPEED
SETTING
LOW SPEED
SETTING
Fig. C
9
Hammer/Drill Selector (Fig. D)
To switch the tool from the drilling mode to the hammering
mode (or vice-versa) rotate the selector
7
to the applicable
symbol as shown in FigureD.
For straight drilling, align selector with drill bitsymbol.
For hammering, align selector with the hammer symbol, as
shown in thefigure.
NOTE: The selector must be in either drill or hammer/drill
mode at all times. There are no operable positions between
thetwo.
Fig. D
7
HAMMER
SETTING
DRILL
SETTING
Chuck
To insert the bit, open chuck jaws by turning collar with
fingers counterclockwise (when viewed from the chuck
end) and insert shank of bit about 3/4" (19 mm) into chuck.
Tighten chuck collar by hand. Place chuck key in each of the
three holes and tighten in clockwise direction. It’s important
to tighten chuck with all threeholes.
To release the bit, turn collar key counterclockwise in just
one hole, then loosen the chuck by hand turning collar
counterclockwise (when viewed from the chuckend).
OPERATION
WARNING: Always observe the safety instructions
and applicable regulations.
WARNING: To reduce the risk of serious personal
injury, turn unit off and disconnect it from
power source before making any adjustments or
removing/installing attachments or accessories.
An accidental start-up can causeinjury.
Proper Hand Position (Fig. E)
WARNING: To reduce the risk of serious personal injury,
ALWAYS use proper hand position as shown.
WARNING: To reduce the risk of serious personal injury,
ALWAYS hold securely in anticipation of a sudden
reaction.
Proper hand position requires one hand on the main
handle
4
and one hand on the side handle
5
.
Fig. E
5
4