20
ENGLISH
fingers hooked over the fence. Always keep your thumb
along side your first two fingers and near thefence.
6. Keeping the workpiece against the table and fence, slowly
feed the workpiece rearward all the way through the saw
blade. Continue pushing the workpiece until it is clear of the
blade guard assembly and it falls off the rear of the table. Do
not overload themotor.
7. Never try to pull the workpiece back with the blade turning.
Turn the switch off, allow the blade to stop and slide the
workpieceout.
8. When sawing a long piece of material or a panel, always use
a work support. A sawhorse, rollers, or out feed assembly
provides adequate support for this purpose. The work
support must be at the same height or slightly lower than
the sawtable.
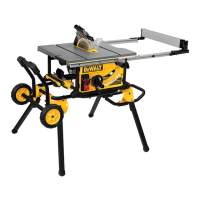
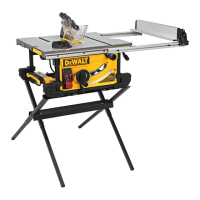
Non-Through-Ripping Small Pieces (Fig. A)
It is unsafe to rip small pieces. It is not safe to put your hands
close to the blade. Instead, rip a larger piece to obtain the
desired piece. When a small width is to be ripped and the hand
cannot be safely put between the blade and the rip fence, use
one or more push sticks. A push stick
21
is included with this
saw, attached to the rip fence. Use the push stick(s) to hold the
workpiece against the table and fence, and push the workpiece
fully past theblade.
Non-Through-Bevel Ripping (Fig. W)
This operation is the same as non-through-cut ripping except
the bevel angle is set to an angle other than zero degrees. For
proper hand position, Refer to FigureV.
WARNING: Before connecting to power source or
operating the saw, always inspect the riving knife for
proper alignment and clearance with saw blade. Check
alignment after each change of bevelangle.
Non-Through-Crosscutting (Fig. Y)
WARNING: NEVER use rip fence in combination with
mitregauge.
WARNING: To reduce the risk of injury, NEVER use the
fence as a guide or length stop whencrosscutting.
WARNING: When using a block as a cut-off gauge,
the block must be at least 19mm thick and is very
important that the rear end of the block be positioned
so the workpiece is clear of the block before it enters the
blade to prevent contact with blade resulting in a thrown
workpiece and possiblyinjury.
1. Remove the rip fence and place the mitre gauge in the
desiredslot.
2. Adjust the blade height to the desired cutdepth.
3. Hold the workpiece firmly against the mitre gauge
10
with
the path of the blade in line with the desired cut location.
Keep the workpiece an inch or so in front of the blade. KEEP
BOTH HANDS AWAY FROM THE BLADE AND THE PATH OF
THE BLADE (Fig. W).
4. Start the saw motor and allow the blade to come up
tospeed.
5. While using both hands to keep the workpiece against
the face of the mitre gauge, and holding the workpiece
flat against the table, slowly push the workpiece through
theblade.
6. Never try to pull the workpiece with the blade turning. Turn
the switch off, allow the blade to stop, and carefully slide the
workpieceout.
Non-Through-Bevel Crosscutting
This operation is the same as crosscutting except that the bevel
angle is set to an angle other than 0°.
WARNING: Before connecting to power source or
operating the saw, always inspect the riving knife for
proper alignment and clearance with saw blade. Check
alignment after each change of bevelangle.
Non-Through-Mitreing (Fig. Y)
This operation is the same as crosscutting except the mitre
gauge is locked at an angle other than 0°. Hold the workpiece
FIRMLY against the mitre gauge
10
and feed the workpiece
slowly into the blade (to prevent the workpiece from moving).
Non-Through-Mitre Gauge Operation
To set your mitre gauge:
1. Loosen the mitre gauge lockknob
46
.
2. Move the mitre gauge to the desiredangle.
3. Tighten the mitre gauge lockknob.
Non-Through-Compound Mitreing
This is a combination of non-through-bevel crosscutting and
non-through-mitreing. Follow the instructions for both non-
through-bevel crosscutting and non-through-mitreing.
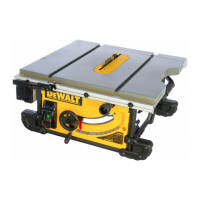
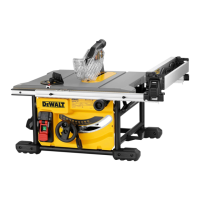
Dust extraction (Fig. A, DD)
The machine is provided with a dust exhaust port
14
at the
rear of the machine suitable for use with dust extraction
equipment featuring 57/65 mm nozzles. Supplied with the
machine is a reducer port for use of dust extraction nozzles
of 34–40 mmdiameter.
Supplied with the machine is a reducer port for use with the
DEWALT AirLock system (DWV9000-XJ).
The blade guard assembly also features a dust exhaust port for
35mm nozzles or direct attachment to the DEWALT AirLock
(DWV9000-XJ).
Dust from materials such as lead-containing coatings and some
wood types, can be harmful to one’s health. Breathing-in the
dust can cause allergic reactions and/or lead to respiratory
infections of the user orbystanders.
Certain dust, such as oak or beech dust, is considered
carcinogenic, especially in connection with wood-
treatmentadditives.
Observe the relevant regulations in your country for the
materials to beworked.
The vacuum cleaner must be suitable for the material
beingworked.