8514-219-001 REV E PAGE 25
9) Press and release the DOWN touch pad switch on the dryer controller twice until the dryer
controller display shows the number “3”.
10) Press and release the SELECT/ENTER touch pad switch on the dryer controller. The dry
time L.E.D. and the programming L.E.D. will remain on, the cool down L.E.D. will switch
off, and the dryer controller display will change to “Prog”.
11) Press and release the STOP touch pad switch on the dryer controller. The dry time L.E.D.
will remain on, the programming L.E.D. will switch off, and the dryer controller display will
change to the word “LOAd”.
The dryer is now ready for the new modified dry cycle to start. This modified dry cycle 1
program will remain in the dryer controller memory until the default settings push button is
pressed. This default settings push button is located on the component side of the dryer
controller printed circuit board at the middle center side of each circuit board controls.
SERVICING AND TROUBLESHOOTING
CAUTION: Label all wires prior to disconnection when servicing controls. Wiring errors can
cause improper and dangerous operation. Verify proper operation after servicing.
IMPORTANT: Clothes should be removed from the dryer as soon as possible after the cycle is
completed and then folded or hung to prevent excessive wrinkling.
If any of the following symptoms occur on this dryer, check the suggested remedies listed
below. If all probable causes have been eliminated and the symptom still exists, contact your
local Dexter agent for further troubleshooting assistance. See contact information in
Preventative Maintenance section. Parts & Service Manuals from Dexter are also available for
further troubleshooting assistance.
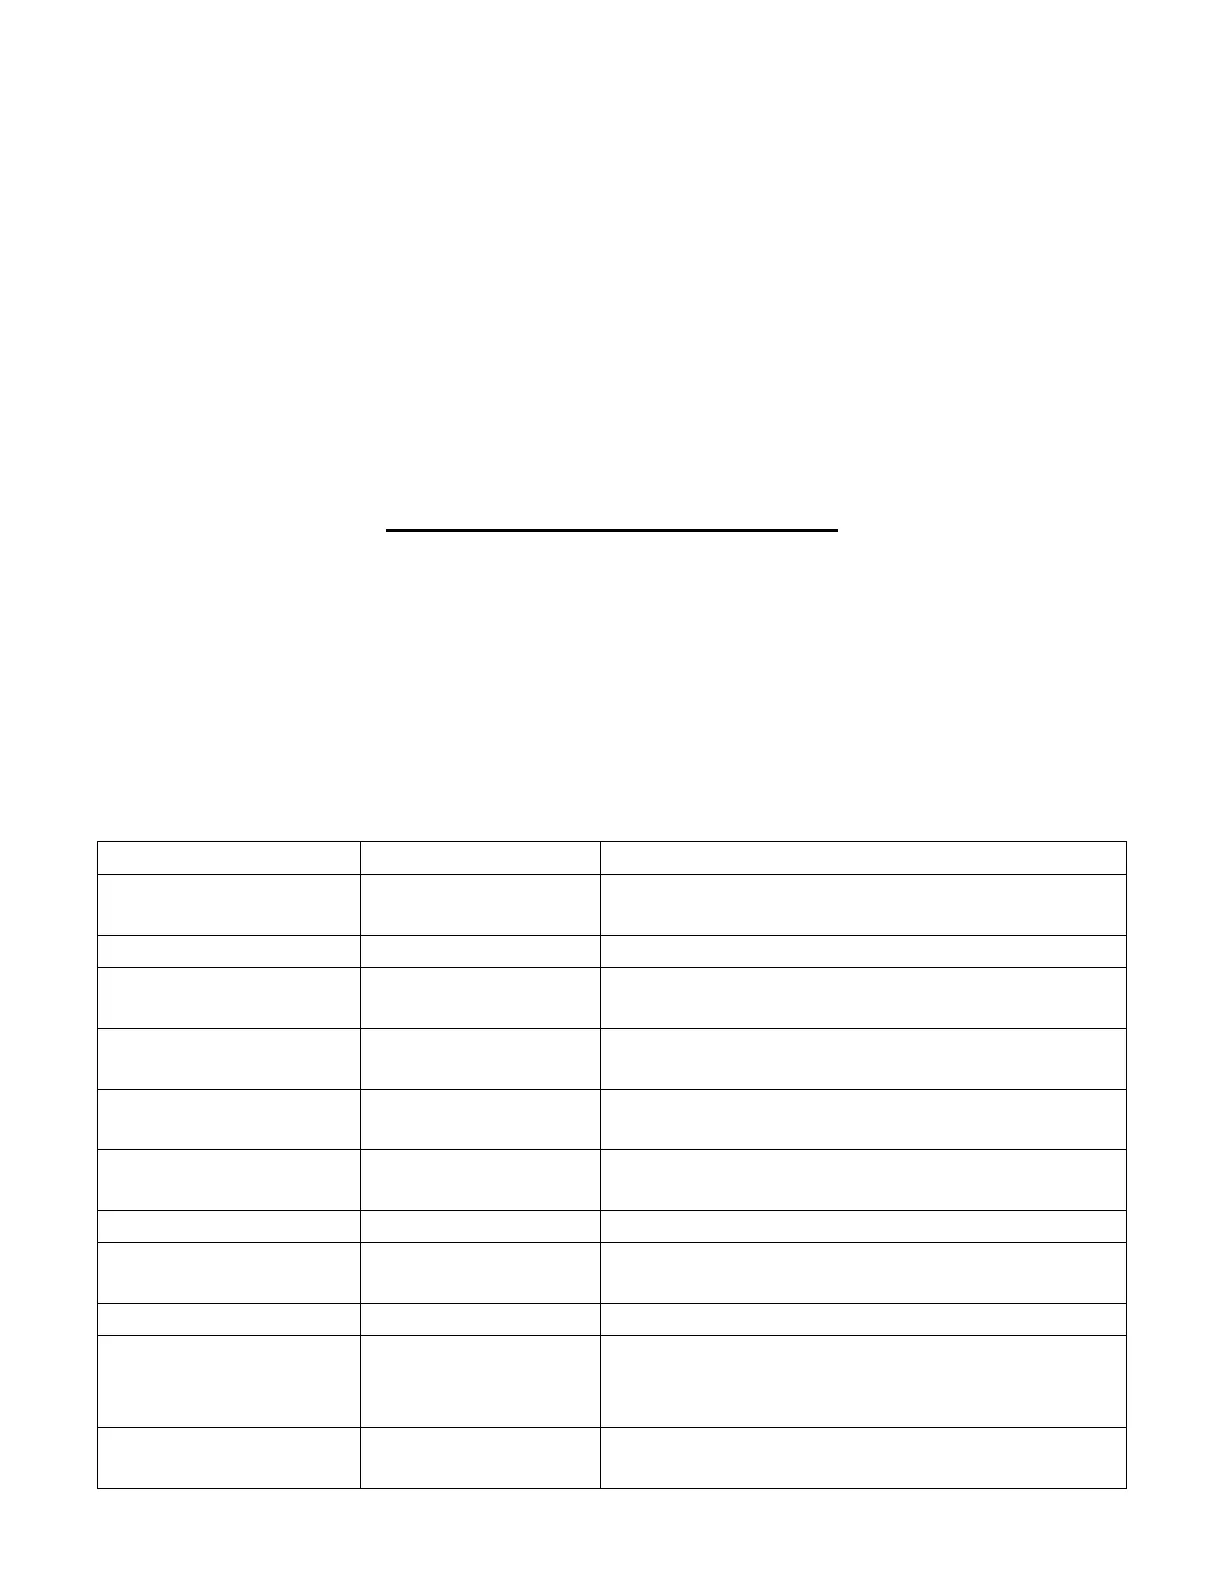
Symptom Probable Cause Suggested Remedy
Tumbler Does not turn Control Check that Control Display shows time
available for drying.
Loading Door Check that Loading Door is completely closed.
Lint Compartment
Door
Check that Lint Compartment Door is
completely closed.
Drive Belts Check drive belts for excessive wear. Replace
as needed.
Tumbler Turns, but
heating element is off
Circuit Breakers Make sure circuit breakers are on.
Heating Element
Relay
Make sure relay is on and wires are connected.
Heat Relay Make sure relay is on and wires are connected.
Slow Drying Control Check that proper Temperature setting is
chosen.
Lint Screen Clean Lint Screen.
Air flow
Restrictions/ Make-
up Air
Follow installation guidelines for static back
pressure and make-up air.
Exhaust Check exhaust for obstructions, follow
installation guidelines.
 Loading...