EasyManua.ls Logo

DHP 5458196 User Manual

DHP 5458196
15 pages
To Next Page IconTo Next Page
Page #1 background imageLoading...
Page #1 background image
STOP
DO NOT RETURN PRODUCT TO THE
STORE
Individual stores do not stock parts.
If a part is missing or damaged, call our
toll-free customer service line. We will
gladly ship your replacement parts FREE
of charge.
Need Parts or Assistance?
1-800-267-1739
www.dhpfurniture.com
For prompt, reliable service; please have your assembly
manual ready.
Date of Purchase
___ / ___ / ___
Lot Number
_________
or access our website
WARNING
• WARNING FOR YOUNG CHILDREN - This product contains small components, please ensure that they are kept away from small children.Children under the age of 6,
small infants and babies must not sleep on this bed for safety reasons. To prevent injury and damage to this unit, PROHIBIT jumping on it.
• Recommended # of people needed for assembly 2 (however it is always better to have an extra hand.) Estimated assembly time is 1.5 hour.
• THIS INSTRUCTION BOOKLET CONTAINS IMPORTANT SAFETY INFORMATION. PLEASE READ AND KEEP FOR FUTURE REFERENCE
5458196
B34545819600-10125-M
Weight Limits:
225 Lbs
102 Kgs
BLACK JUNIOR LOFT BED
0 2998
6 545
82
4
Question and Answer IconNeed help?

Do you have a question about the DHP 5458196 and is the answer not in the manual?

DHP 5458196 Specifications

General IconGeneral
BrandDHP
Model5458196
CategoryIndoor Furnishing
LanguageEnglish

Summary

Pre-Assembly Guidance

Read Before Beginning Assembly

Crucial steps and advice to follow before starting furniture assembly.

Helpful Hints

Practical tips for assistance, moving, and furniture care.

Safety Instructions and Warnings

Assembly Steps

Step 1: Assemble Main Frame Components

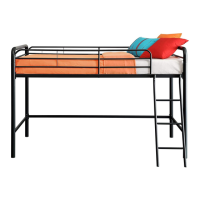
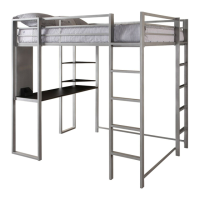
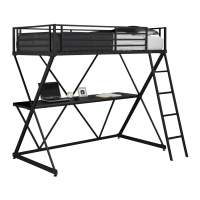
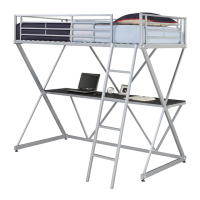
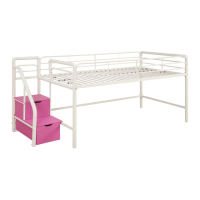
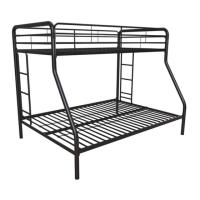
Attaches post links to post rails and end guard rail to leg posts using screws and bolts.

Step 2: Attach Side Rails

Connects side rails (G, H, J) to leg posts (A, B, C, D) using bolts.

Step 3: Attach Guard Rails

Secures guard rails (E, F) to leg posts (A, B, D) and side rails (G, H) with bolts.

Step 4: Install Slats

Attaches slats (Q, K) to upper side rails (G, H) using plastic plugs.

Step 5: Install Slat Spacers and Ladder

Installs slat spacers between slats and attaches the ladder to the side rail.

Warranty and Support Information

Warranty Information

Details the product warranty terms, coverage, and exclusions.

Customer Support Contact

Provides phone, fax, and website details for assembly help and parts.

Related product manuals