AGE Reader mu Installing the AGE Reader mu
User Manual
5
5 Installing the AGE Reader mu
1. Place the AGE Reader mu on a horizontal, flat and stable surface.
2. Attach the correct mains connector plug to the DiagnOptics power supply
accompanying the device and plug it in to the mains outlet.
3. Insert the power plug in the power inlet, which is located on the rear panel
at the backside of the AGE Reader mu (figure 2). A blue LED will light up
when the battery is being charged.
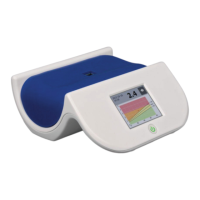
4. The AGE Reader mu can now be turned on by the power button located
on the front of the AGE Reader mu (figure 1). The ‘standby’ symbol on the
button will light up green if the device is in its ‘power on’ state.
5. The dedicated AGE Reader mu Software is preinstalled and will start
automatically.
IMPORTANT: ONLY USE USB CABLE INLET FOR FIRMWARE UPGRADES
Figure 2. AGE Reader mu rear panel
Charging LED
Power inlet
Reset switch
USB inlet
AGE Reader mu Instructions for use
User Manual
6
6 Instructions for use
6.1 Starting the AGE Reader mu
When starting the AGE Reader mu for the first time it is recommended that you
charge the internal battery completely before use. This will extend the battery life.
Insert the power plug into the power inlet that is located on the rear of the AGE
Reader mu, labelled as “Power Inlet” (figure 2). The blue charging LED will light up
when the battery is charging, when the charging LED is off, the battery is fully
charged.
Turn the AGE Reader mu on by pressing the ‘power button’ (figure 1). During the
start-up phase nothing is displayed on the touchscreen and the power button will
not be lit. Part of this initialization is a self-test of the AGE Reader mu’s internal light
sources. Notice that some light will be emitted from the measurement window for a
short period during this phase this is completely harmless.
If the start-up is unsuccessful the power button will be lit red in a blinking fashion.
The blinking pattern corresponds to the error code as described in section 9.2.
Upon a successful start-up the graphical display will show the AGE Reader mu
screen as shown below and the power button will be lit steady green.
Figure 3. Start screen
Shortly after displaying the start screen the AGE Reader mu main screen will
become visible (see section 6.2) indicating that the AGE Reader mu is fully
operational.
6.1.1 Turning the AGE Reader mu off
Turn the AGE Reader mu off by pressing the ‘power button’ (figure 1).