CAUTION: Whenever working on a machine in the rocked back
position, ask an assistant to hold the handle and prevent the ma-
chine from falling forward.
3. Remove the small cotter pin / hair pin from the wheel axle.
4. Remove the wheel axle.
5. Remove the wheel and any spacer.
6. Reposition the wheel and spacer in desired hole.
7. Insert the wheel axle.
8. Insert the cotter pin / hair pin.
WARNING: To ensure personal safety, adjustments should ONLY
be made by a qualied technician or an authorized service enter.
WARNING: Prior to any maintenance, ensure engine is turned o
and disconnect spark plug wire from spark plug. Never attempt
service or maintenance on a running engine.
The equipment uses an onboard charging system integrated within the
wiring harness which charges battery during normal use.
The battery can be recharged oine with any o-the-shelf battery charger
with the following specs:
Voltage = 12 volts
Charging Amperage = 0.5 to 15 Amps
Battery Charging Procedures:
1. Disconnect the plastic battery cable terminal on equipment, and remove
battery from equipment.
2. Connect the charger clamps to the battery posts:
• Red clamp on the positive “+” post
• Black clamp on the negative “-” (ground) post
3. If the charger has settings, set the output voltage and amperage within
the ranges noted above.
4. Plug in the battery charger to standard wall outlet in a well ventilated
area.
5. For best results, leave the charger connected for minimum of 8 hours.
6. Disconnect battery from charger by reversing steps 5-2
7. Reinstall battery on equipment, and connect the plastic battery cable
terminal.
5. MAINTENANCE
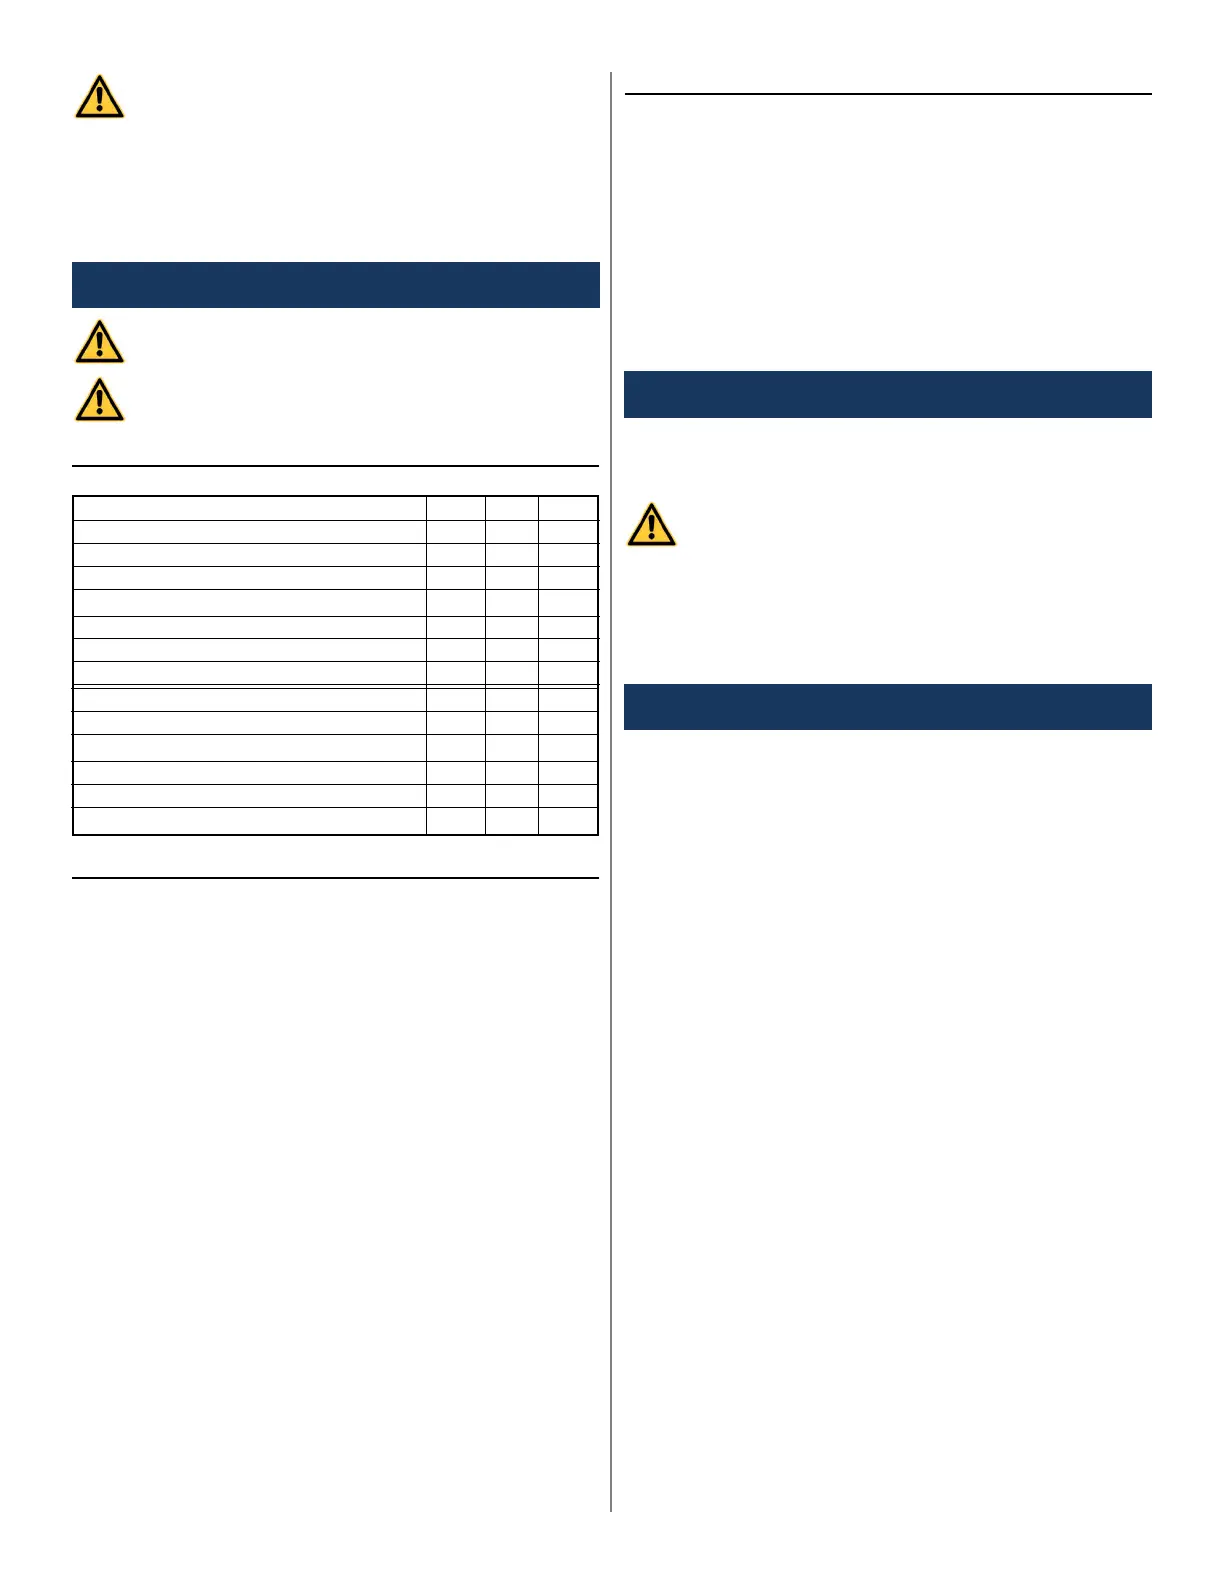
5.1. Maintenance Schedule
Check Engine Oil Level
Check for Loose Hardware
Check for Fuel or Oil Leakage
Check/Clean Intake Air Filter
Check/Clean Bonnet Filter
Check, Clean, and/or Replace Dust Bag
Check Pad
Check Shroud & Shroud Seal
Check Engine Mounts
Check Belt for Wear or Slippage
Check Pulleys, Drive Shaft, and Bearings
Check Wheels & Bearings
Overall Checkup at Authorized Service Center
DAILY
X
X
X
X
X
X
X
X
25HR
X
X
X
X
200HR
X
5.2. Battery Maintenance
Battery Specs:
Model
Voltage (V)
Capacity (Ah)
Weight
Charging Current
Charging Voltage
Cold Cranking Amps
Cycle Life
HJTZ5S-30-GFP
12.8
3
0.7 kg / 1.5 lb
0.5A to 15A
14.4 0.5 V
180
≥1000
5.3. Dust Collection Maintenance
If equipped with a dust collection system, the dust bag should be serviced
frequently as follows:
1. Stop engine.
2. Remove the bag from the dust chute, but pulling the elbow out of the
dust chute.
3. Unzip the back of the bag.
4. Empty the contents of the bag into a garbage receptacle and shake out
any debris. This is best done outside.
5. Reinstall the bag onto the dust chute, and secure the bag to machine
via the rope loop and Velcro on bag.
Note: The bag will remain functional for approximately 20-30 cycles, after
which the bag should be replaced.
1. Stop the engine.
2. Adjust handle position to highest position and rock machine back, until
handle grips are resting on ground.
WARNING: Whenever working on a machine in the rocked back
position, ask an assistant to hold the handle and prevent the ma-
chine from falling forward.
3. Remove the Pad Holder by turning it counterclockwise.
4. Remove the Pad, by pealing it o of the gripper surface
5. Install a new Pad onto the gripper surface, paying attention to keep it
centered and aligned with the gripper surface.
6. Reinstall the Pad Holder, and tighten it by turning it clockwise.
Take the following steps when storing the machine:
1. Ensure the ignition switch is turned to “o”.
2. Remove the propane tank, and store in an approved outside location.
3. Disconnect battery cable connectors, to prevent battery drain. When
disconnected, the battery will keep its charge in storage for
approximately 12 months.
4. Store machine in an indoor, climate controlled location with low
humidity.
6. HOW TO CHANGE PAD
7. STORAGE
 Loading...