910ErOwner’sManual
9
ASSEMBLYINSTRUCTIONS
1. Unpackthe910Erfromthecarton.Pleaserecycle.
2. Verifythecartoncontainsallpartsfromthe list.
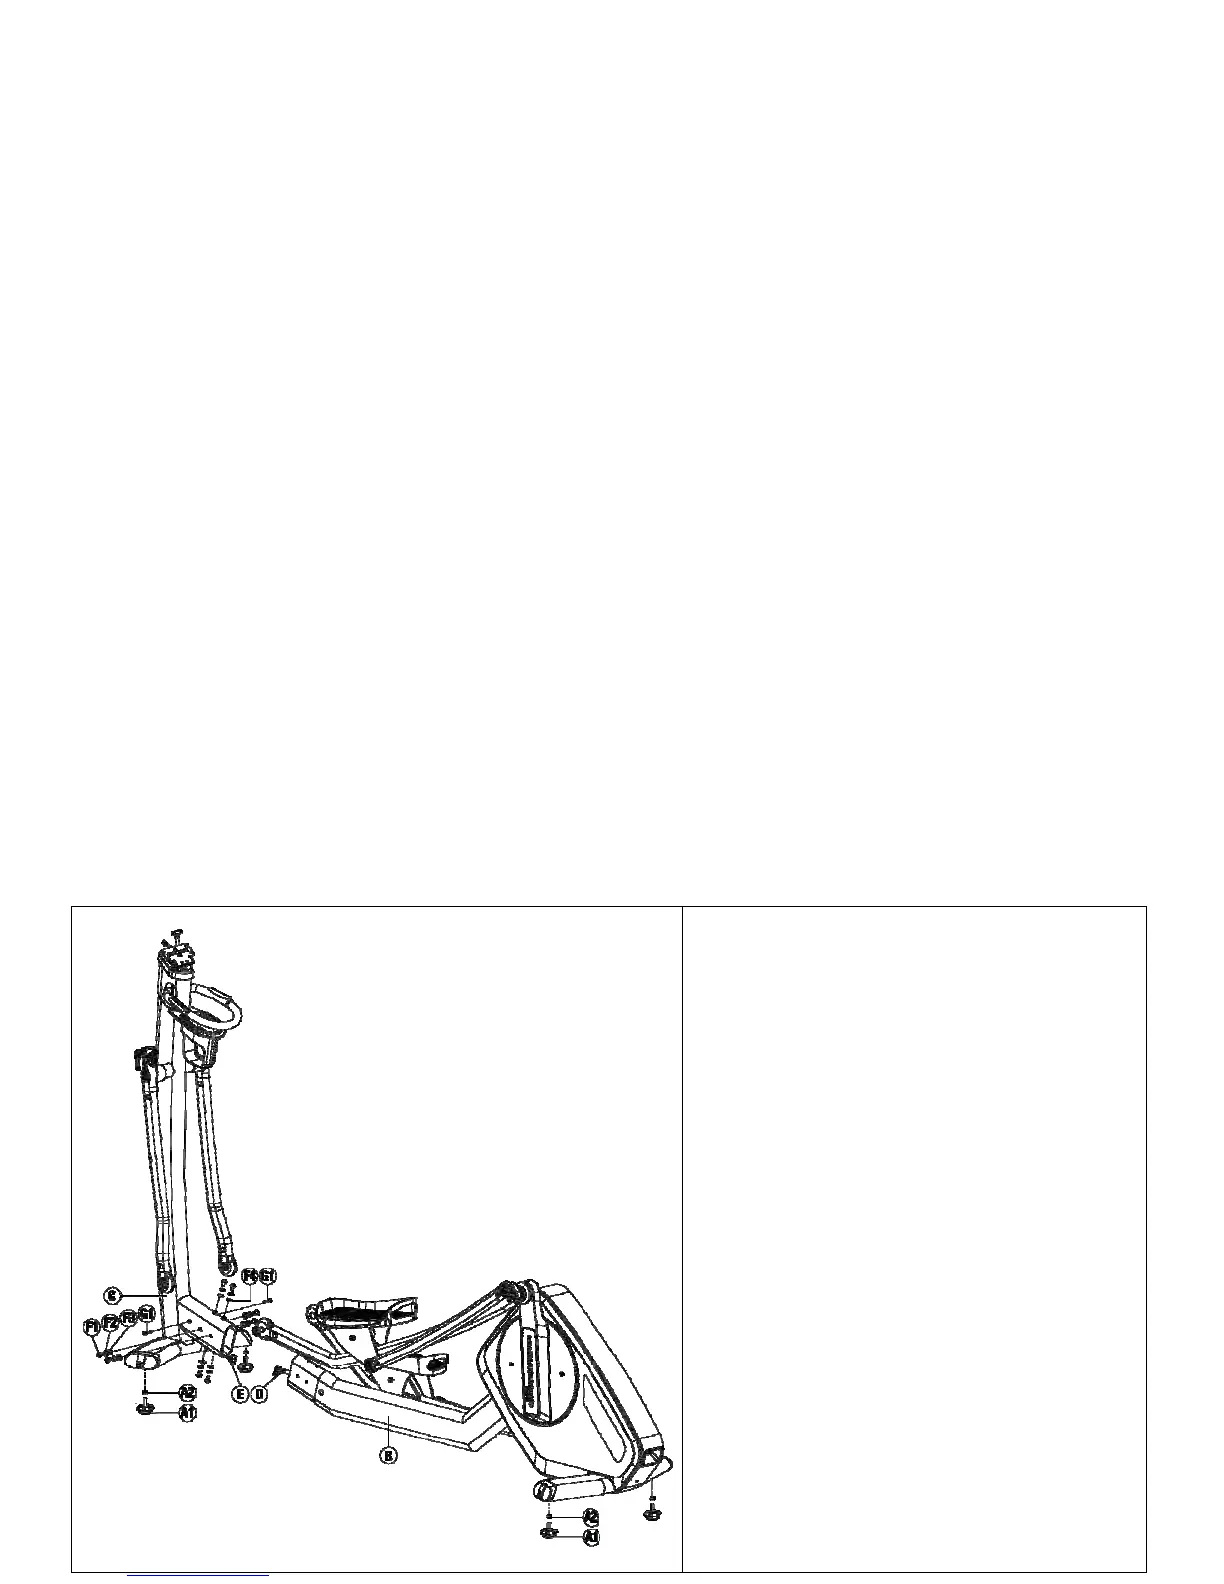
3. Installthefour(4)stabilizerfeetassemblies(A1&
A2)intotheunder‐sideofthefrontandrear
stabilizers.Threadallthewayin.
4. Removetheeight(8)Alle
nscrews(F1),eight(8)lock
washers(F2),four(4)flatwashers(F3)andfour(4)
curvedwashers(F4)fromrearframeassemblyBand
setaside.
5. Removethetwo(2)AllenboltsG1fromtheleftand
rightsidesoftheconsolemastassembly(C)andse
t
aside.
6. Standtherearframeassembly(B)right‐sideupand
laytheconsolemastassembly(C)nearby.Join
connectorsDandEfirmlytoensureagood
connection.
7. CarefullystandconsolemastassemblyCuprightand
joinwiththerearframeassembly(B).Ensurerear
assem
bly(B)isfullyinsertedintotheconsolemast
receiver(C)byconfirmingtheboltholesarealigned.
8. Install,byhand,thefour(4)Allenscrews,lock
washer&flatwasherassemblies(F1,F2&F3)into
thesidesofconsolemastass
emblyB.Threadthe
four(4)Allenscrews,lockwasher&curved
assemblies(F1,F2&F4)intothetopandbottomof
theframe.Onceallboltsarepartiallyinstalled,
tighteneachfirmlywiththeenclosedAllenwrench.