J
Jeffrey HernandezAug 15, 2025
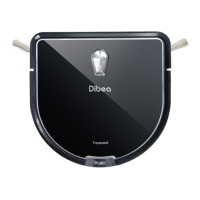
What to do if dibea x500 shows E03 error?
- WwilsonshelbyAug 15, 2025
If your dibea Vacuum Cleaner displays error code E03, you should clean the dust bin and suction passage.
What to do if dibea x500 shows E03 error?
If your dibea Vacuum Cleaner displays error code E03, you should clean the dust bin and suction passage.
What to do if dibea x500 Vacuum Cleaner shows E09 error?
If your dibea Vacuum Cleaner displays error code E09, move the main body and start it again.
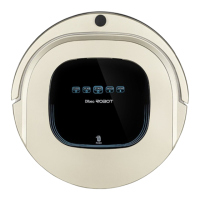
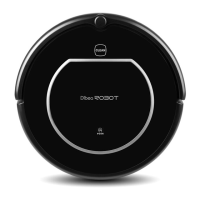
| Type | Robot Vacuum Cleaner |
|---|---|
| Suction Power | 1200 Pa |
| Battery Capacity | 2600 mAh |
| Charging Time | 4-5 hours |
| Weight | 2.7 kg |
| Dust Collection Type | Dustbin |
| Power | 30 W |
| Filter Type | HEPA Filter |
| Dustbin Capacity | 0.6 L |
| Dust Capacity | 0.6 L |
| Cord Length | Cordless |
| Features | Auto Charging, Scheduled Cleaning, Anti-Collision Sensors |
Read this manual thoroughly and follow all safety precautions to prevent product damage or personal injury.
Features 25W suction power and automatic suction adjustment for efficient and power-saving cleaning.
Includes easy operation, washable dust bin, and multiple cleaning modes for user convenience.
Lists the main body and essential accessories included with the robot vacuum.
Detailed illustration and labeling of the main robot body's parts and sensors.
Components of the charging home base and virtual wall, including battery installation for the virtual wall.
Explains the buttons and operations of the remote control for robot management.
Details the status, progress, charging, and error codes shown on the robot's display panel.
Instructions for placing the charging base and properly charging the robot's battery.
Guides on how to start, temporarily pause, and put the robot into sleep mode.
Step-by-step guide to set specific cleaning schedules for the robot.
Details the Auto, Spot, and Edge cleaning modes for different cleaning scenarios.
Instructions on how to use the virtual wall accessory to restrict robot access to certain areas.
Procedures for cleaning and replacing the robot's side brushes for optimal performance.
Steps for cleaning and maintaining the dust bin and its filters.
Guidance on gently cleaning the robot's sensors and auto-charging contacts.
Lists common error codes, their causes, and recommended solutions for troubleshooting.
Illustration showing the robot's components that can be replaced by the user.
Step-by-step guide for safely removing and installing the robot's battery.