
H
Haley DavilaAug 13, 2025
Why will my Digital-Ally DVM-500Plus not power up?
- NNatalie PetersAug 13, 2025
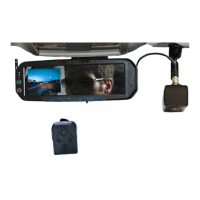
If the Digital-Ally Car Video System will not power up, the (2) 7.5 Amp fuses in the I/O Box may be blown. Inspect these fuses and replace any that are bad. If the fuses are good, further assistance may be needed.