Positioning The Screen And Projector
1. Install the screen, ensuring that it is in the best position for viewing by your audience.
2. Position the projector, ensuring that it is at a suitable distance from the screen for the image to ll the screen.
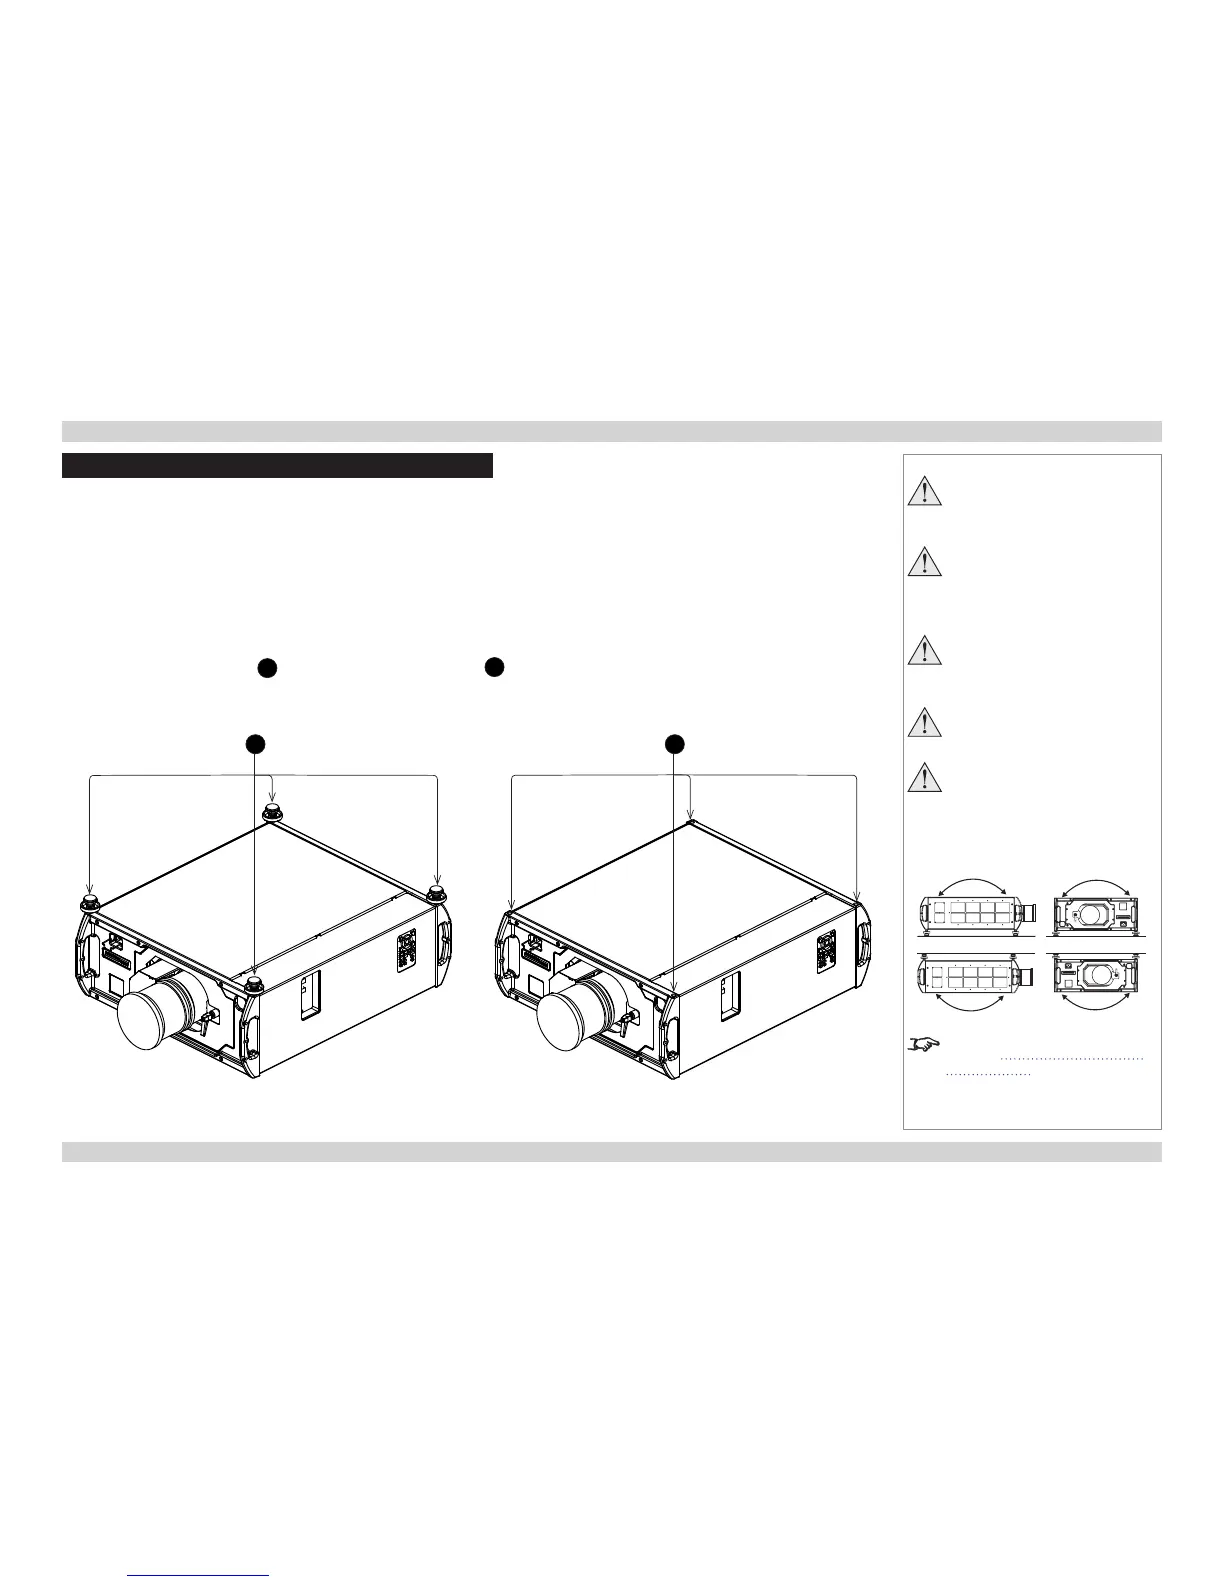
Desktop mount
If the projector is to be operated from a at surface such as a projector table, adjust the projector level by turning the four feet
under the chassis. Set the adjustable feet so that the projector is level, and perpendicular to the screen.
Ceiling mount
Inverted installation is recommended for maximum lens offset.
Remove the four adjustable feet
1
and use the four M10 xing holes
2
for ceiling mounting.
You can also use the optional rigging frame, or mount two projectors together using the optional Titan 40K assembly.
Notes
Ensure that there is at least
30cm (12in) of space between the
ventilation outlets and any wall,
and 10cm (4in) on all other sides.
Do not place heavy objects on top
of the projector chassis. Only the
chassis corners and the rigging
frame are capable of withstanding
the weight of another projector.
Do not place the projector with its
front panel down on a surface, as
this may damage the lens or the
lens release lever.
Backup safety chains or wires
should always be used with
ceiling mount installations.
Do not tilt the projector more
than ±12° in either direction, in
desktop or ceiling mode, when in
use, as this may cause serious
lamp failure, damage the lamp
module and cause extra cost on
replacement.
See also Adjusting the optional
rigging frame further in this guide.
±12°±12°
±12°±12°
Ceiling
Desktop
1 2
 Loading...


