Edge Blend menu
The Edge Blend menu is available only when Setup >
System > Conguration is set to Edge Blend.
Overview
When several projectors are used to create a large tiled
image, the edges need to be blended to avoid the overlaps
appearing brighter than the rest of the image.
As it is not possible for any projector to produce an
absolute black, any ‘black’ areas in the overlapped edges
may appear slightly less dark than those in the rest of the
image. Black Level Uplift can be used to counteract this
effect, by raising the black level of the rest of the image.
The amount of uplift required will be either x2 or x4,
depending on how many images are overlapped, as shown
in the examples on this page.
Image brightness changes from one point to another,
within the same blended region. If the same level of black
level uplift is applied throughout the blended region, the
overlapping edges may still be visible on the screen.
Therefore, brightness in these areas is decreased
gradually, using an s-curve factor. S-Curve Value is used
to control the steepness of the decrease.
Notes
Main Menu
Edge Blend
This menu is available only when
Setup > System > Conguration is
set to Edge Blend.
None of the other items in this menu
are available until either the Array
Width or the Array Height setting
is greater than 1.
For a detailed step-by-step
description of the edge blend
process, see Blending images
from multiple projectors further in
this section.
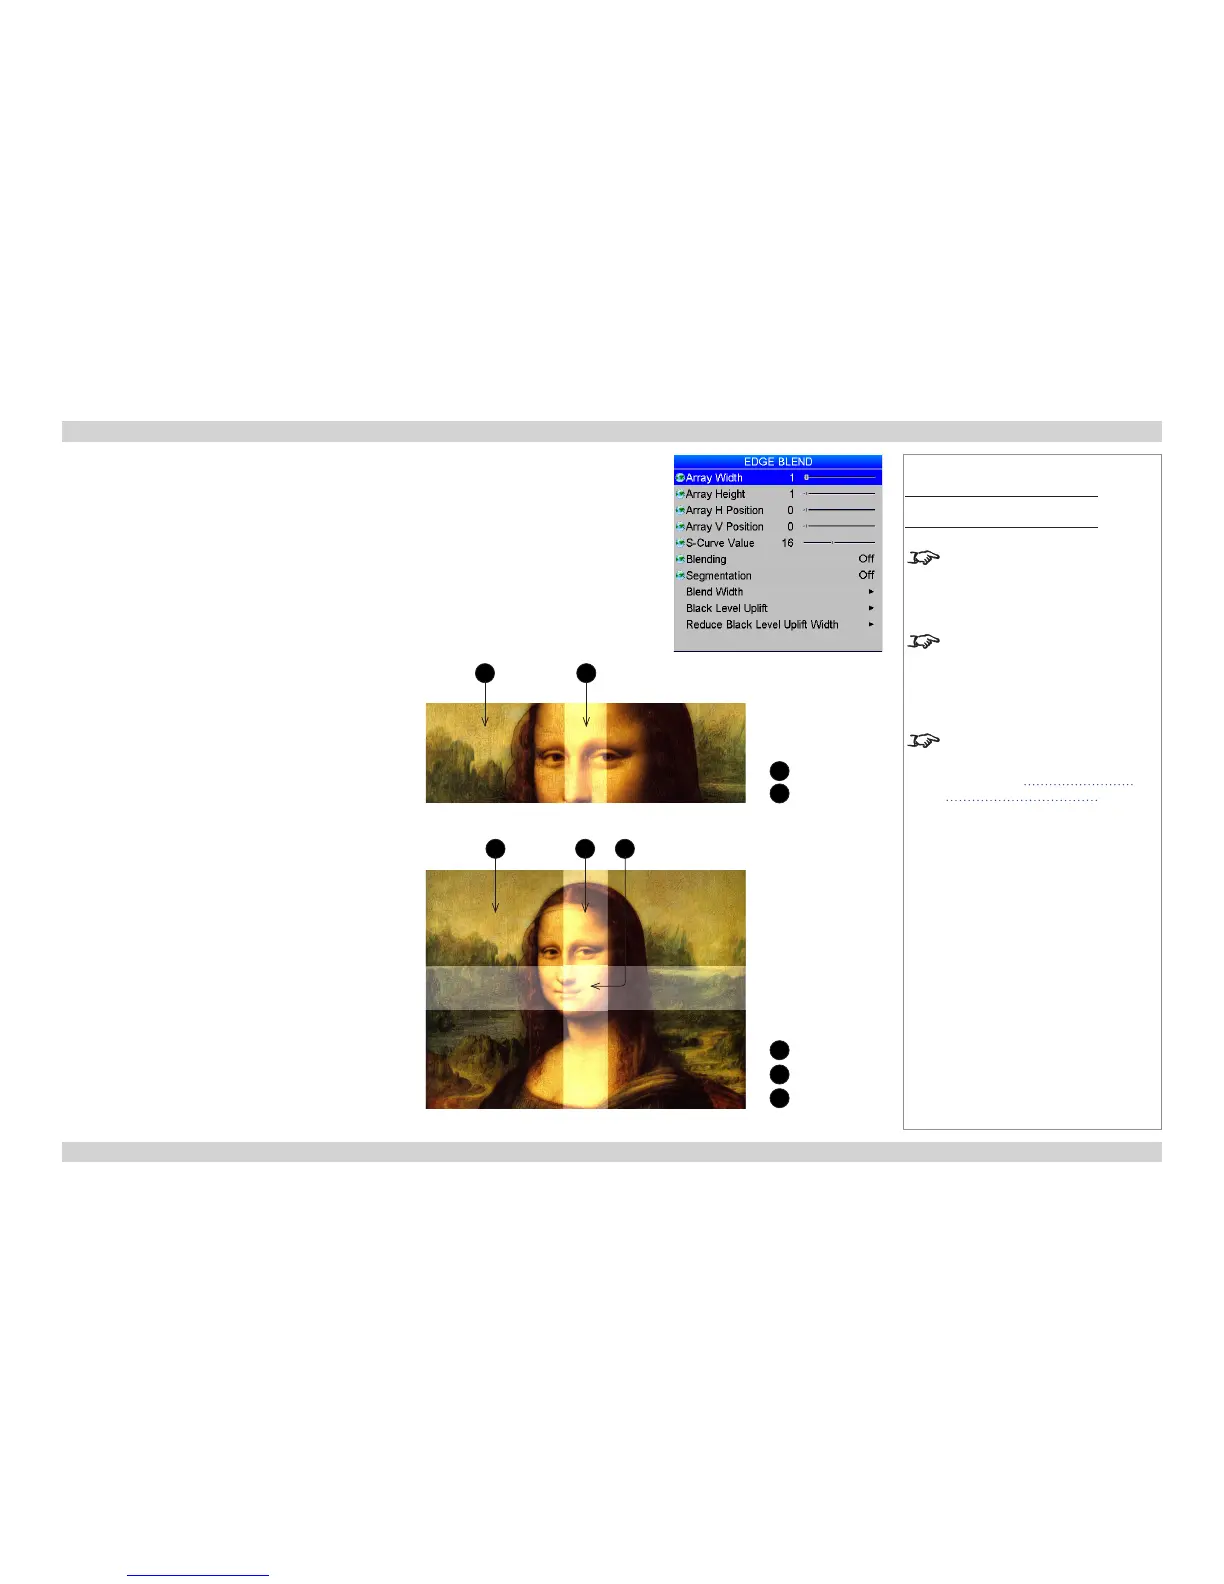
Two projectors sharing one overlapping edge
1 2
1
x2 uplift area
2
no uplift
Four projectors with overlapping edges
21
3
1
x4 uplift area
2
x2 uplift area
3
no uplift
 Loading...


