5
WIRELESS THERMO-HYGRO SENSOR
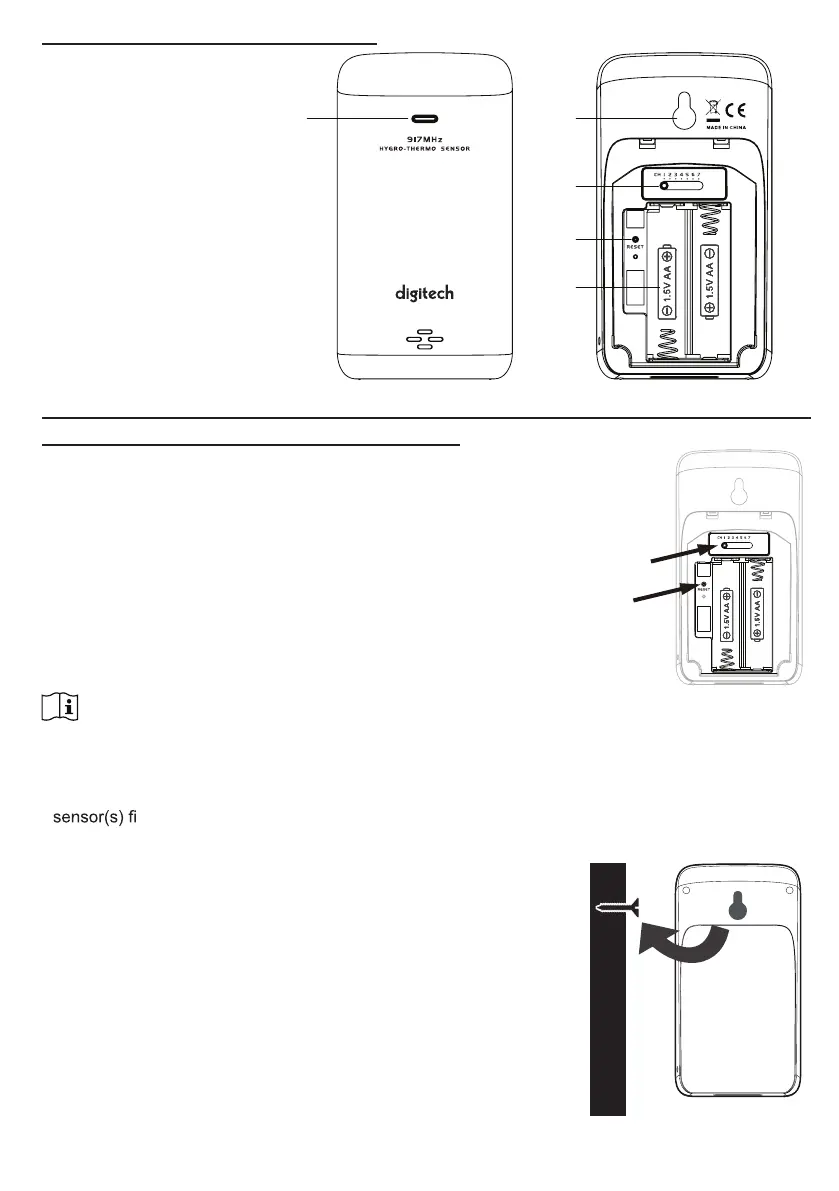
1. LED indicator
2. Wall mounting holder
3. Channel slide switch
4. [ RESET ] key
5. Battery compartment
1 2
3
4
5
INSTALLATION AND SETUP
INSTALL WIRELESS THERMO-HYGRO SENSOR
1. Remove the battery cover of the sensor.
2. Use the channel slide switch to set the channel number for the
sensor (e.g. Channel 1)
3. Insert 2 x AA size batteries into the battery compartment according
to the polarity marked on the battery compartment, and close the
battery cover.
4. The sensor is in synchronization mode, and can be registered to the
console within the next few minutes. The transmission status LED
will begin to ash every 1 minute.
NOTE:
- If you need to re-assign the sensor channel, slide the channel slide switch to the new channel
position and press the [ RESET ] key on the sensor for the new channel number to be effective.
- Avoid placing the sensors in direct sunlight, rain or snow.
- To avoid the sensor/s and console pairing failure during new console setup, please power up the
rst, and then press [ SENSOR/WiFi ] key on the main unit.
PLA
CING THE WIRELESS THERMO-HYGRO SENSOR
Place a screw on the wall that you wish to hang the sensor on.
Hang the sensor onto the screw by the wall mounting holder. You
can also place the sensor on a table by itself.