14 www.dimplex.com
Remove the rebox from the mantel.1.
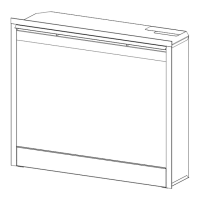
Remove top trim piece by unscrewing three (3) Philips 2.
head screws that lay behind the trim piece and along
the top edge. (Figure 19)
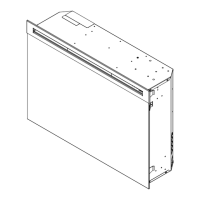
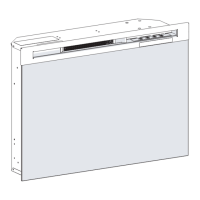
Remove the 10 screws that fasten the top cover to 3.
the rest of the rebox. There are: (four) 4 screws at
the back of the rebox, along the top; two (2) screws
on each side and at the top of the rebox; and two (2)
screws on the top of the rebox. (Figure 20)
Flip the top panel over and place upside down on the 4.
top of the unit. You may experience some resistance
as the Heater Assembly is mounted to the top panel
and may be a snug t inside the rebox. Orient
yourself with the placement of the Heater Assembly
and wiring as shown in Figure 21.
Disconnect the two (2) wire connectors on the right 5.
side of the Heater Assembly (one blue, one black), the
three (3) vertically stacked wire connectors attached
to the left side of the heating element (one yellow and
two grey), and the two (2) wire connectors on the left
side of the Heater Assembly (one grey and one black),
noting all of their original positions.
Turn the top panel over and while supporting the 6.
Heater Assembly and panel in one hand, remove the
ve (5) heater mounting screws, noting the center
screw is of a larger diameter. (Figure 22)
Separate the Heater Assembly from the top panel.7.
Properly orient the new Heater Assembly and connect 8.
all of the wiring connections.
Reassemble in the reverse order as above.9.