8
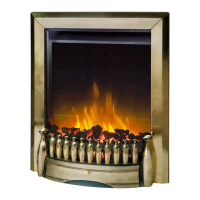
EF830
In more detail . . .
Intended use
> This product is intended for indoor use only. It is not intended for commercial use.
> This product is intended for xed installation only. Do not use it as a free standing
heater.
>
This product contains no user serviceable parts and requires little maintenance.
Leave any servicing or repairs to qualied personnel only. The LEDs contained in
this product are non-replaceable.
> Before connecting the appliance to the power supply, check that the power supply
voltage and current rating corresponds with the power supply details shown on the
appliance rating label.
Installation
NOTE: The wall mount fasteners included with this replace are for use ONLY with a
concrete walls. For wood walls, cinder blocks, or other wall types, consult a professional
for the best attachment methods.
NOTE: This product includes a GLASS panel! Always use extreme caution when handling
glass. Failure to do so could result in personal injury or property damage.
> This appliance is designed to be permanently xed to a wall at a minimum height of
300 mm from bottom of heater to oor. The wall bracket must be tted horizontally
and the cable routed to the bottom right of the heater.
>
A height of 600 mm from bottom of heater to oor is recommended for optimum
viewing of fuel bed (see Fig. 2 for recommend xing dimensions).
> Keep top of heater at least 1000 mm away from ceiling or other objects for optimum
heat ventilation.
>
For optimum viewing, mark the top ve screws xing positions on wall in accordance
with the recommend xing dimensions- see Fig. 2. Drill holes.
> Fix the wall bracket using the plugs and screws provided (05).
> Before the installation, take off the glass panel from the heater, and store the glass
panel in a safe place.
>
Carefully lift the heater up ensuring that the two top rear slots of heater engages the
wall bracket (see Fig. 3) and is sitting centrally.
> Gently bring the heater level with the wall.
>
Load the small wall bracket with the 2 pcs short screws (06) on the lower parts of
the heater (see Fig.4).
>
Mark the two bottom holes position-see Fig.5, remove the heater and keep the
heater in a safe position.
> Drill and t wall plug.
>
Place the front glass panel over the front of the heater aligning the hooks at each side
of the glass panel with the slots at each side of the heater body See-Fig.6. Then slide
down the glass panel in place. Again two people will be required for this operation.
Product function
5059340241678-EF830_A5_IM_GB-V03.indd 85059340241678-EF830_A5_IM_GB-V03.indd 8 13-05-2021 13:17:2813-05-2021 13:17:28