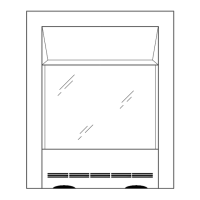
This document outlines the features, specifications, and usage instructions for the EF830 Electric Fireplace, a wall-mounted heating appliance designed for indoor use.
Function Description:
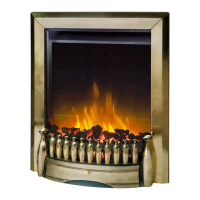
The EF830 Electric Fireplace provides both heating and a flame effect. It operates at 2000W and offers two heating levels: low (1000W) and high (2000W). The appliance can be controlled manually via switches on the top right-hand side or using the supplied remote control. It features a standby mode, a flame effect with five dim levels, and an automatic heating mode with adaptive start. The automatic heating mode adjusts the heating power based on the difference between the room temperature and the set temperature. It also includes a programmable timer function, allowing up to 10 different timer settings with specific power-on and power-off times, and temperature settings.
Important Technical Specifications:
- Model Identifier: EF830
- Rated Voltage: 220-240 V~, 50 Hz
- Rated Power Input: 2000 W
- Nominal Heat Output (Pnom): 2.0 kW
- Minimum Heat Output (Pmin): 1.0 kW (indicative)
- Maximum Continuous Heat Output (Pmax,c): 2.0 kW
- Auxiliary Electricity Consumption:
- At nominal heat output (elmax): 0.014 kW (fan motor)
- At minimum heat output (elmin): 0.014 kW (fan motor)
- In standby mode (elSB): 0.48 W
- Heat Output/Room Temperature Control:
- Single stage heat output and no room temperature control: No
- Two or more manual stages, no room temperature control: No
- With mechanic thermostat room temperature control: No
- With electronic room temperature control: No
- Electronic room temperature control plus day timer: No
- Electronic room temperature control plus week timer: Yes
- Other Control Options:
- Room temperature control, with presence detection: No
- Room temperature control, with open window detection: No
- With distance control option: No
- With adaptive start control: Yes
- With working time limitation: No
- With black bulb sensor: No
- Safety Features: Non-self-resetting overheat protection devices.
- Compliance: Complies with conformity requirements of applicable European Regulations or Directives and UK Regulations.
- Usage: For indoor use only. Class I product, must be connected to earth.
- LEDs: Non-replaceable.
Usage Features:
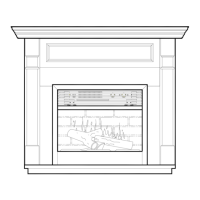
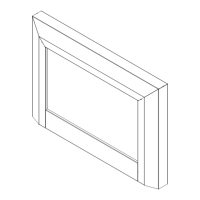
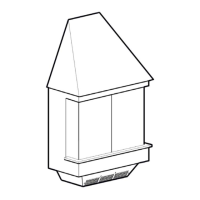
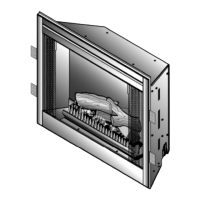
- Installation: Designed for permanent wall mounting. Minimum height of 300 mm from bottom of heater to floor, with 600 mm recommended for optimum viewing. Top of heater should be at least 1000 mm from the ceiling or other objects for optimum heat ventilation. Installation involves fixing a wall bracket, taking off the glass panel, engaging the heater with the bracket, securing the lower part, and then re-attaching the glass panel. Two people are required for glass panel handling.
- Power On/Off: Use the on/off switch to power on the appliance to standby mode.
- Manual Operation: In standby mode, the appliance can be operated via switches on the unit or the remote control. The appliance only starts heating if the set temperature is higher than the ambient room temperature.
- Flame Effect: Press a button to switch the flame effect on/off. Press and hold to toggle between 5 different flame dim levels.
- Heating Control:
- Low level heating (1000W): Activated by a dedicated button.
- High level heating (2000W): Activated by a dedicated button.
- Remote Control: Allows full operation of the appliance, including switching on/off, setting day/time, increasing/decreasing temperature, setting timer, confirming selections, setting automatic heating mode, and activating heating levels.
- Temperature Setting: The temperature can be set from 15 to 30 °C using the “+” or “-” keys. This setting applies to standard heating mode, not timer mode.
- Timer Setting: Up to 10 different timer settings can be programmed, each with a date, power-on time, and power-off time. The maximum duration for a timer setting is 23 hours 50 minutes. If the power-off time falls on the next day, only the power-off time needs to be set.
- Automatic Heating Mode ("AUTO"): Activated by the "IC" key.
- Adaptive Start: If the weekly timer is on and the appliance is in standby, within 20 minutes before the scheduled start-up time, the heater will adjust heating based on room temperature: high power if ≥10°C below set temp, low power if ≥5°C but <10°C below set temp, no heating if <5°C below set temp.
- Automatic Heating (without timer or during default heating period): High power if ≥6°C below set temp, low power if <6°C below set temp. Heating stops when room temperature reaches or exceeds set temperature.
- Display: Features a display showing cursor, timer icon, timer on/off, flame dim level, day of the week, temperature/timer number, heating level (low/high), automatic heating mode icon, and time/temperature display.
Maintenance Features:
- Cleaning:
- Switch off the product and disconnect from the power outlet.
- Allow the product to cool completely.
- Clean the exterior surface with a soft, moist cloth and mild soap solution.
- Do not allow liquids to enter the interior of the product.
- Periodically clean guards with a vacuum cleaner nozzle to remove dust.
- Do not use harsh detergents, chemical cleaners, or solvents.
- Battery Replacement: The remote control requires 2 x AAA, 1.5V batteries. Instructions for replacement are provided with illustrations.
- Storage: Store in original (or appropriately sized) packaging in a safe, dry location during off-season.
- Transportation: Transport in original, secured packaging, avoiding excessive vibrations.
- Plug Replacement (for BS1363 plugs):
- The appliance is supplied with a BS1363 pin plug fitted with a 10 Amp fuse (approved to BS1362).
- If the mains plug needs replacement, follow wiring instructions: blue wire to N (black), brown wire to L (red), yellow-green wire to E (earthing symbol).
- Never connect live or neutral wires to the earth terminal.
- Only fit an approved 13 Amp BS 1363 or BS 1363/A plug with the correctly rated fuse. Consult a qualified electrician if in doubt.
- If a moulded plug is removed, dispose of it carefully to prevent accidental engagement into a socket.
- Servicing: Contains no user-serviceable parts. All servicing or repairs must be performed by qualified personnel only.