9
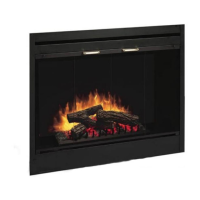
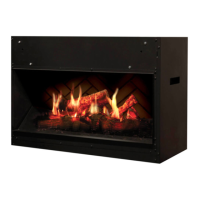
Opti-V Installation
CAUTION: When inserting the
unit take care not to damage or
pinch any of the power cables
that are concealed in the wall.
6. Remove the outer jacket and
strip the individual conductors
½ in. (1.3 cm) from the end.
7. Connect the black wire from
the unit to the Live (120V) or
Line 1 (240V) wire from the
power supply using a wire
connector (included).
8. Connect the white wire from
the unit to the Neutral (120V)
or Line 2 (240V) from the
power supply using a wire
connector (included).
!
NOTE: Cap any additional
wires from the power supply
not used in the installation.
9. Ensure that the green
grounding wire is securely
attached to the back plate.
CAUTION: Ensure the wire
connectors are securely
tightened, so no bare wires
(live or neutral) are exposed.
10. Ensure the grounding wire of
the supply cable is securely
attached to the grounding
screw.
!
NOTE: The wire connections
on the Opti-V feed into a
3-prong plug just below the
electrical cavity opening, before
closing the electrical cover
ensure that the plug is fully
installed.
11. Reinstall the electrical cover
panel.
12. Reinstall the protector sheet
to prevent dust from entering
the unit while nishing the
surround.
13. Finish surrounding wall. There
are 3 dierent options for
nishing the wall:
• Permanent - install drywall
right up to the ange that
surrounds the opening.
• Semi Permanent - nish
around edge using ashing
material (not included)
• Flexible - create opening big
enough to access mounting
anges and a false front that
can be removed.