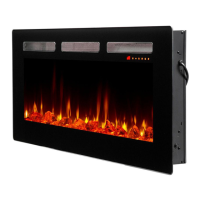
9
Flicker Motor Replacement
Tools Required: Phillips Head Screwdriver
Wire Cutter/Stripper
1. Follow steps 1-6 of “Preparing for Service” on page 6 of this manual before continuing.
2. Remove the icker rod by rst taking it out from the middle brackets, then pulling it from the side opposite the icker
motor, and nally pulling it away from the icker motor (Figure 8).
3. Remove the two screws that hold the icker motor bracket to the rebox (Figure 9).
4. Using a wire cutting tool, cut off the factory-installed wire connectors.
5. Using a wire stripping tool, strip the purple and white wires approximately 13 mm (1/2”).
6. Using the twist-on wire connectors, connect the white wire from the icker motor to the white wire from the rebox,
and the black white from the icker motor to the purple wire from the rebox (Figure 10).
7. Install the icker motor on the bracket.
8. Secure the bracket to the replace.
9. Reassemble the replace by reinstalling the top panel, followed by the back panel.
motor bracket
motor
white
white
purple
black
new motor
Figure 8
Figure 9
Figure 10