Lamp Replacement
WARNING – ALWAYS DISCONNECT FROM THE POWER
SUPPLY BEFORE REMOVING LAMPS.
Warning - The lamps reach high temperatures during
operation. For this reason, allow the lamps to cool down
after switching off the appliance.
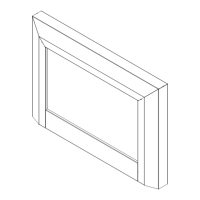
The front panel will need to be removed in order to change
lamps – see Fig. 9.
Warning - The front panel is heavy and easily damaged.
The front panel is supported at the top by two brackets and
held tight by magnets at the bottom.
To gain access to lamps please apply the following
procedure:
While holding the front panel by its sides with both hands, (1)
carefully tilt the bottom of the frame outwards until free and
then lift the panel up (2) and then away (3) from the main
body - see Fig. 9.
To gain access to the bulbs remove the screws at ‘A’ to remove
the cover bracket ‘X’ and the screws at ‘B’ to remove the
cover bracket ‘Y’ - see Fig. 10.
To access the bottom bulbs, carefully slide the flexible
rotisserie to one side ensuring that the rubber grommet is
not lost - see Fig. 11.
Remove the defective lamp by unscrewing it - see Fig. 11.
Replace with a 60W E14 SES Clear Candle bulb, rotating it.
Take care not to over-tighten the lamp.
Steps for reassembling the appliance
1. Refit the rotisserie making sure that the rubber grommet
is carefully pushed into the slotted hole on the axial bracket.
2. Replace the cover brackets ‘X’ and ‘Y’ - see Fig. 10.
3. Replace the front by aligning the slots at top of the front
frame with the support brackets on the chassis and
ensuring it catches fully on the support brackets.The
magnets on the chassis will hold the front flush to the
main body.
Thermal Safety Cut-out
For your safety, this appliance has been fitted with 2 thermal
cut-outs. In the event that the product overheats, the cut-out
switches the heat off automatically on the defective side.
To bring the heat back into operation, remove the cause of
the overheating, then unplug or turn off the electrical supply
to the heater for up to 10 minutes.
When the heater has cooled sufficiently, re-connect and switch
on the heater.
Cleaning
WARNING – ALWAYS DISCONNECT FROM THE POWER
SUPPLY BEFORE CLEANING THE APPLIANCE.
For general cleaning use a soft clean duster – never use
abrasive cleaners. The glass viewing screen should be
cleaned carefully with a soft cloth. DO NOT use proprietary
glass cleaners.
Recycling
For electrical products sold within the European Community.
At the end of the electrical products useful life it
should not be disposed of with household waste.
Please recycle where facilities exist. Check with
your Local Authority or retailer for recycling advice
in your country.
After Sales Service
Your product is guaranteed for one year from the date of
purchase.
Within this period, we undertake to repair or exchange this
product free of charge (excluding lamps & subject to
availability) provided it has been installed and operated in
accordance with these instructions.
Your rights under this guarantee are additional to your statutory
rights, which in turn are not affected by this guarantee.
Should you require after sales information or assistance
with this product please go to www.dimplex.co.uk where
you will find our self help guide by clicking on “After Sales”
or ring our helpdesk on 0845 600 5111 (UK) or 01 842 4833
(R.O.I.) .
Spare parts are also available on the website
www.dimplex.co.uk
Please retain your receipt as proof of purchase.