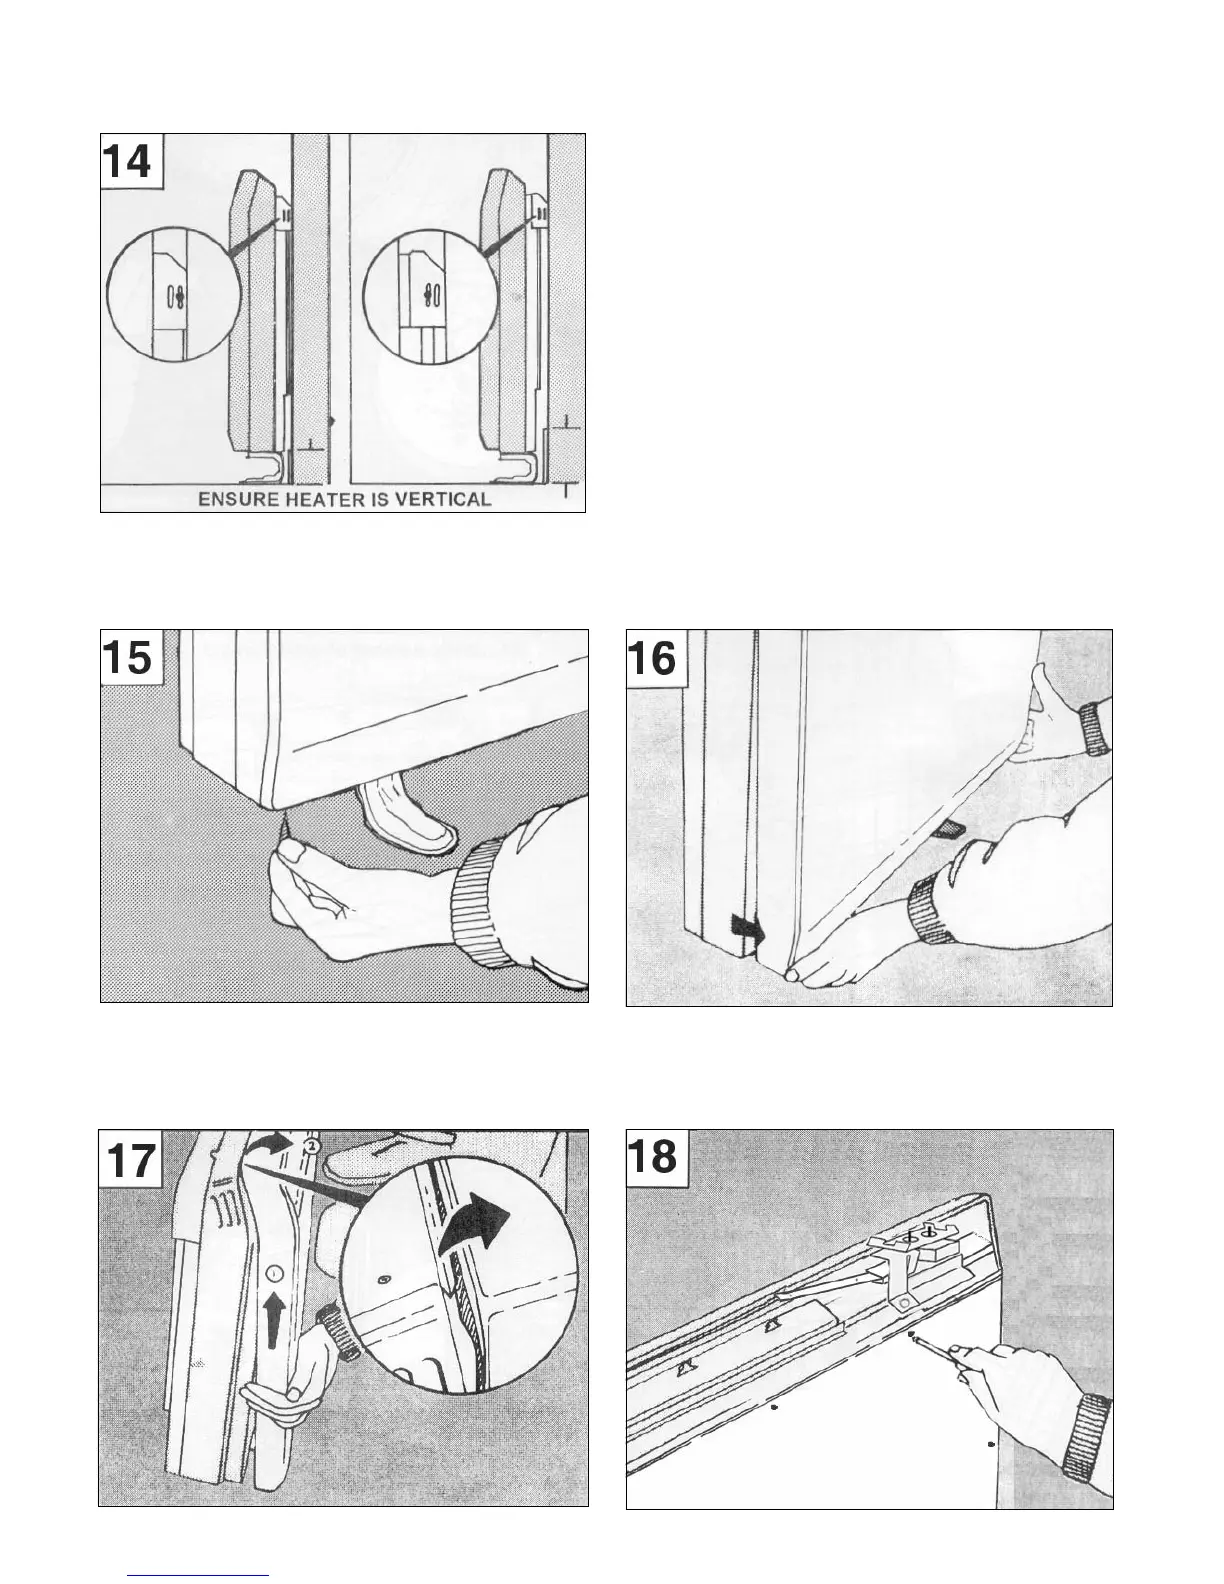
14. Secure heater to wall fi xing bracket by replacing the
two screws removed in step 10 (do not fully tighten these
screws until the bricks are loaded into the heater as
some settling of the heater may occur). The feet and wall
mounting arrangement are designed to accommodate
skirting board sizes up to 25mm (1”) thick. To avoid
obstructing the airfl ow to the rear of the heater the
following must be strictly adhered to:
(a) For skirtings higher than 100mm (4”) it will be
necessary to position the heater with the screws attached
through the alternative fi xing slots to the front.
(b) For skirtings having a height in excess of 150mm (6”)
it will be necessary to reduce the height of the skirting to
150mm (6”) over the entire length of the heater plus 25mm
(1”) at either end.
15. Remove bottom front panel securing screws. These
were loosened in step 4 and should be easily unscrewed
by hand.
16. Pull bottom of front panel forward to disengage it from
bottom of heater.
17. Still holding the bottom of front panel forward, lift
upwards to disengage top edge of front panel from groove
on heater top panel 1, and remove front panel from
heater 2.
18. Remove the protective polystyrene packing from
the front inner skin panel and discard. Remove screws
retaining front inner skin.