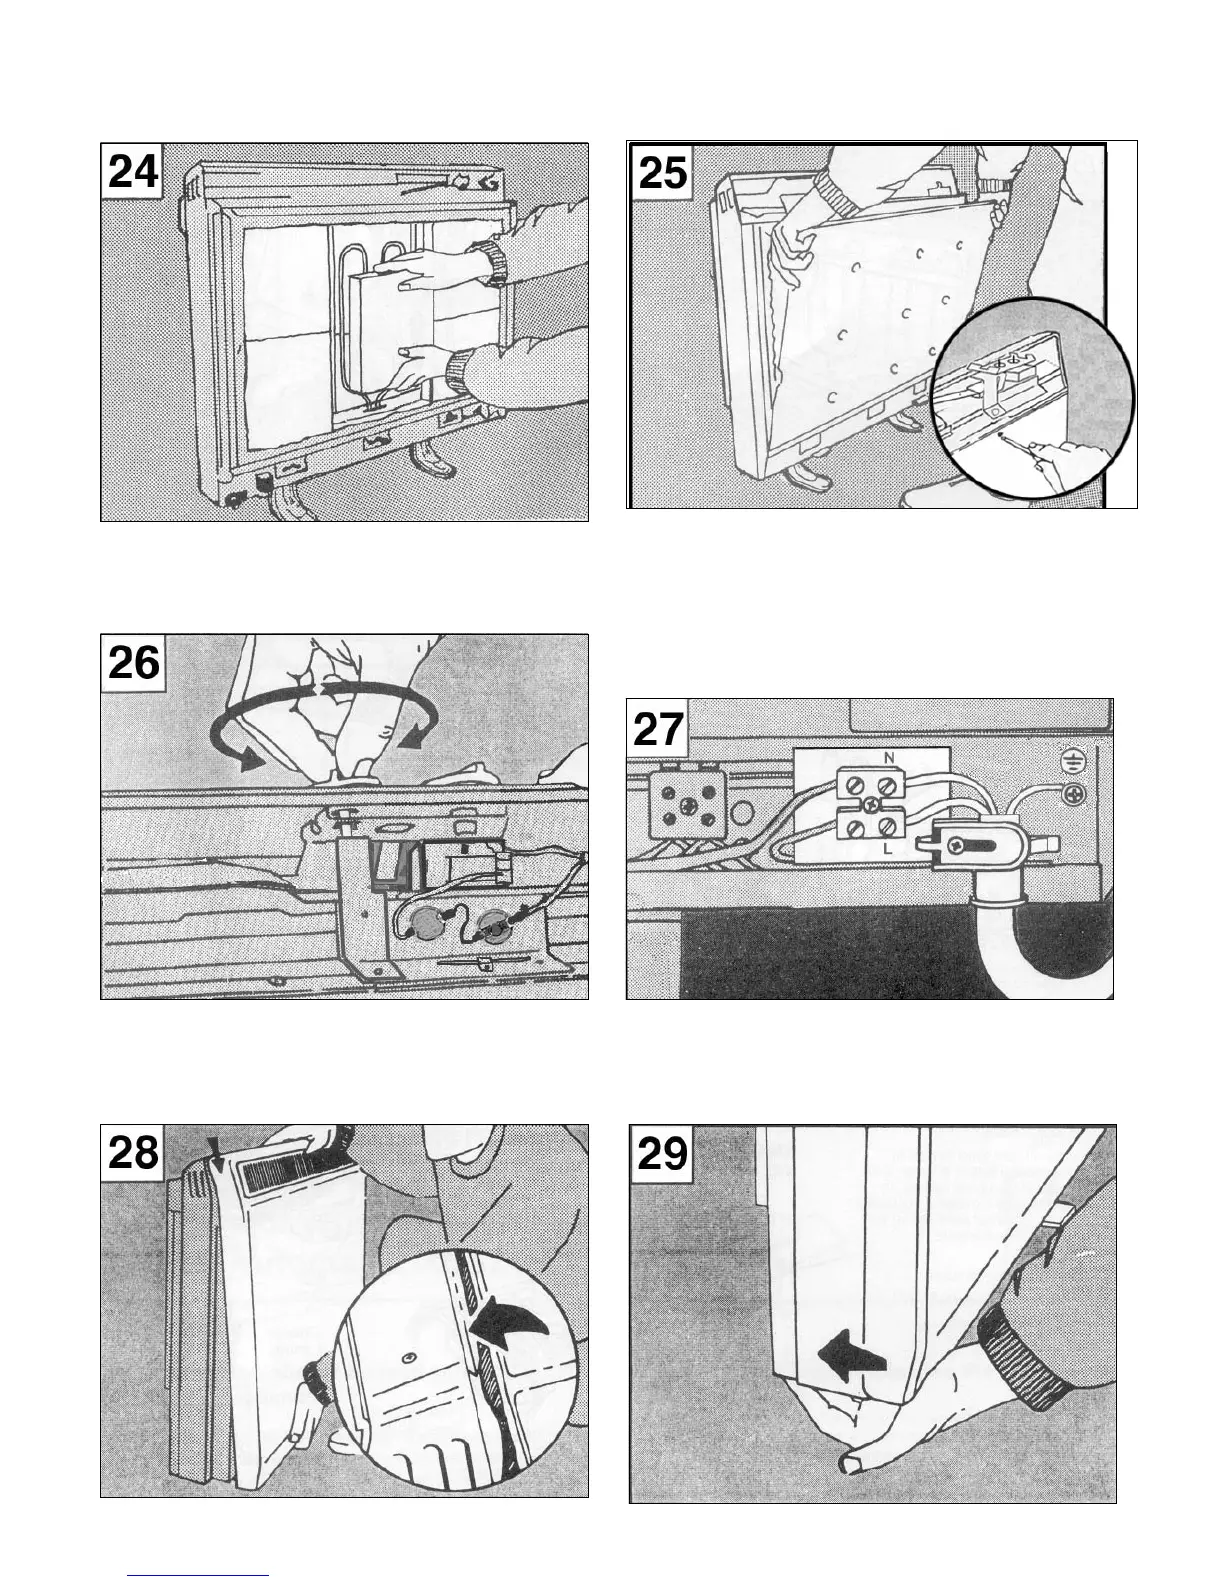
24. Fit the front bricks with the airways facing inwards.
25. Re-fi t the inner front panel/insulation assembly,
ensuring the bottom edge of the panel is located behind
the base fl ange. Make sure all screws removed in
Operation 18 are replaced securely.
26. Check that the damper mechanism within the heater
functions freely by rotating the left hand control knob.
Check also that the right hand (input) knob rotates freely.
27. Introduce mains supply cable through the cable clamp
into the terminal area, and connect in accordance with the
terminal markings. HEAT RESISTING CABLE MUST BE
USED (min. T85). Ensure that the cable is clamped so
that there is no excess cable in the terminal area. ON
NO ACCOUNT SHOULD ANY SURPLUS CABLE BE
PUSHED INSIDE OR BEHIND THE HEATER. CHECK
ALL ELECTRICAL CONNECTIONS FOR TIGHTNESS.
29. Push the bottom of the front panel towards the heater,
so that the bottom fl ange locates under the base.
28. Holding the bottom edge of the front panel towards
you, locate the top edge of the front panel in the groove at
the top of the heater.