front with louvers
Upholstey
EPDM
Gasket
Cabin roof
Nut M6
Stud M6
10
Unit base
Air ducts
Foam Gasket
10
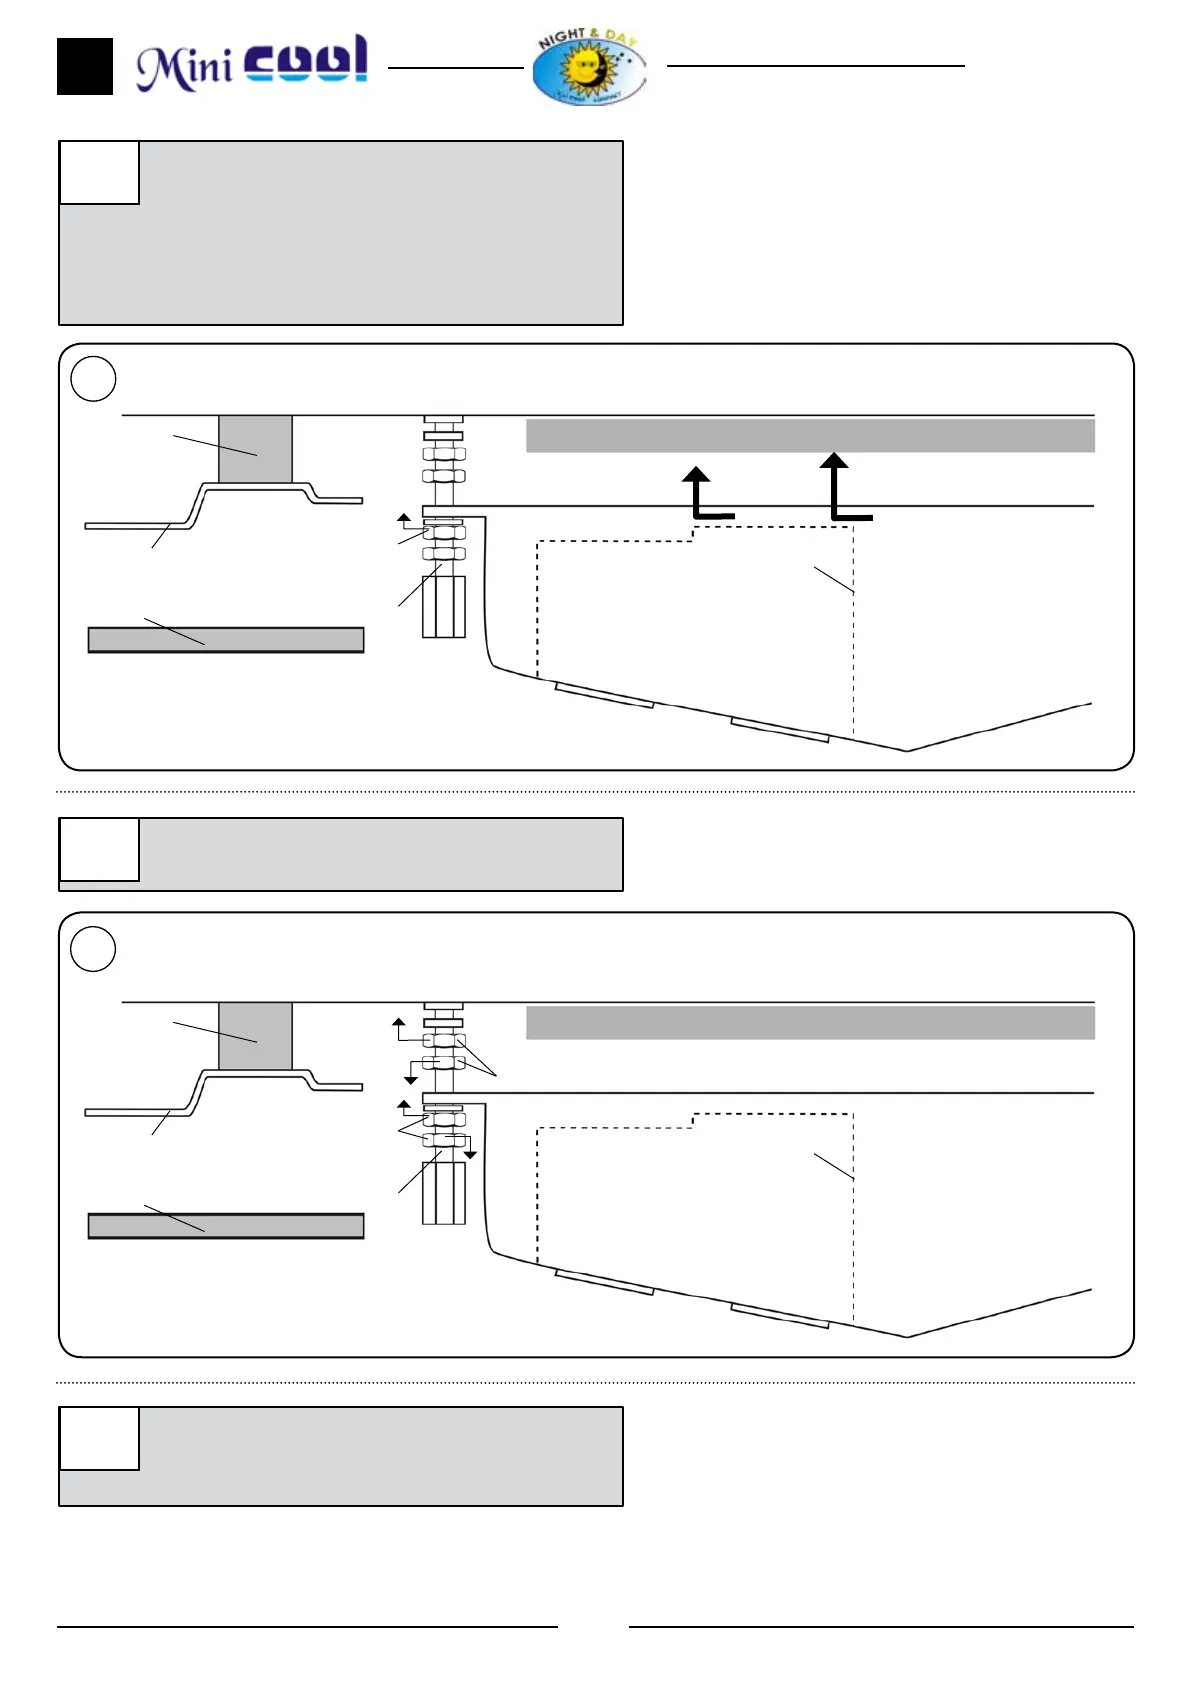
Place the evaporator front on previous studs
with (1) M6 wide ring washer and (1) M6
nut on each stud. Tighten nuts until air ducts
systems touch upper foam gasket (see diagram
bellow). Important: Air ducts must touch
foam gasket to avoid air leaks.
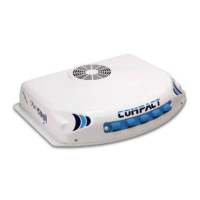
Nut M6 (9a)
front with louvers
Upholstey
EPDM
Gasket
Cabin roof
Nut M6
Stud M6
11
Unit base
Air ducts
Foam Gasket
11
Tighten nut mentioned under point 9a until it
touches upper surface of front.
12
Place console and centre equipment in the most
convenient place of cabin roof. Once centred,
remove console for later installation.