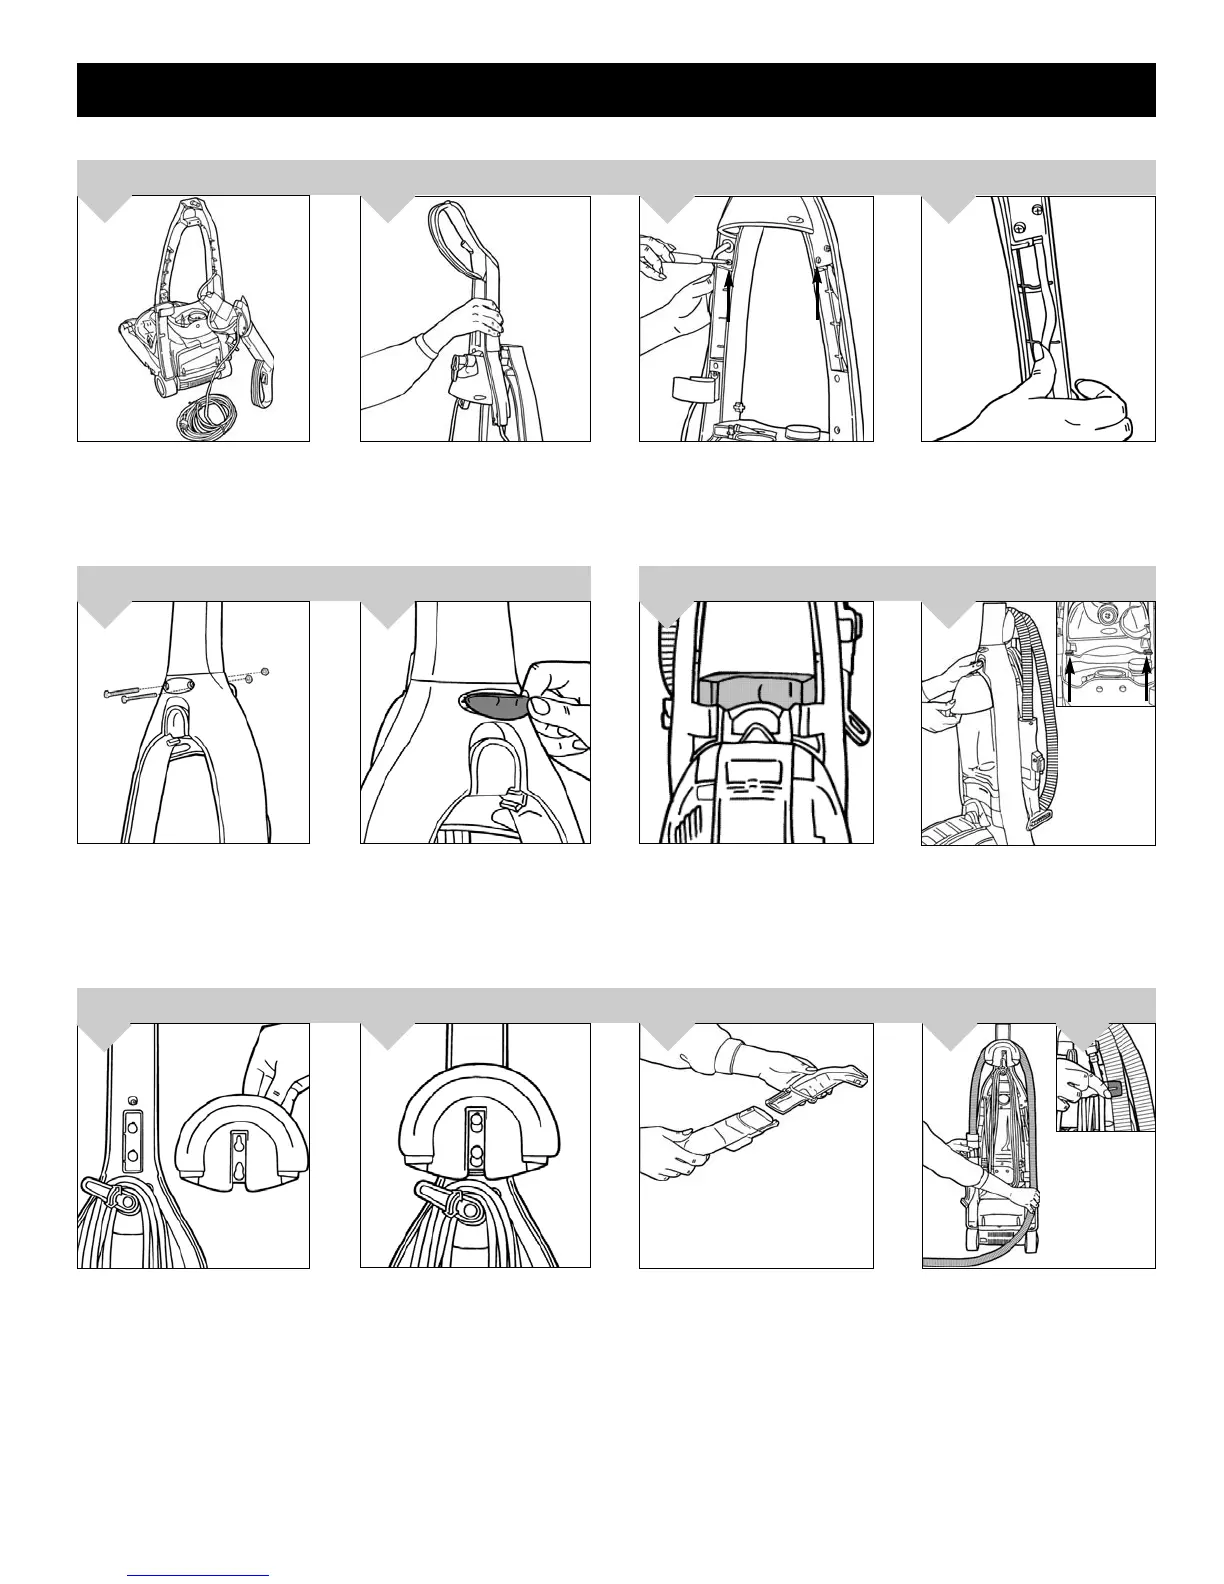
HOW TO ASSEMBLE
Line up upper handle with lower
handle and push into place.
Secure from back with the two
smaller screws.
2.
3.
TOOL REQUIRED: PHILLIPS SCREWDRIVER
7
Remove your Platinum Force
™
Extractor from the carton with cau-
tion. The handle is connected to
the body by a cord. NOTE: DO
NOT tug or pull on cord.
1.
Feed cord through slots on the
back of handle.
Remove backing of tape on the
screw cover and press into place.
5.
6.
Place nut into recess in back of
upper handle (5a). While holding nut
in place, insert LARGE screw
through front of upper handle and
tighten. Repeat process with second
LARGE screw.
4.
TOOL STORAGE
To install tool caddy , line up
grooves of tool caddy storage with
round tabs on back of handle
(above quick cord clip).
Slide tool caddy down until secured
in place. NOTE: Tool caddy is
removable for storage on wall.
2.
3.
1.
Push upholstery attachment into left
hose clip, wrap hose around tool
caddy starting on the back groove
of storage caddy. Secure into place
by pushing end of hose into hose
clip on right. Press solution/hose
clip onto hose to secure solution
tube into place (4a).
4.
4a.
CLEAN WATER RESERVOIR
NOTE: Make sure soap tank is rest-
ing in place with the solution tube
firmly pressed into tube opening.
1.
Connect upholstery attachment to
end of hose by pressing until it
clicks into place (Upholstery tool
may come preattached).
Line up grooves of clean water
reservoir with support posts inside
of handle. Tilt top of clean water
reservoir inward and push until it
locks into place.
2.