Do you have a question about the Dish Hopper and is the answer not in the manual?
Attach the blue label to the cable connected to the "Home Video Network" port.
Attach appropriate labels (black, orange, red) to HDMI, RCA, or YPbPr cables.
Attach the yellow label to the cable connected to the "Ethernet" port.
Attach the white label to the cable connected to the "Phone" port, if applicable.
Attach the green label to the cable or antenna connected to the "Remote Antenna" port.
Disconnect cables only at the end connected to the receiver being replaced.
Connect the Home Video Network cable to the designated port on the replacement receiver.
Connect HDMI, YPbPr, or RCA cables from the TV to the corresponding ports.
Connect the Ethernet cable to the "Ethernet" port on the replacement receiver.
Connect the Phone cable to the "Phone" port on the replacement receiver, if applicable.
Connect the remote antenna to the "Remote Antenna" port on the replacement receiver.
Open the panel and ensure the Smart Card is securely inserted into the slot.
Plug the TV cord into the wall outlet and turn on the TV. Plug the receiver power cord into a wall outlet.
Ensure the System Setup screen is displayed; check TV input if not.
Wait for the system to automatically acquire satellite signals.
If installation tests fail, check cable connections and retest using the remote control.
Press the SAT button on your remote control to pair it with your Hopper.
Use remote arrows to select Hopper location, then highlight "Next" and press SELECT.
Allow approximately 20 minutes for the system setup wizard to download Hopper software.
The Hopper will automatically reboot once the software download is complete.
Select your TV's resolution using the remote control and press SELECT, then highlight "Next".
Highlight "Keep" and press SELECT to retain your chosen TV display configuration.
Select "Pair with Remote Control" and then press SELECT to begin the TV pairing wizard.
Follow step-by-step instructions in the TV Pairing wizard to configure your TV with your DISH remote.
Call 1-800-333-DISH (3474) and have your Receiver ID and Smart Card ID ready.
After activation, the system will authorize your Hopper, taking 10-15 minutes.
Once authorized, highlight "Watch TV" and press SELECT to begin using your Hopper.
Pack the original receiver and power cord in the protective bag and the new receiver's box.
Locate the original shipping label, remove it using the red tab, and prepare the return label.
Turn over the original label, peel off the yellow return label, and apply it to the top of the box.
Copy the RA and UPS tracking numbers for your records before shipping.
Return the original receiver at the nearest UPS dropoff location or schedule a pickup.
| DVR Storage | 2TB |
|---|---|
| Whole-Home DVR | Yes |
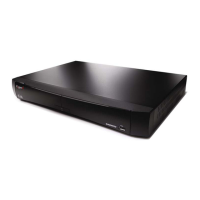
| Category | Receiver |
| Connectivity | Ethernet, Wi-Fi |
| Remote Control | Voice Remote |
| HDMI Output | 1 |
| Dolby Digital Support | Yes |
| Voice Control | Yes |
| Video Output | HDMI |
| Audio Output | HDMI, Optical Audio |
| Type | Satellite Receiver |
| Output Resolution | 1080p |
| Optical Audio Output | 1 |