6
EN
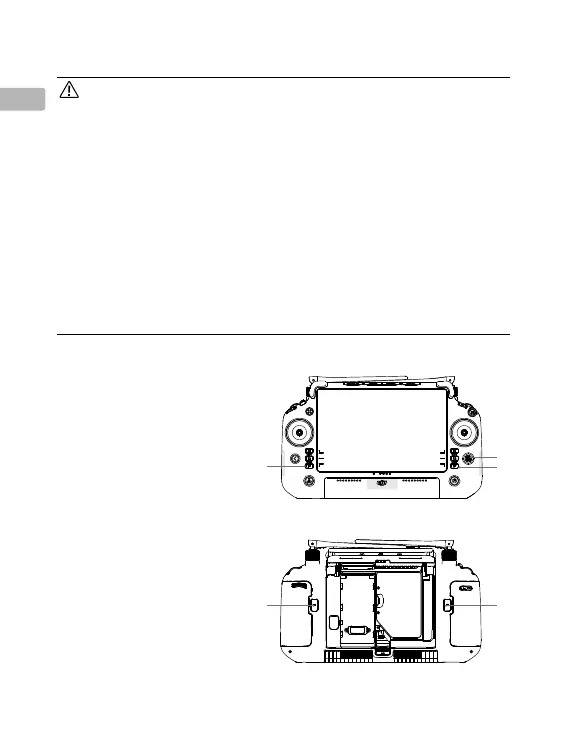
Camera Controls
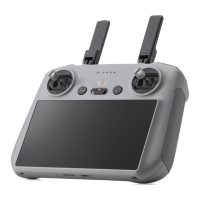
Remote Controller
With the buttons on the DJI RC Plus
remote controller, users can switch
between point cloud and visible light
live views, preview the point cloud
effect, and control the gimbal and
camera.
1. L1/L2/L3/R1/R2/R3 Buttons: go to
Camera View in DJI Pilot 2 to view
the specific functions of these
buttons. Refer to the DJI Pilot 2 App
section for details.
2. 5D Button*
3. Customizable C1/C2/C3 Buttons*
1
3
1
3
2
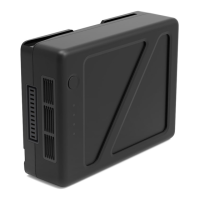
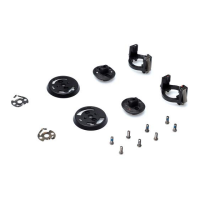
Installation (Figure A)
• To ensure the mapping accuracy, make sure the L2 is mounted on a single
downward gimbal connector with the cable connected to the right USB-C
port (when facing the aircraft).
• Make sure the gimbal connector on the aircraft is positioned correctly when
mounting. Otherwise, the L2 cannot be mounted.
• Only remove the L2 after powering off the aircraft.
• Remove the L2 by pressing the button on the aircraft to detach the gimbal
and camera.
• Make sure the microSD card slot cover is firmly in place to prevent dust or
moisture entering during usage or transportation.
• To avoid burns, DO NOT touch the camera case and the optical window
when powering on.
• Detach the gimbal from the aircraft during transportation or storage.
Otherwise, the service life of the damper balls may be shortened or they
may even be damaged.
 Loading...