Do you have a question about the DLE DLE-85 and is the answer not in the manual?
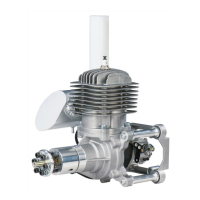
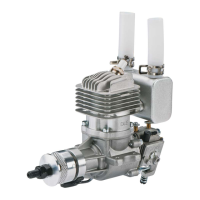
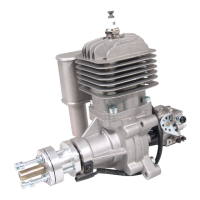
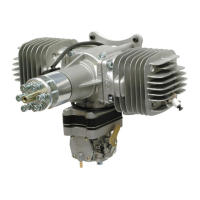
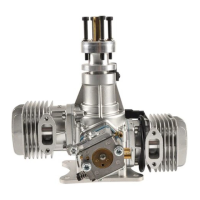
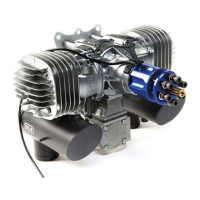
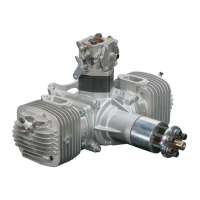
8.5HP/7,500 RPM engine performance.
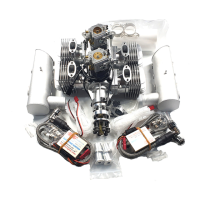
Breakdown of component weights: engine, muffler, ignition, standoffs.
Recommended fuel: 87-93 octane gasoline with 30:1 gas/2-stroke oil mixture.
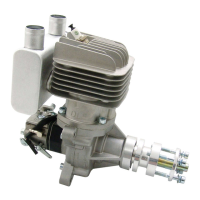
Specifies the carburetor type: DLE with Manual Choke.
Emphasizes safety for operator and others; DLE disclaims responsibility for accidents.
Engine must be operated in a properly ventilated area.
Do not stand in front of or in line with the propeller when the engine is running.
Never use a propeller that has hit the ground or shows nicks, cracks, or splits.
Do not use silicone fuel line; use gasoline-approved vinyl or neoprene rubber fuel line.
Keep gasoline away from open flames, heat, or sparks due to high flammability.
Never rotate the propeller with the electronic ignition system switched on and plug cap off.
Lean mixtures cause overheating and spark plug damage; monitor High-Speed Needle adjustment.
Check all screws and bolts for tightness and inspect for any cracks, breaks, or missing parts.
Connect the engine sensor lead to the Electronic Ignition Module lead, securing with a clip.
Mount the ignition module and battery securely, using foam rubber between module and surface.
Install the spark plug into the engine head with 7-8 lbs torque; do not overtighten.
Install on a minimum 9.5mm [3/8"] thick 5-ply plywood firewall, securely glued to the airplane.
Install 4 standoffs using 5x20mm SHCS and 5mm washers, applying threadlocker.
Install fuel tank using 1/8" [3.175 mm] gasoline-safe fuel lines and a gasoline-safe stopper.
Mount the engine to the firewall using 5x25mm SHCS through the isolation mount and into blind nuts.
Install throttle servo at least 305mm [12"] away, ensuring full carburetor rotation with servo travel.
Cut necessary clearance, adjustment, cooling, and exhaust holes in the aircraft cowl.
Use a propeller washer to mark the centering hole on the propeller for drilling.
Set engine at compression stroke beginning and note ignition magnet position for timing.
Drill the outer hole using a #35 pilot bit, then a #5 bit for finishing, drilling halfway from each side.
Mount propeller using 5x50mm SHCS, lock washers, and flat washers; use threadlocker.
Instructions for starting the engine manually by hand.
Let the engine idle for 30-45 seconds after starting, then slowly open and close throttle.
A 24-volt electric starter and lightweight aluminum spinner are recommended for starting.
Use the electric starter to turn the engine until it fires, then open the choke.
Diagnoses for when the engine fails to ignite, including battery and spark plug issues.
Diagnoses for when the engine starts but then cuts out, often related to fuel delivery.
Adjusting the Idle Adjustment Screw (No.3) to set the engine's idle speed.
Adjusting the Low-Speed Needle (No.4) for optimal fuel/air mixture at low speeds.
Adjusting the High-Speed Needle (No.5) for optimal fuel/air mixture at high speeds.
Leaning or richening the high-speed mixture using the High-Speed Needle (No.5).
Troubleshooting engine hesitation or increased idle RPM by adjusting the low-speed needle.
Troubleshooting engine stopping at full throttle or failing to reach full RPM.
Addresses issues where engine doesn't reach full RPM or shows consistent carbon buildup.
Clean the non-removable fuel filter periodically to prevent needle adjustment mis-calibration.
The DLE-85 has a two-year limited warranty through Hobby Services.
Provides contact information for Hobby Services, including address, phone, and email.
Lists optional accessories available for the DLE-85 engine.
Diagram showing the mounting hole pattern for the anti-vibration mount.