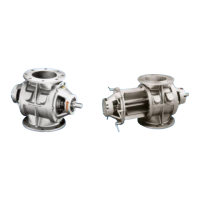
DMN-WESTINGHOUSE AL-BL Rotary Valves
Code: AL-E.B.01.B 11-2012
33
3.3.4.2 Re-assembly standard execution
After thoroughly cleaning, checking and renewing necessary parts the valve should be
re-assembled as follows:
It has been stressed by 'SKF' that no grease is to be used in the
assembly or operation of the bearings.
- Gland packing:
re-assemble the lantern ring (422) and the gland follower (421) to the end
covers without packing cord.
- Bearing house assembly:
- Press the high temperature bearing into the housing and ensure it is tight to
housing shoulder, re-fit circlip (227)
Clean the spigot edges of both end covers (102/107) carefully. To
ensure the rotor position is concentric with the valve bore the end
cover spigots are a light interference fit in the body. Before
assembly the jack screws (152) have to be removed.
- Assemble the end cover to the non-drive side of the body and secure it using
bolts (152).
- Fit the rotor in the body and gently push the rotor shaft through the sealing area
at the non drive side end cover.
- Fit the drive side end cover.
- Fit the inner spacer ring (202) to rotor shaft, press in bearing house assembly to
end cover and secure.
- Loosely fit outer spacer ring (202), retainer ring (221) and the locknut (222) at
both ends of the rotor shaft.
3.3.4.3 Rotor adjustment for standard execution
Special clearances are to be set with high product temperatures,
according to special instructions.
Product characteristics may influence the clearance. In case of any
doubts please contact sales department.
Prior to the delivery the axial position of the rotor is set at the right clearance. This
means that differences in clearance between the rotor and the end cover on both
drive side and non-drive side have been equated as far as possible. Nevertheless,
should it be necessary to readjust the axial position of the rotor, proceed as follows: