1-10 (No.HD003<Rev.004>)
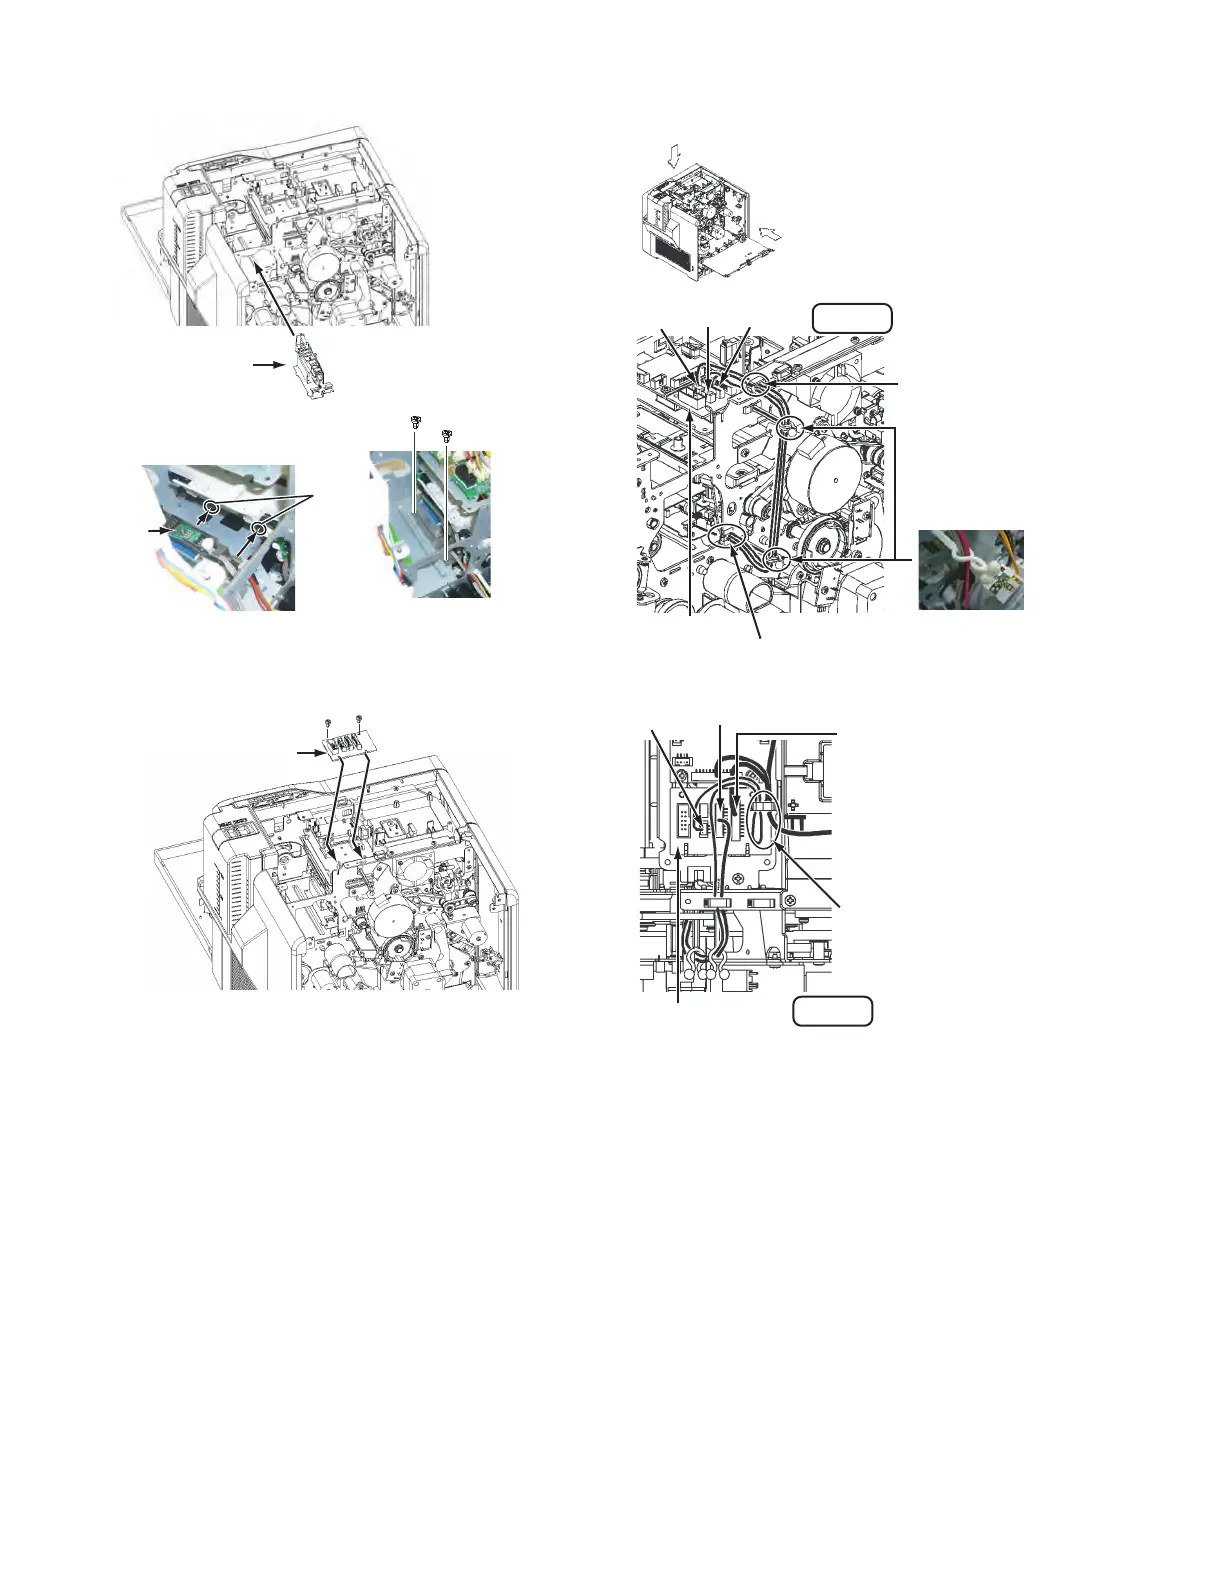
(4) Mount the IC contact unit.
(5) Attach the IC CONTACTIFC Board.
(6) Connect the wire from the IC contact unit following the
drawing below.
Align the screw holes, make sure that
the IC contact unit does not move, and
then fix the IC contact unit with the screws.
IC Contact unit
IC Contact
unit
Slide the IC contact unit into the
hook of the bracket on the main unit.
Hook
Screw :
QYSDST2604NA x 2
Insert the IC CONTACTIFC
Board into the bracket
on the main unit.
IC CONTACTIFC Board
Screw : QYSDST3006NA x 2
CN4 CN1 CN3
IC CONTACTIFC
Board
Run the wires from the IC contact
unit through this wire clamp.
Run the wires through
this wire clamp.
Fix the wires with the two
wire clamps. (Tighten the
wire clampsas shown in the
picture below.)
Be careful to prevent wires from
touching nearby rotating objects
such as belts/gears.
View A
A
B
View B
IC CONTACTIFC Board
CN4
CN3
CN2
Connect the free PH10-pin
connector of the jump wire.
Jump wire
Fold back, and then run the
excess of the wire (red),
connected to the CN4, through
the wire clamp as shown in the
drawing.