8
OPERATION
G. Closing The Awning Manually
PINCH HAZARD. Keep CLEAR of arm assemblies while closing awning. Arm assemblies will close against back rail. Failure
to obey this warning could result in death or serious injury.
Read BEFORE proceeding with this section:
• Perform these steps ONLY if the awning did not retract aer performing the steps in “E. Testing The Awning Before Travel” on page
6. Use a 3/8" wrench (or drill) and a flat-bladed screwdriver to complete steps.
• The awning may display up to a 4” gap when closed. To remove the gap, readjust the awning close limit aer a qualified service techni-
cian has repaired the awning.
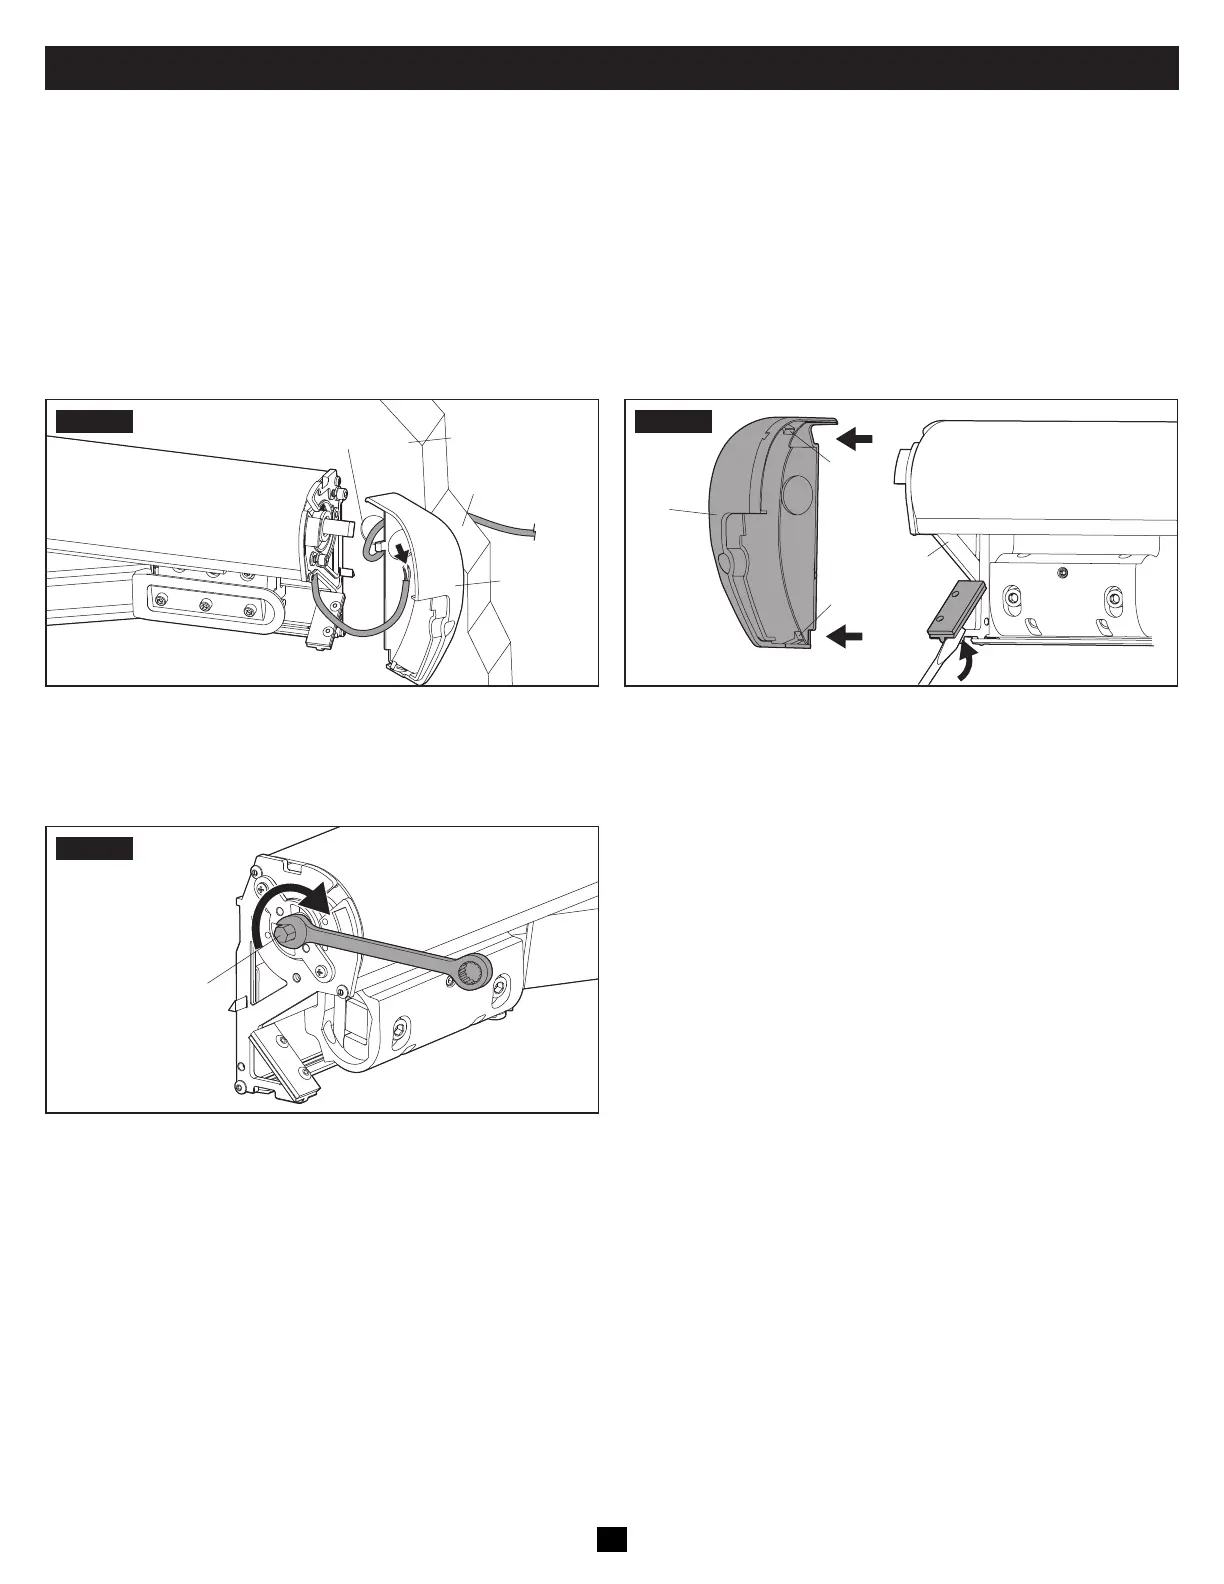
STEP1
RH End Cap
RV Wall
Wiring
Wiring Hole
• Disconnect power to the RV, the receiver unit, and the awning.
• Unplug the motor connector from the RV wiring connector
inside the RH end cap.
STEP2
Tab
Tab
LH End
Cap
LH End
Plate
STEP3
Hex Rod
• Use a wrench to turn the hex rod until the awning is closed.
The awning may not close completely. Up to a 4" gap may
exist between the lead rail and the awning case.
• Reinstall the LH end cap.