Do you have a question about the Dometic Carry-On 7000 and is the answer not in the manual?
Covers warnings, important information, and general safety guidelines.
Details dimensions, hatch size, power requirements, and inverter/generator use.
Instructions for placing the unit in the hatch and securing it with the hatch bag.
Step-by-step guide to operation and explanation of the Automatic Thermostat and FAN/COOL Selector.
Guidelines for cleaning the unit, air filter, cabinet, and fabric accessories.
Advice for storing the unit and its accessories to maintain performance.
Guide to diagnosing and resolving common operational issues with the Carry-On unit.
Illustrated list of unit parts and their corresponding part numbers.
List of available accessories like air deflectors and power cords.
Explanation of what the limited warranty covers and its terms.
Details on what is not covered by the limited warranty.
Warnings about electrical shock, grounding, and electrolytic deterioration risks.
Precautions for refrigerant gases, ventilation, and condensate handling.
Warning against sleeping in closed areas with operating combustion equipment.
This document outlines the installation, operation, and maintenance of the Carry-On 7000 Portable Air Conditioner, a marine air conditioning unit designed to enhance boating enjoyment.
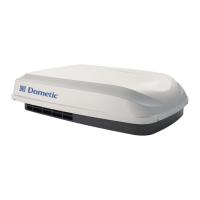
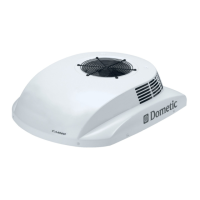
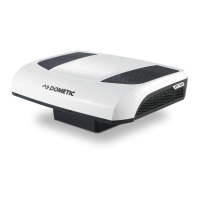
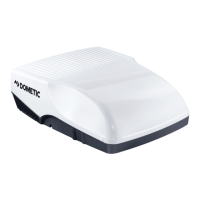
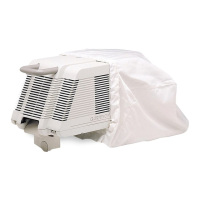
The Carry-On 7000 is a portable air conditioning unit specifically designed for marine environments, particularly for cooling "below decks space" on boats. It is engineered to cool an area of approximately 120 square feet (for the 7000 model), assuming typical powerboat conditions with no large windows. The unit functions by circulating air, cooling it, and dehumidifying the cabin. It operates on either 115V (50/60Hz) or 220V (50Hz) dockside power, and can also be used with an inverter/generator if the power requirements are met. The unit is designed to be placed in an open hatch, with a specialized hatch bag and batten rods used to create a snug, weathertight seal, preventing outside air from entering and ensuring efficient cooling. An optional air deflector is available to change the direction of airflow from vertical to horizontal, and a storage cover can be purchased for protection during long periods of non-use.
The Carry-On 7000 is designed for straightforward operation. To begin, the unit is plugged into a power source. The thermostat should initially be set to the coldest setting (fully clockwise), and the FAN/COOL selector to "HI COOL." For optimal cooling, all windows, vents, hatches, doors, and exhaust fans in the area to be cooled should be closed. Once the cabin or boat has reached a comfortable temperature, the thermostat and fan speed can be adjusted to suit individual comfort levels.
The unit features an automatic thermostat that, when either "HIGH" or "LOW COOL MODE" is selected, automatically cycles the compressor on and off to maintain the desired cabin temperature. The fan, however, runs continuously to circulate air. Users may find it beneficial to adjust the thermostat away from the coolest setting after sundown or once the cabin is comfortable, especially for sleeping. The FAN/COOL selector allows users to choose between cooling the cabin air (HI COOL/LOW COOL) or simply circulating air at the existing temperature (HI FAN/LOW FAN). The "HIGH/LOW" settings in either mode only determine the air speed. A notable operational feature is the unit's ability to dehumidify the cabin, which contributes to increased cooling efficiency as humidity levels drop.
For installation, the unit is placed in an open hatch, ensuring the hatch pad protects and insulates the hatch and the unit itself, and that the unit is wedged securely. The hatch bag is then placed over the unit in the provided grooves, ensuring it does not cover air intake vents or the condensate drain. The hatch bag should be adjusted to fit snugly over the hatch cover and opening, using the provided batten rods to form a deckframe. Alternative batten pockets are available for smaller hatches, requiring battens to be cut to size. For a more weathertight seal, the hatch bag can be adapted with Velcro® brand fasteners or snaps. The unit must be leveled using its adjustable cam and leg, ensuring it is not more than 10 degrees off level to prevent damage to internal parts and voiding the warranty. A condensate drain is located under the unit, allowing water to drain onto the deck. Optionally, a 3/8" I.D. flexible drain tubing can be connected to route this water to another area, ensuring it is routed downhill continuously without "up" loops or air traps.
Safety is paramount during operation. The use of the Carry-On is not recommended while the boat is underway due to potential damage or personal injury. Users should always carry or move the unit using its handles and unplug it from the receptacle and control panel before moving. The unit should never be disassembled. Proper installation according to the instructions is crucial. Electrical service must be adequate and equipped with a circuit breaker (15 amps minimum for 115V units, 10 amps minimum for 220V units). A three-prong (grounded) power cord rated at 15 amps minimum for 115V units or 10 amps minimum for 220V units should be used, with a length no longer than needed to reach a grounded 3-wire receptacle or dockside outlet. It is critical not to cut or remove the grounding prong from the power cord, and adaptor plugs that bypass grounding should not be used. If operation is interrupted in COOL mode, a 3-minute wait is required before restarting to allow compressor pressure to equalize, preventing tripped circuit breakers or blown fuses. If the unit has been stored in any position other than upright within 10 degrees of level, a 30-minute wait after installation is necessary for compressor oil to settle.
Maintaining the Carry-On 7000 is essential for its longevity and efficient operation. Regular cleaning is recommended to keep the unit looking new and functioning properly, always ensuring it is unplugged before cleaning.
The air filter should be removed and gently washed by hand in a solution of mild soap and warm fresh water. After allowing it to drain, the filter can be reinstalled. Extra filters can be ordered from a dealer.
The cabinet can be cleaned with mild soap and fresh water. For tougher stains or scuffs, SOFT SCRUB® may be used. While the Carry-On is designed for adverse conditions, direct spraying of water into the air slots should be avoided.
The Hatch Bag and Storage Cover, made of SUNBRELLA fabric, should be cleaned regularly to prevent the accumulation and embedding of dirt and dust. For regular cleaning, the fabric can be brushed off with a clean brush, hosed down, and cleaned with a mild solution of a natural soap (such as LUX® or IVORY LIQUID®) in lukewarm water (not exceeding 100 degrees F). Thorough rinsing is necessary to remove all soap. Detergents should not be used. For more stubborn cases, the Hatch Bag or Storage Cover can be soaked for approximately twenty minutes in a solution of no more than 1/2 cup (4 oz.) CLOROX® and 1/4 cup IVORY or LUX SOAP per gallon of warm water, followed by thorough rinsing in cold water. It is important to note that excessive soaking in CLOROX can deteriorate sewing threads and may reduce the fabric's water repellency, necessitating an application of a marine water repellent treatment like 3M® 303 waterproofing.
For storage, the Carry-On Hatch Bag and Storage Cover should be cleaned, allowed to dry, and stored in a dry, well-ventilated area. When storing the Carry-On unit for long periods, it is advisable to purchase the optional Storage Cover, cover the unit with plastic, or return it to its original carton. The unit should be stored in an operating position in a dry place. These precautions help prevent dust and airborne particles from accumulating, which could otherwise lower future performance efficiency or require more frequent cleaning.
Troubleshooting guidance is provided to address common issues before calling for service. For example, if the unit does not operate, checks include ensuring the plug is connected, resetting circuit breakers or replacing fuses (with time delay type), and adjusting the thermostat. If the air does not feel cool enough, users should check if the selector switch is on FAN, if the thermostat is set incorrectly, if the boat temperature is below 70°F, or if air intakes are blocked. If the unit operates but the cabin fails to cool, the air filter may be dirty, the thermostat set too cold (causing the evaporator coil to freeze), or air intakes blocked. Rapid cycling of the compressor could indicate a dirty air filter or extremely hot outside temperatures. Water dripping inside the cabin through the hatch might be due to improper installation, a blocked condensate drain, the bag covering the drain, or a blockage in the hose. Water dripping outside on the weatherdeck is considered normal, as drains are provided for rainwater and some drainage may occur from water condensing in compressor spaces. If issues persist after reviewing the troubleshooting checklist, users are advised to contact their dealer.
| Cooling Capacity | 7000 BTU |
|---|---|
| Weight | 46.3 lbs |
| Dimensions | 13.5" H x 14.5" W x 18" D |
| Voltage | 115V |
| Hertz | 60 Hz |
| Noise Level | 52 dB |
| Installation Type | Window |
| Power Consumption | 750 W |