Instructions before installation DA20DC
16
!
WARNING!
A horizontal distance of at least 40 cm must be maintained
between the fully open awning and any permanent object.
Make sure the RV structure will safely and securely support
awning before installation. Otherwise, the cassette awning may
become unstable and could bend or collapse.
Select a height of more than 2.5 m above ground or other level
that could provide access to it.
A
NOTICE!
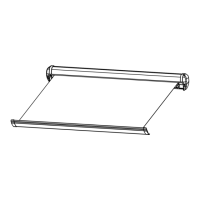
Only attach the awning to flat and vertical wall surfaces (Fig. 2
and fig. 3, page 1). On curved wall surfaces, the mounting
bracket needs to be adequately supported under the fastening
points.
Ensure that the living space door opens without coming into
contact with parts of the awning (fig. 4, page 1). Pay particular
attention to the pivoting range of the awning arms.
If the awning ends in the middle of a window or flap, you cannot
use the accessory MyRoom (fig. 5, page 1).
Check whether there is enough space available on the inside,
for mounting the backer plates.
A backer plate must be mounted behind each of the shoulder
joints of the awning! (fig. 6, page 1)
Before drilling holes ensure no cables and cabinets in the
interior of the vehicle will be damaged.
I
NOTE
Point out to the user of the vehicle that the three screws on the
shoulder joints (fig. k, page 2) must be tightened up (see
operating manual). This must be done by the service partner.