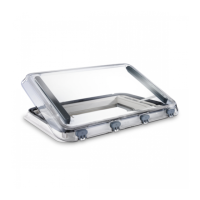
Installing the Heki3 Plus Heki3 Plus
8
See fig. 8
A
➤ Seal the mounting frame with a flexible non-hardening sealing compound (e.g.
SikaLastomer-710).
See fig. 9
➤ Check the direction of travel when installing.
You can fit the roof light sideways (hinge-side at front in direction of travel) or
lengthways (hinge-side on left or right in direction of travel).
➤ Place the outer frame in the middle of the roof opening.
I
➤ Press the outer frame in the roof slightly so that the packing compound spreads
out.
See fig. 0
➤ Place the 16 mounting supports on the inside of the vehicle all the way into the
recess of the outer frame.
➤ Attach the 16 mounting supports using the fastening screws
∅ 4.
To do this use the large holes in the mounting supports.
➤ Tighten the screws 10 minutes after installation.
See fig. a
You need to remove the lamps to be able to tighten the inner frame.
➤ Take the lamps out of the holders carefully and let them hang by the cables (A).
See fig. b
The lamps are fitted at the factory and installed on the short side of the inner frame. If
you do not want to connect the lamps, dismantle them. If you want to install the
lamps on the long side, you need to dismantle them and replace them on the long
side.
NOTICE!
Observe the instructions of the sealant manufacturer.
NOTE
Pay attention to the power supply lines.
Heki3-Plus--IO-16s.book Seite 8 Dienstag, 10. Januar 2017 5:47 17


 To Next Page
 Loading...