SECTION 1
HARDWARE COMPONENTS
The
hexnut
is simply a threaded fastening device
used to tighten down the black adjustment knob. If
the knob will not tighten,
first remove the main
rafter assembly from the
hardware. Turn the knob
to determine if the is
stripped or spinning. If
so, replace the
hexnut.
If you cannot turn the
knob it will be necessary
1
.1
HEXNUT
to replace both the
hexnut
and the black
adjustment knob.
1.2 PUSH BUT-
TON ASSEMBLY
Thepushbutton
assembly locks the
main support arm to
the adjustable arm
assembly and controls
the height of the
awning in the open
position. To check it,
open the awning to full
,
LIFT HANDLE LOCK BUTTON
3/16"
X
1/4"
GRIP
_lQ%%kY
7
m-32
HEX NUT
extension.
Look inside the main support arm, and
activate the push button to see if the locking pin is
moving in and out of the hole in the adjustable arm
assembly. If the locking pin does not move, or has
been broken off, the push button assembly must be
replaced.
At times the lock pin of the push button assembly
can break off and jam between the push button
housing and the adjustable arm assembly, making it
difficult to extend the main support arm.
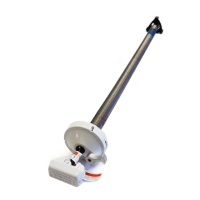
1.3 ADJUSTABLE ARM ASSEMBLY
The adjustable arm assembly allows for telescoping
height adjustment of the main support arm, and it
connects to the bottom mounting bracket to support
ADJUS
ARM
NOTE:
GO-EASY is available from Sunchaser.
the weight of the awning. If the main support arm cannot
be extended freely, the adjustable arm assembly should be
checked. Remove the adjustable arm assembly and check
for nicks, burrs, bends or twists. If any deflection is noted,
the adjustable arm assembly must be replaced. For ease of
operation apply GO-EASY, a special lubricant.
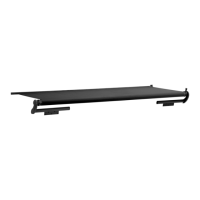
1.4 TOP MOUNTING BRACKETS
The top mounting bracket supports the main rafter assembly
to hold the awning in the open extended position, and allows
the rafter to pivot into the
"C"
channel of the main support
arm.
The top mounting brackets have a slot where the rafter
attaches, allowing them to be adjusted side-to-side at time of
installation. To adjust the rafters, close the awning and sight
down the main support arm and the main rafter. The
clearance on each side of the rafter should be approximately
1/4
inch. If clearance is not appropriate, adjust the rafter as
necessary.
i
1.5
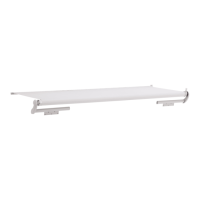
BOTTOM MOUNTING BRACKETS
The bottom mounting brackets are screwed to the side of
the wall, and they support the weight of the awning. They
also provide a quick release to set up the awning in the patio
position. If a bottom mounting bracket settles, sags, or
becomes loose it can reduce the clearance between the top
casting of the torsion and the extension of the top mounting
bracket, making operation difficult.
Check the bottom mounting bracket for looseness or
settling, and tighten or reposition it accordingly for proper
operation.
Check clearance for proper operation of the release lever
on the bottom mounting bracket. According to the siding, a
spacer may be needed. Order Bottom
Mounting Bracket Extension Kit.
BOTTOM MOUNTING
BRACKET RELEASE LEVER
SPACER - PART OF
BOTTOM MOUNTING
BRACKET EXTENSION KIT
2
 Loading...