Do you have a question about the Dorma AGILE 150 and is the answer not in the manual?
Details maximum height, panel weight, glass thickness, and defines system dimensions.
Covers glass compatibility, cleaning, substructure requirements, and usage guidelines.
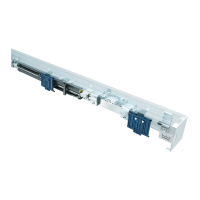
Step 1: Inserting the safety catch into the track rail.
Step 2: Installing the track rail onto the wall or substructure.
Warning about using appropriate fixing materials for different foundation types.
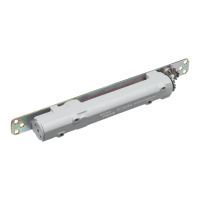
Step 3: Mounting the clamp carriers onto the glass panels.
Clean clamp areas and use spacers for opposite doors to protect glass.
Instructions for cleaning, applying, and ensuring adhesion of glass edge protection.
Step 4: Mounting the floor guide, including material selection and fixing.
Step 5: Checking and adjusting the anti-jump device.
Step 6: Hanging the sliding door onto the track.
Step 7: Final adjustments to the floor guide after opening the door.
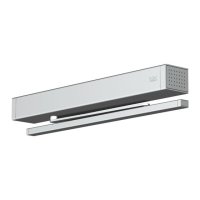
Step 8: Attaching the cover profile to the track.
Step 9: Adjusting the height of the sliding panel and clamp carriers.
Step 10: Fine-tuning the anti-jump device for proper function.
Step 11: Positioning and adjusting panel stops for door travel limits.
Step 12: Installing the optional brush profile, including bending and insertion.
Step 13: Fixing optional end caps to the track rail using adhesive tape.
| Product Type | Automatic sliding door system |
|---|---|
| Max Door Weight | 150 kg |
| Power Supply | 230 V AC, 50/60 Hz |
| Max Door Width | 1200 mm |
| Hold-open Time | Adjustable |