UNPACK AND INSTALL YOUR ICE MAKER
WHAT'S IN THE BOX
Dispose of the refrigerator in accordance with Federal and Local Regulations. The flammable
refrigerant and insulation material used in this product require special disposal procedures. Contact
your local authorities for the environmentally safe disposal of your refrigerator.
Carefully remove the packing material. Do not use sharp tools that can damage the box contents.
Do not use any electrical device to defrost your appliance.
1.
Make sure that the ice bin and ice scoop are included. If any part or accessory is missing, please
contact our customer service team.
2.
Clean the interior with lukewarm water and a soft cloth. Remove the ice bin and wash it with warm
water.
3.
Locate the ice maker in a place that is protected from direct sunlight, and allows for a minimum of
six inches (6'') clearance around the side and back walls of the ice maker for proper air circulation.
4.
For first use, we suggest using an ice machine cleaner and descaler, citric acid, or vinegar to clean
the ice maker.
5.
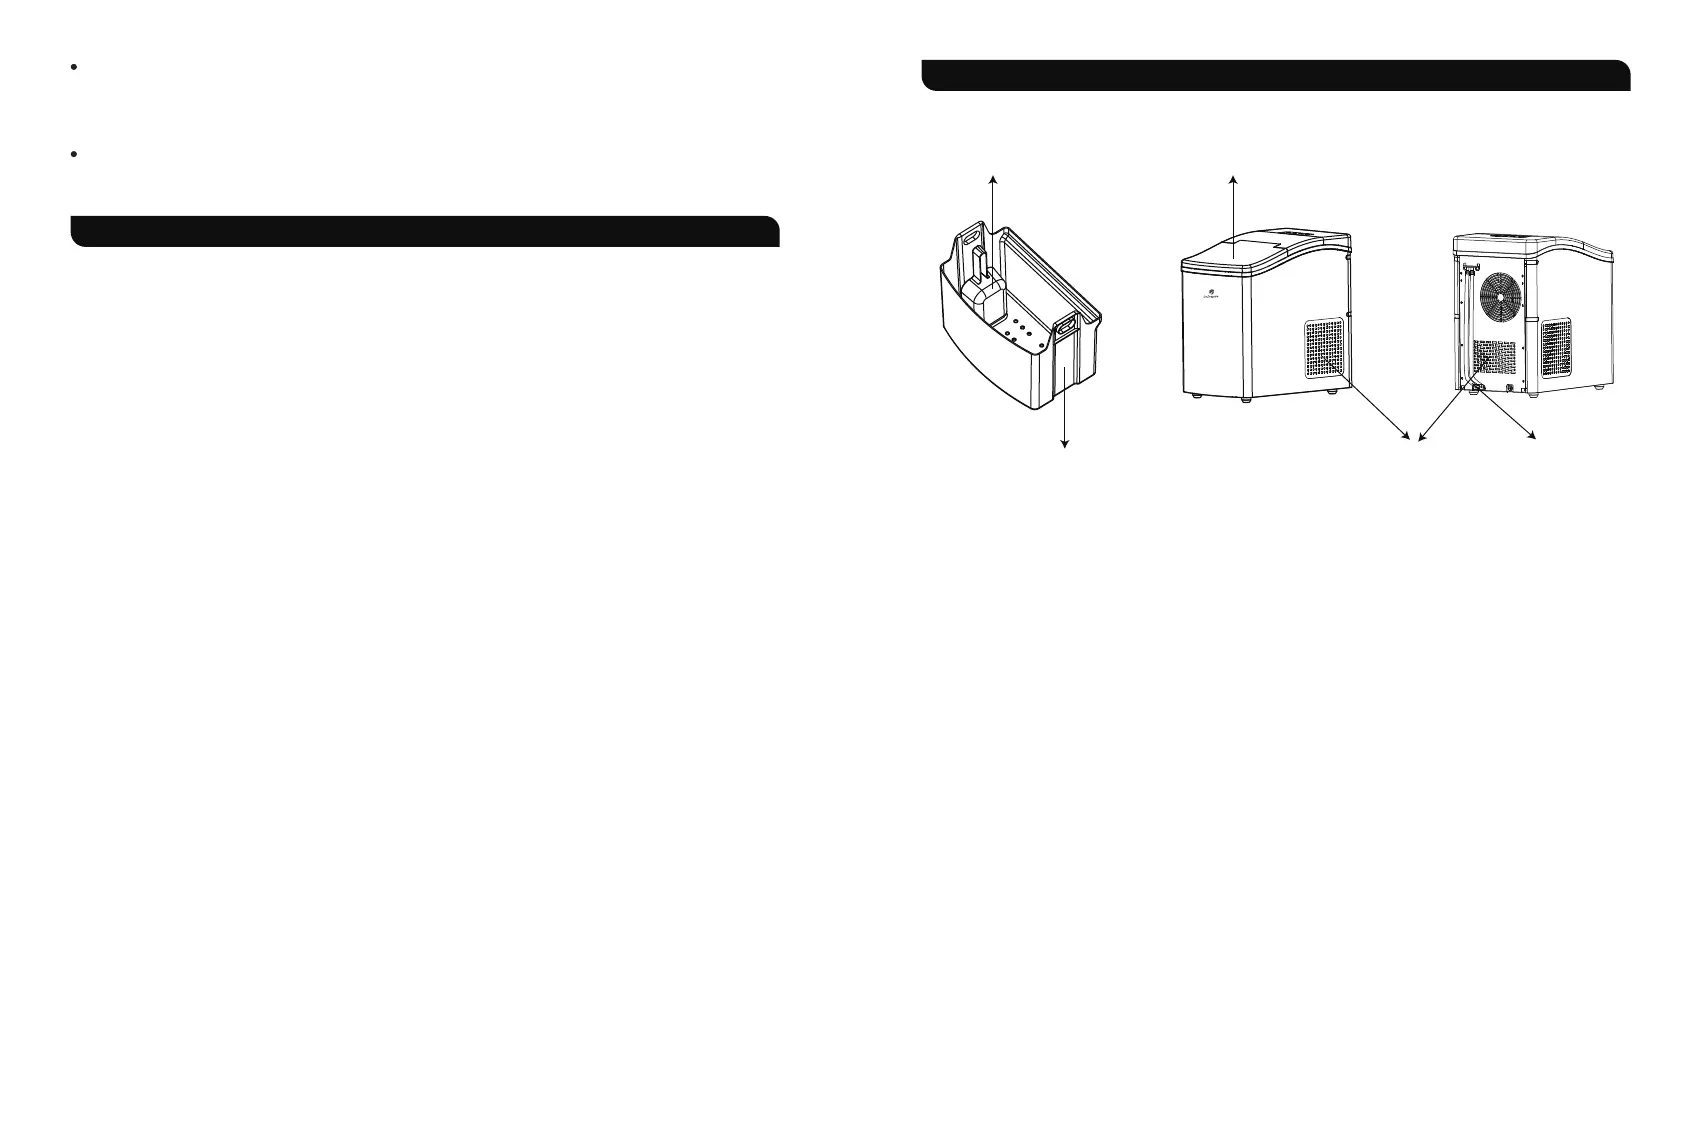
1. Ice Scoop and Bin
Used for serving and storing the ice.
2. Viewing Window
Allows you to see the amount of ice being produced without opening the top cover to let warm air
in.
3. Air Vents
Located on the back and sides of the appliance, they help prevent the ice maker from overheating.
NOTE: When placing the ice maker, allow at least six inches (6'') of space all around it for proper
ventilation.
4. Water Drain Tube
Allows you to easily empty the water in the reservoir.
Ice Scoop
Ice Bin Air Vents Water Drain Tube
Viewing Window
- 05 - - 06 -