CONTACT US AT www.DRpower.com 13
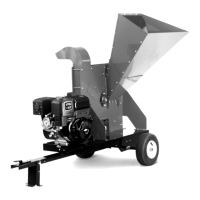
9. Mount a Light Bracket to both sides of the Chipper with two 5/16-18 x 3/4"
Bolts and Locknuts each using two 1/2 Wrenches (Figure 12).
10. Attach the Lights to the mounting brackets with the Locknuts that are
included on the Lights using a 7/16" Wrench.
Note: The Side Light of each Light Assembly must face to the outside of the Chipper
with the clear Lens facing down.
11. Secure the Wires to the Light Brackets with a Cable Tie.
12. Cut the wires with Wire Cutters near the top of the Light allowing enough
extra Wire for installation into the back of the Light after Wires are stripped
in the next step.
13. Strip (remove) 1/2" of insulation from the ends of the Yellow/Brown wires
and Green/Brown wires with Wire Strippers and twist the individual wire
ends to aid in installation.
14. At the left side of the Chipper, insert the Yellow Wire into the top left hole in
the back of the light socket. Insert the Brown Wire into the top right hole.
Note: The wires are retained in the light socket holes by spring-loaded connectors.
15. At the left side of the Chipper, insert the Green Wire into the top left hole in
the back of the light socket. Insert the Brown Wire into the top right hole.
16. Remove 1" of insulation from the end of the White (Ground) Wire with the
Wire Strippers (Figure 13).
17. Loosen a Trailer Hitch Bolt, wrap the White (Ground ) Wire around the Bolt,
and then re-tighten with two 3/4" wrenches.
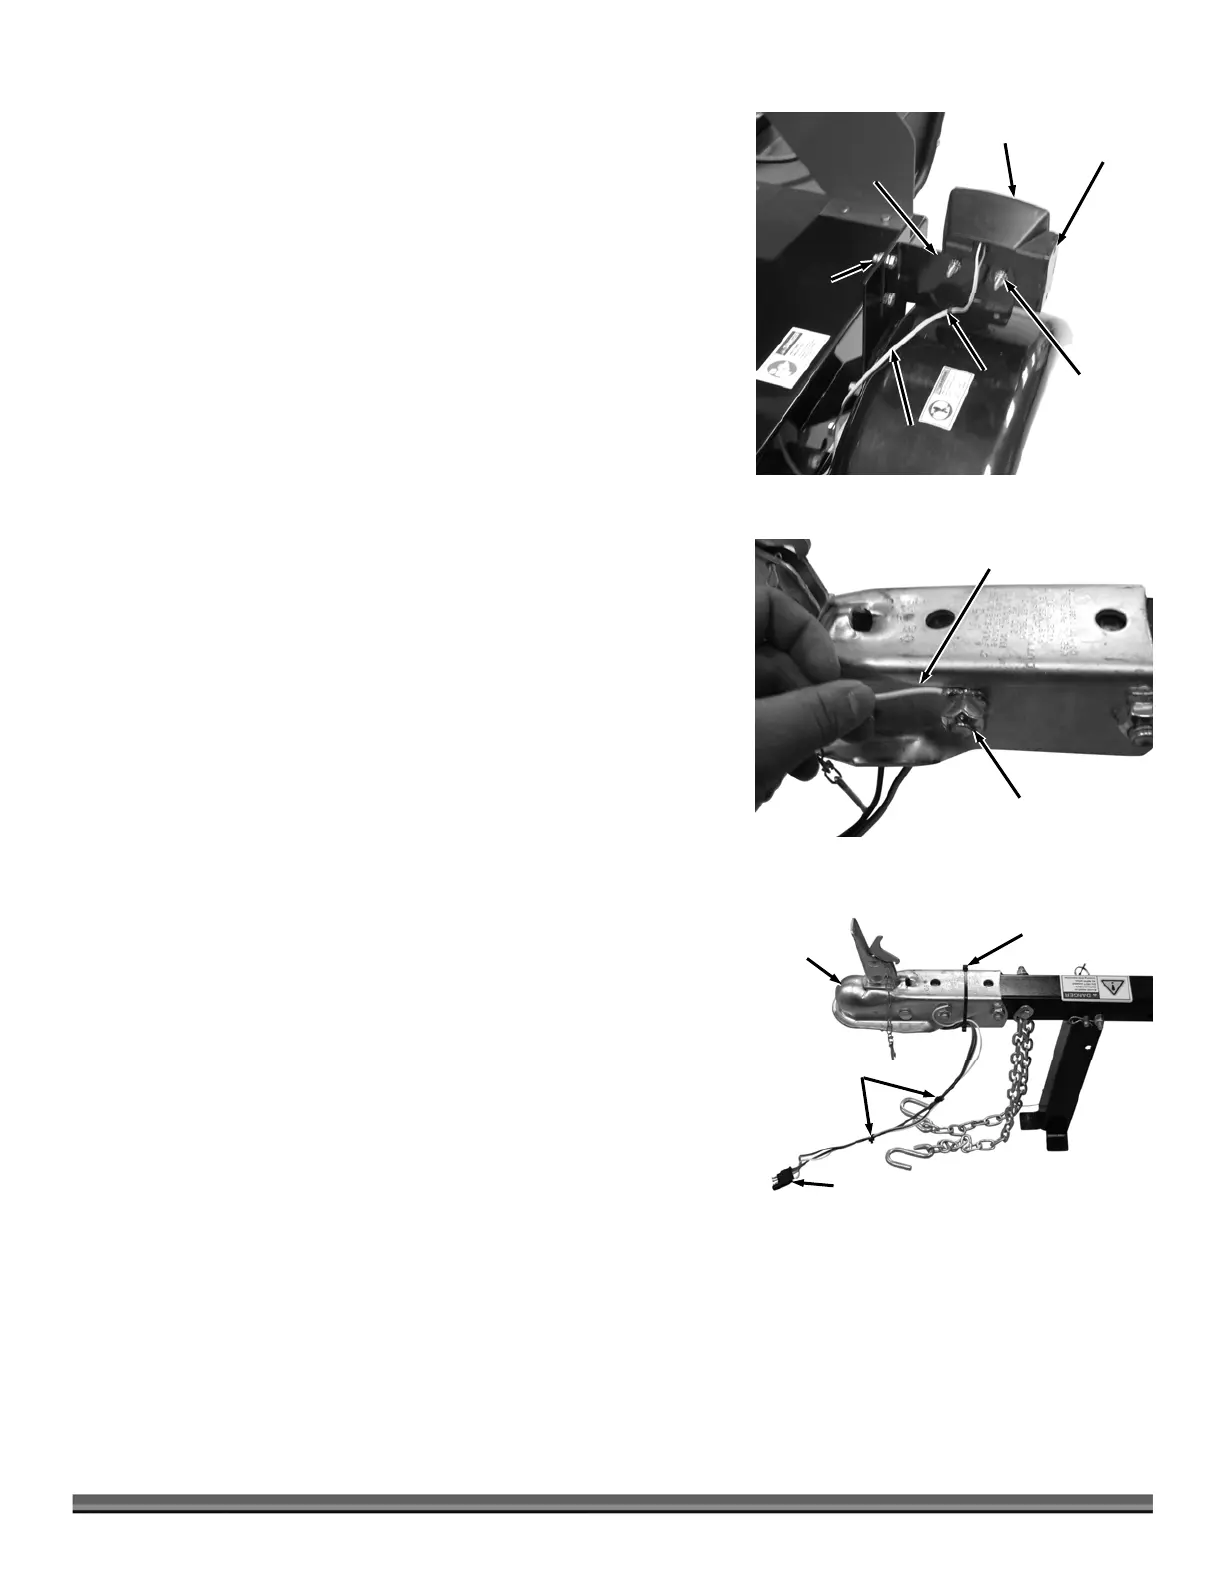
18. Secure the Wires to the Tongue Assembly between the two large Bolts to
ensure they will not get caught between the Tongue and Ball of the Tow
vehicle (Figure 14).
19. Secure the colored and white wires together with a couple of Cable Ties.
Figure 14
Zip Tie
Tongue
ssembly
Light Plug
Zip Ties
Figure 13
Ground Wire
Hitch Bolt
Figure 12
Tail Light
Yellow/Brown
Wires
Light
Mounting
Bracket
Bolt and
Locknut
Light
Mounting
Hardware
Cable
Tie
Side Light
 Loading...