14 DR
®
SELF-FEEDING CHIPPER
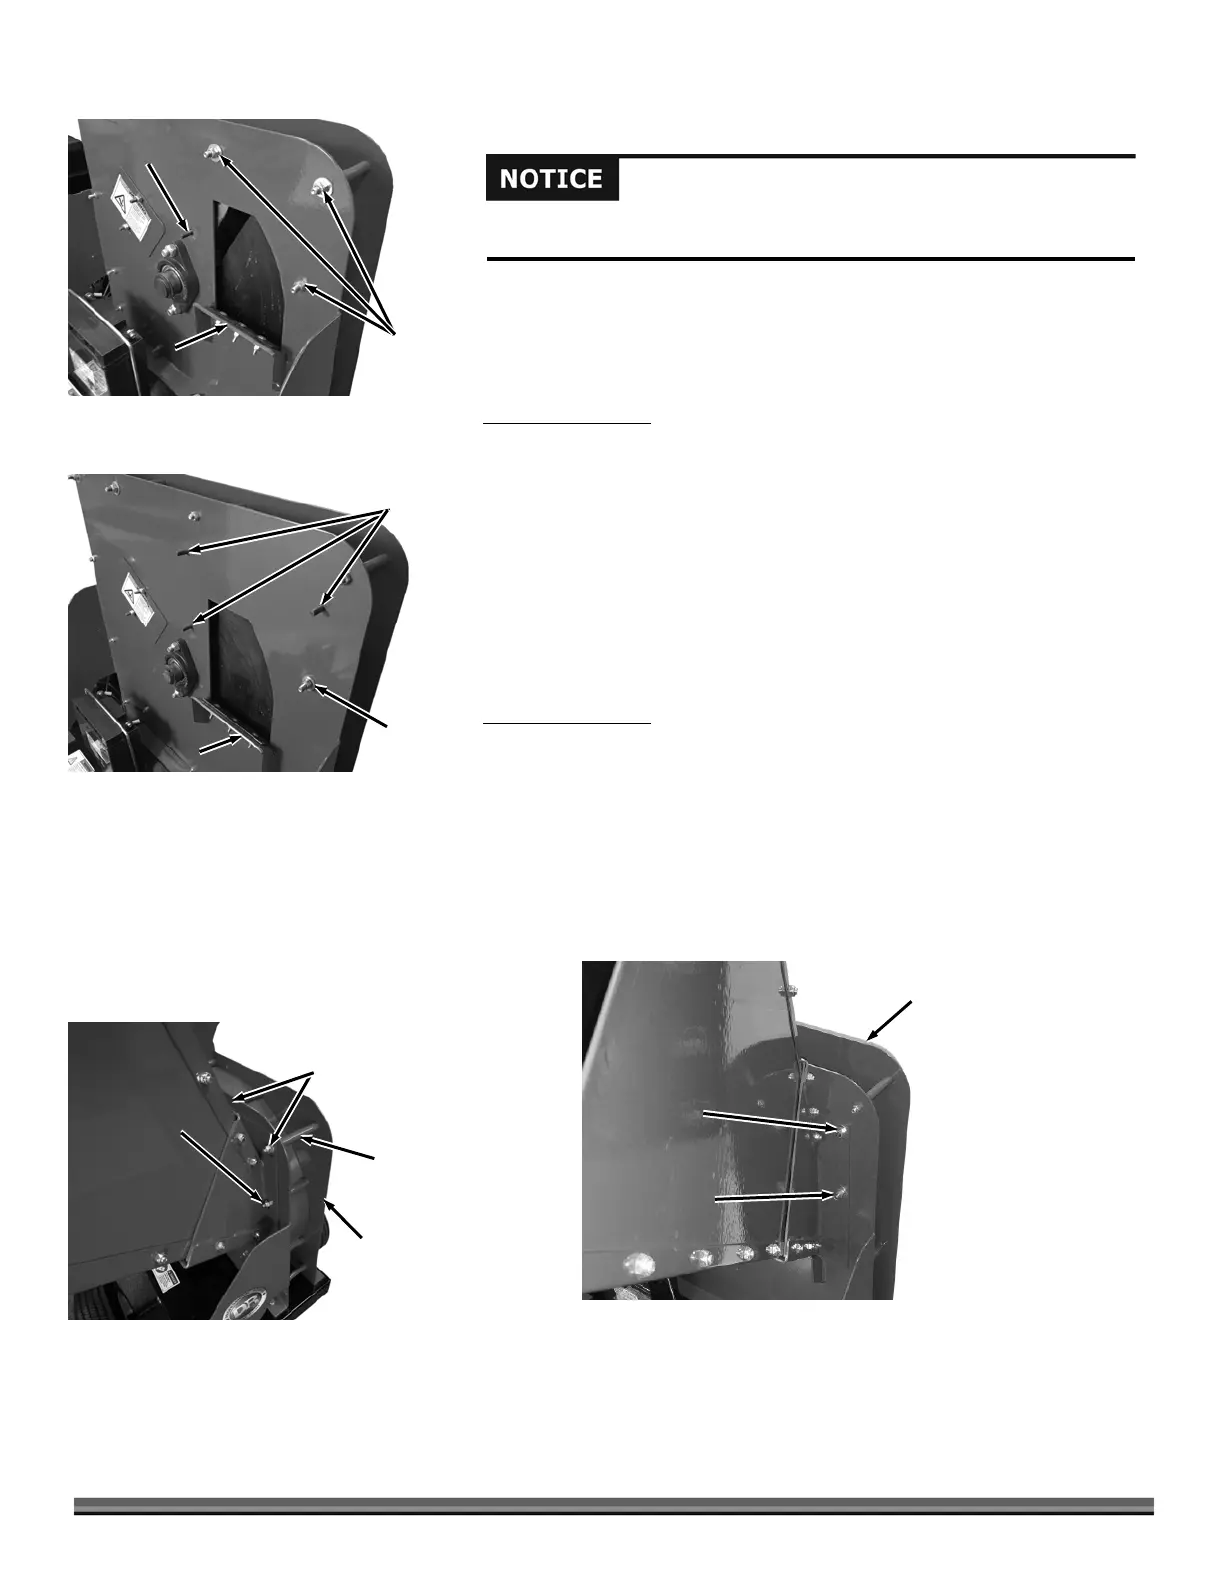
Attaching the Hopper Assembly
Note: We recommend that you have someone help you lift the Hopper in place and
support it until it is secured to the Chipper.
Tools Needed:
Two 1/2" Wrenches
For 16.5 Models:
1. Remove and discard the three Shipping Nuts from the Housing Bolts
with two 1/2" Wrenches, but leave the Housing Bolts in place (Figure 15a)
2. Position the Hopper Assembly onto the Housing Support and Stud
(Figure 16a) and secure the upper Bolts to the Hopper Assembly with two 5/16-
18 Locknuts and Washers using two 1/2" Wrenches.
3. Secure the lower right Bolt to the Hopper Assembly with a 5/16-18
Locknuts (no Washer) using two 1/2" Wrenches.
4. Install a 5/16-18 Locknut and Flat Washer to the lower Housing Stud
and secure with a 1/2" Wrench.
For 21.0 Models:
1. Remove and discard the Shipping Nut from the Housing Bolt with two
1/2" Wrenches, but leave the Housing Bolt in place (Figure 15b.)
2. Position the Hopper Assembly onto the Housing Support and the three
Housing Studs (Figure 16b) and secure the Bolt to the Hopper Assembly with a
5/16-18 Locknut and Washer using two 1/2" Wrenches.
3. Install three 5/16-18 Locknuts and Flat Washers to the three Studs and
tighten with a 1/2" Wrench.
Figure 16a: 16.5
Hopper
Chipper
ssembly
Bolt, Locknut and
Washer (Upper
Left and Right)
Spacer
Bolt and Locknut
(Lower Right)
Locknut
(Lower Left)
Bolt and
Locknut
Figure 15b: 21.0
Housing
Studs
Housing
Support
Bolts and
Locknuts
Figure 15a: 16.5
Housing
Stud
Housing
Support
Always secure the Support Leg in the up (transport) position before towing to
prevent damage to the machine.
Figure 16b: 21.0
Hopper
Chipper
ssembly
Locknut and Washer
(Two on other side of
Hopper Also)
Bolt, Locknu
and Washer
 Loading...