CONTACT US AT www.DRpower.com 11
- IMPORTANT FIRST STEP ! -
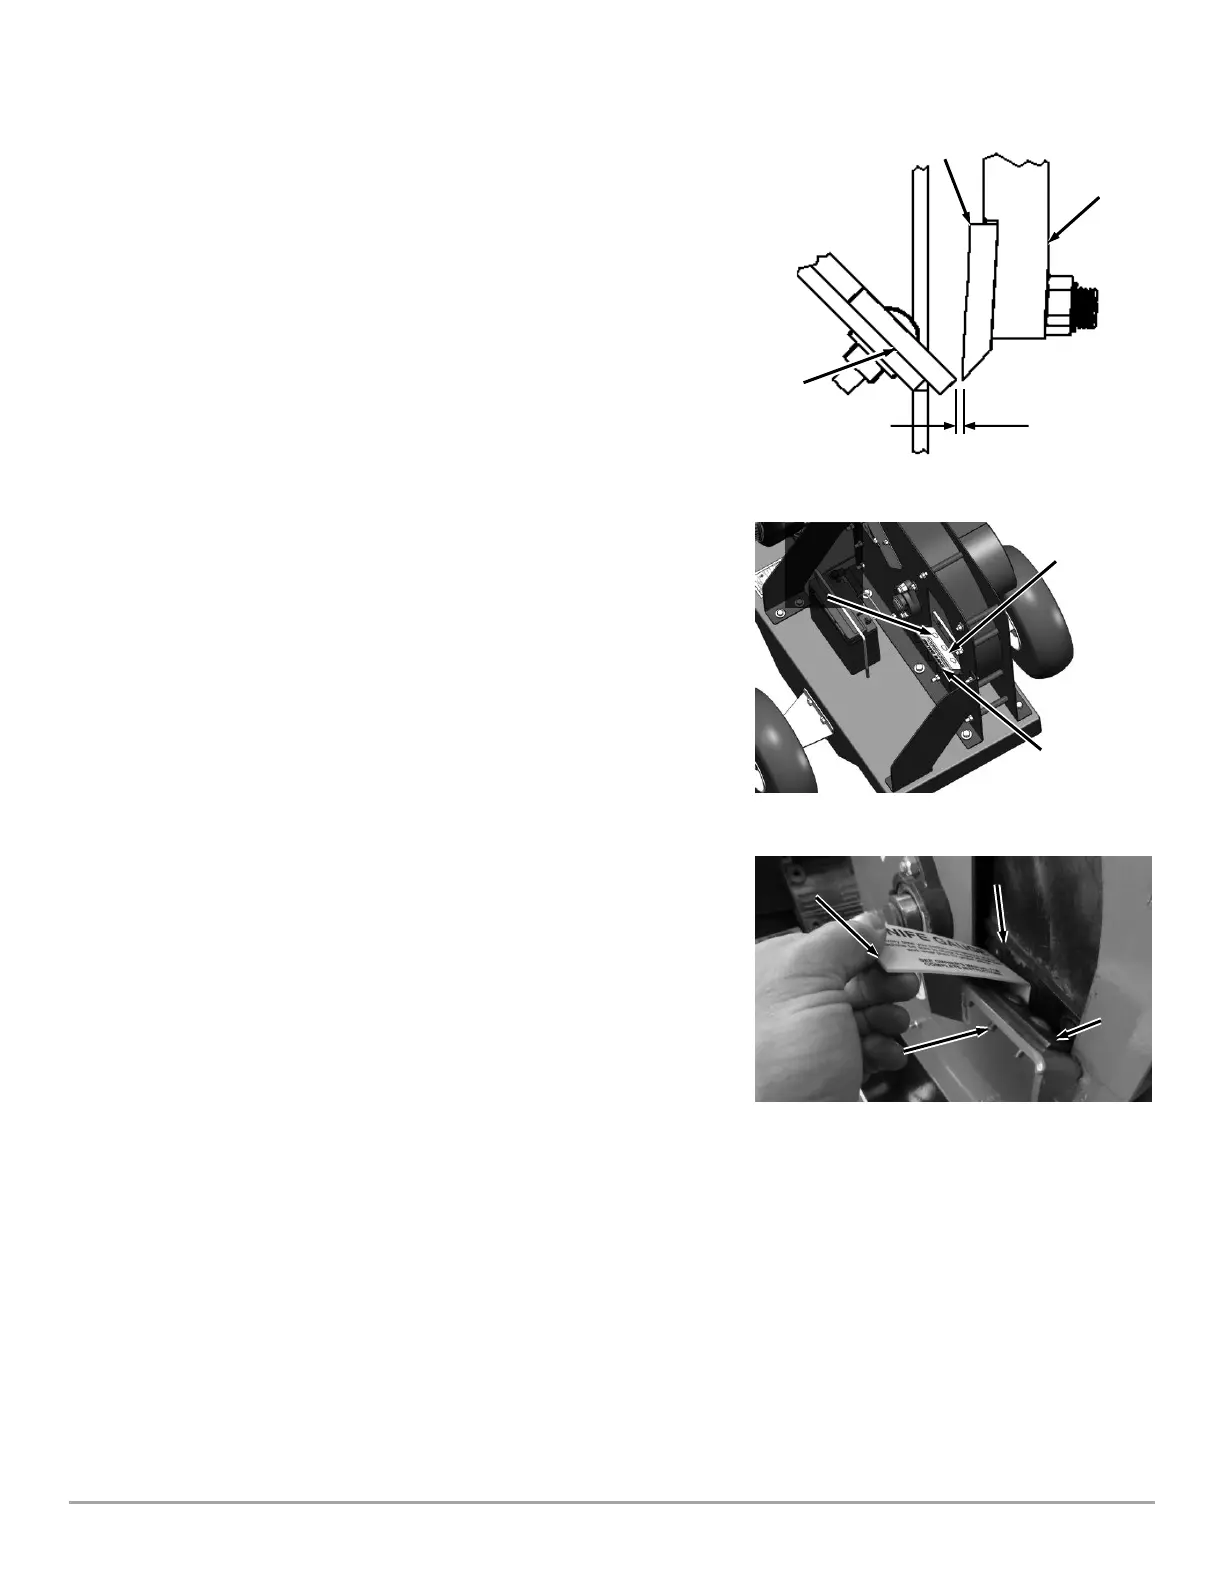
Setting the Gap between Knife and Wear Plate
BEFORE you begin assembling the Chipper, you must set the clearance between
the Knife and Wear Plate to 1/16" (Figure 4) by using the Knife Gap Gauge.
First remove the Knife Gap Gauge that has been installed temporarily under the
Wear Plate as described below.
Tools Needed:
• Gap Gauge (provided with Chipper)
• 7/16” Wrench
1. Loosen the three Locknuts on the Carriage Bolts enough to remove the
Knife Gap Gauge (Figure 5).
2. Use a stick to rotate the Flywheel so the Knife is positioned next to the Wear
Plate (Figure 6).
3. Position the Knife Gap Gauge as shown and push the Wear Plate against it
so the Gauge is touching both the Knife and Wear Plate. Tighten the
outside Locknut, check the gap, tighten the inside Locknut and then the
center Locknut.
4. Slide the Knife Gap Gauge in between the Knife and Wear Plate as shown to
check the gap at the entire length of the Wear Plate.
• If the Knife Gap Gauge slides freely with no resistance and a lot of
extra space, readjust the Wear Plate as described in the previous
steps.
• If the Knife Gap Gauge will not slide down between the Knife and
Wear Plate, readjust the Wear Plate as described in the previous
steps.
• If the Knife Gauge slides in between the Knife and Wear Plate with
some resistance felt against them both or slides in between with
no noticeable space, then the Wear plate is properly adjusted.
Ensure the Locknuts are tight and continue to the next step.
5. When adjustment is finished, rotate the Flywheel with a long stick to ensure
that it is rotating freely.
6. Continue to page 12 for instructions on assembling the Chipper.
 Loading...


