476 Issue date: 17 November 2006 49 of 80
Set reduced volume:
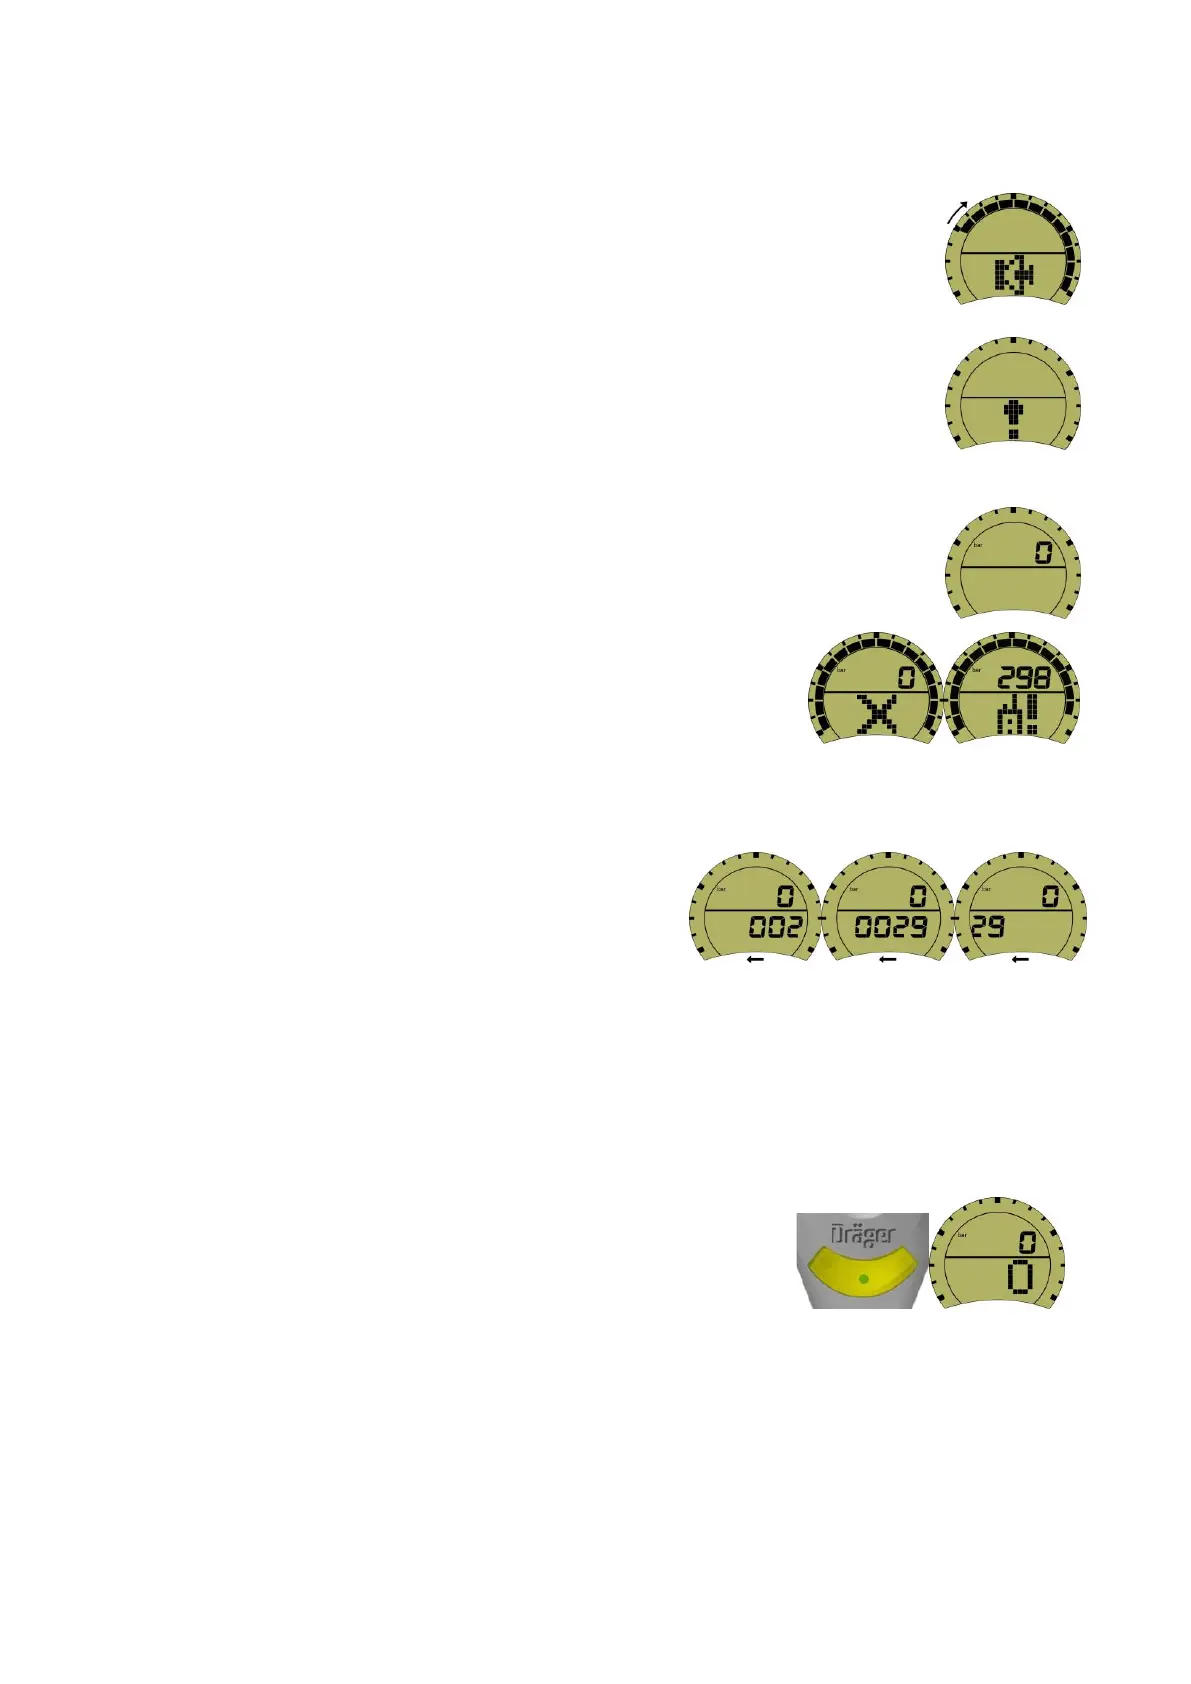
20.50 When all the segments have switched off, the display will change to ‘reduced
volume’ icon. When the ‘reduced volume’ icon appears the wearer should first
press the left button followed by the right button to confirm this setting (see
image right).
20.51 When all the segments have switched off, the display will change momentarily to
‘automatic (motion sensor) DSU not active’ icon (see image right).
20.52 The display will then quickly change to ‘non-operational mode’ (see image right).
Note: the display of an ‘X’ or ‘telemetry fault code’ icon alerts the
user that the Bodyguard 7000 has failed the ‘self-check’ or the
telemetry module has failed. Return the BA set to OSG (see
images right).
’Do not use after date’ and ’B’ test: confirm BA set I.D.
20.53 To confirm the do not use after date and the BA set
number; after the completion of the ‘self-check’ as in
paragraph 13.1 above press the right button and the
do not use after date, followed by the four digit BA
set number will scroll across the display screen from
right to left (the example above is BA set 0029).
Check this date to ensure it corresponds with the
front of the BA log book as per 20.2 above.
’B’ test: test automatic and manual distress signals
20.54 Operate the first breath button.
20.55 Put neck loop on and connect the face mask to the retaining stud
and check it holds securely.
20.56 Remove Bodyguard key, note the reduced volume of the
Bodyguard. Note ‘green’ flashing LED and zero display (see
image right).
20.57 Open the cylinder valve slowly and fully. The cylinder must have a minimum pressure of 270 bar
to start the test. If cylinder change is required enter the cylinder bar code number into BA log
book. Note the pressure reading for entry into the BA log book.
20.58 Test ADSU, to check pre alarm signal, confirm the ‘green’ LED continuously flashes.
20.59 Wait 30 seconds – pre-alarm sounds – cancel pre-alarm (tap side of unit).
 Loading...