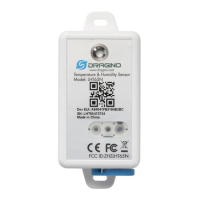
User Manual for LoRaWAN End Nodes - LHT65N LoRaWAN Temperature & Humidity Sensor Manual
• 2. Connect LHT65N to IoT Server
• 2.1 How does LHT65N work?
• 2.2 How to Activate LHT65N?
• 2.3 Example to join LoRaWAN network
• 2.3.1 Step 1: Create Device n TTN
• 2.3.2 Step 2: Activate LHT65N by pressing the ACT button for more than 5 seconds.
• 2.4 Uplink Payload
• 2.4.1 Decoder in TTN V3
• 2.4.2 BAT-Battery Info
• 2.4.3 Built-in Temperature
• 2.4.4 Built-in Humidity
• 2.4.5 Ext #
• 2.4.6 Ext value
• 2.4.6.1 Ext=1, E3 Temperature Sensor
• 2.4.6.2 Ext=9, E3 sensor with Unix Timestamp
• 2.4.6.3 Ext=6, ADC Sensor (use with E2 Cable)
• 2.5 Show data on Datacake
• 2.6 Datalog Feature
• 2.6.1 Ways to get datalog via LoRaWAN
• 2.6.2 Unix TimeStamp
• 2.6.3 Set Device Time
• 2.6.4 Poll sensor value
• 2.6.5 Datalog Uplink payload
• 2.7 Alarm Mode
• 2.8 LED Indicator
• 2.9 installation
• 3. Sensorsand Accessories
• 3.1E2 Extension Cable
• 3.2E3 Temperature Probe
• 4. Configure LHT65N via AT command or LoRaWAN downlink
• 4.1 Set Transmit Interval Time
• 4.2 Set External Sensor Mode
• 4.3 Enable/Disable uplink Temperature probe ID
• 4.4 Set Password
• 4.5 Quit AT Command
• 4.6 Set to sleep mode
• 4.7 Set system time
• 4.8 Set Time Sync Mode
• 4.9 Set Time Sync Interval
• 4.10 Print data entries base on page.
• 4.11 Print last few data entries.
• 4.12 Clear Flash Record
• 4.13 Auto Send None-ACK messages
• 5. Battery & How to replace
• 5.1 Battery Type
• 5.2 Replace Battery
• 5.3 Battery Life Analyze
• 6. FAQ
• 6.1 How to use AT Command?
• 6.2 Where to use AT commands and Downlink commands
• 6.3How to change the uplink
interval?
• 6.4How to use TTL-USB to connect a PC to input AT commands?
• 6.5 How to use TTL-USB to connect PC to upgrade firmware?
• 6.6 Using USB-TYPE-C to connect to the computer using the AT command
• 6.7 How to use USB-TYPE-C toconnect PC to upgrade firmware?
• 7. Order Info
• 8. Packing Info
• 9. Reference material
• 10. FCC Warning
Page 4 / 56 - last modified by Bei Jinggeng on 2022/07/06 13:48

 Loading...