WARNING! Keep packaging materials out of reach
of children. Dispose of packaging correctly and
responsibly and in accordance with local
regulations.
6. Operating Instructions
Important: Before operating this product, read and
understand all the safety instructions listed in this manual.
Important: Inspect the device for signs of damage,
particularly the probes and insulated cables. Replace faulty
leads immediately.
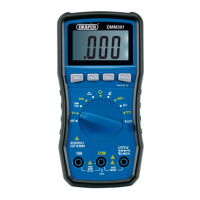
For each measurement type, connect the positive probe (5)
to the voltage, resistance and amperage probe terminal (8),
and connect the negative probe (4) to the common earth
probe terminal (1).
If a negative value is shown on the display, check the
polarity of the probes at the component contacts and the
device terminals.
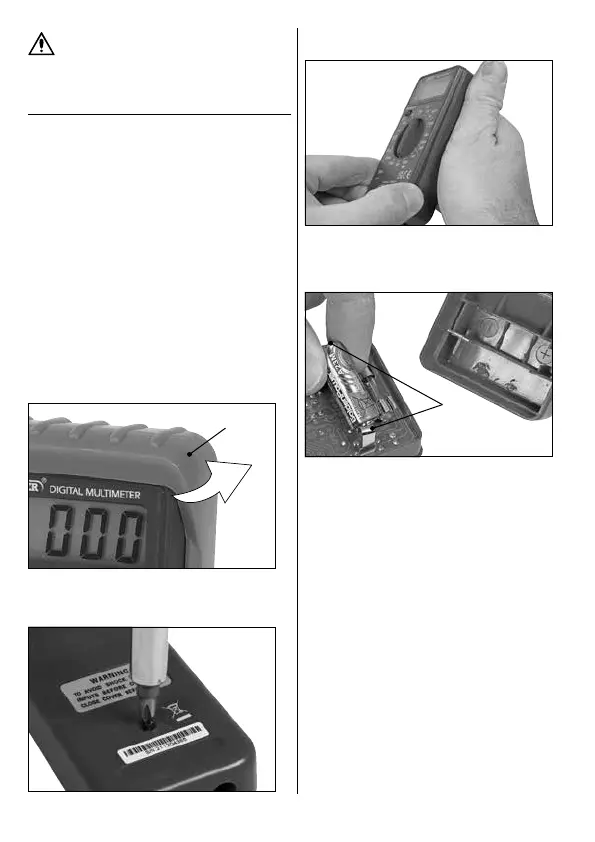
6.1 Installing the Battery
Important: Use ONLY 12V (Type 23A) batteries identical to
the battery supplied with this device.
1. Pull the rubber cover (7) back and remove the device
from inside it.
1 Fig.
(7)
2. Remove the screw on the back of the device to loosen
the battery compartment cover.
2 Fig.
3. Separate the front of the device from the rear casing
at the divide around the tapered edge of the housing.
3 Fig.
4. Install the battery between the two contacts (9) on the
back of the circuit board, observing the polarity
marked on the inside of the rear housing.
4 Fig.
(9)
Important: Read the polarity with the rear housing
positioned as it would be when installed onto the back
of the device.
5. Reassemble the device housing and tighten the rear
screw securely.
6. Insert the device back into the rubber cover.
– 5 –