6. Preparing the Starter/Charger
Important: Before using this product, read and
understand all the safety instructions listed in this
manual.
6.1 Connecting a Plug
Important: This product must be tted with a plug that is
appropriate to the function it is used to perform.
This product is tted with a 13A plug. This plug may
ONLY be used for charging using the lowest mode [
].
To safely use any other charging mode, a 16A plug MUST
be tted before use.
If the product is used for jump-starting purposes, a 32A
plug MUST be tted. Failure to t an appropriate plug
will result in the product overheating and may cause
signicant damage to the jump starter. Draper Tools
highly recommends installing a 32A plug for jump-
starting operations.
Important: The plug MUST be tted by a qualied
electrician or an otherwise qualied and competent
person.
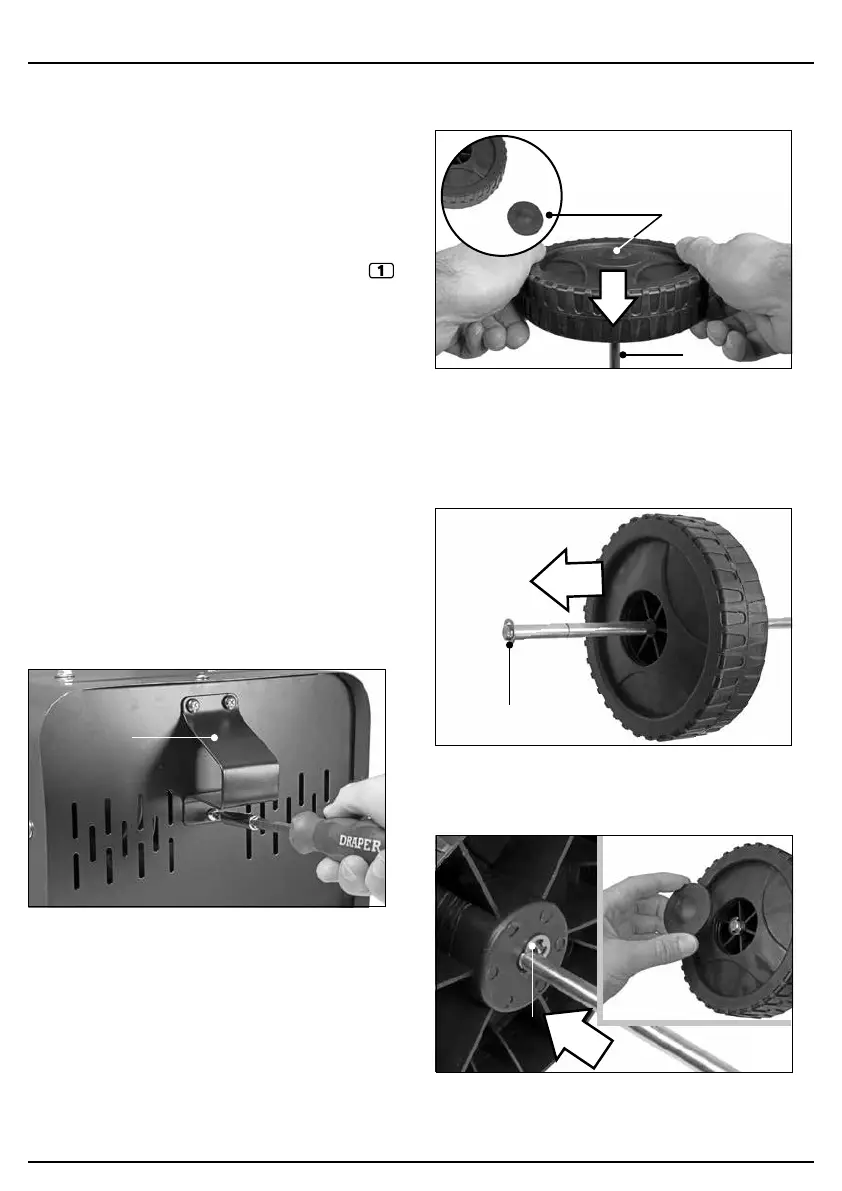
6.2 Attaching the Wheels and Foot
1. Carefully lay the machine down on its front panel.
2. Align the foot (C) with the three holes on the base of
the product and secure it in place using the M5 ×
10mm screws (F).
1 Fig.
(C)
3. Use the axle to punch the hub caps (14) from both
wheels.
2 Fig.
(E)
(14)
4. Using a pair of pliers, snap a circlip (G) into one of the
outer grooves at the very ends of the axle (E).
5. Slide the other end of the axle through the front of
one of the wheels (9) until it reaches the circlip.
3 Fig.
(G)
6. Snap a second circlip into the groove behind the
wheel and push the hub cap back into the wheel bore.
4 Fig.
(G)
– 10 –