EasyManua.ls Logo

Drayton Digistat RF3 User Manual

Drayton Digistat RF3
4 pages
To Next Page IconTo Next Page
Page #1 background imageLoading...
Page #1 background image
Digistat RF3 ‘Wireless System’
User instructions
SCR RECEIVER
INITIAL START UP
IMPORTANT: ENSURE THAT THE COMMISSIONING PROCEDURE HAS
BEEN CARRIED OUT IN ACCORDANCE WITH THE ENCLOSED
INSTRUCTIONS.
SCR (RECEIVER) NORMAL OPERATING MODE
Once the ‘Wireless System’ has been commissioned, there should be little need
for any user interface with the SCR.
During normal operation the red and green LEDs will occasionally be on,
these signify the following:
Green LED
The green LED will be on when there is a demand for heating, and off when
there is no demand.
Red LED
The red LED will flash for 7 seconds, approximately every 5 minutes. This
denotes that a radio signal is being received from the Digistat RF unit.
SITUATIONS REQUIRING ATTENTION
Red LED continually flashing
This denotes that the batteries in the Digistat RF unit are approaching the end of
their life (see ‘battery replacement’).
Red LED continually on
This denotes that the SCR has been unable to receive a radio signal from the
Digistat RF unit. This may be caused by the batteries being dead (see ‘battery
replacement’) or some temporary interference with the radio signal.
To re-send and test the signal, go to the Digistat RF unit. If the flame symbol is
visible on the display, press the ‘–’ button until it disappears. If the flame symbol
is not visible, press the ‘+’ button until it appears. If the radio signal has been
successfully transmitted and received, the red LED will flash for 7 seconds then
go off. If the red LED is still on, ‘learn mode’ may have been selected by accident
(SCR buttons 1 and 2 pressed simultaneously). To correct, open both RF battery
drawers and wait for the display to fade, close the right hand drawer followed by
the left and reprogramme RF with your desired time and temperature settings.
If the red LED is still on, there may be some other fault that will require the
attention of a heating engineer/electrician.
MANUAL OVERRIDE
The heating can be manually switched on and off by using the ‘OVERRIDE’
button on the SCR in a fault situation, even though the red LED will stay on until
a satisfactory signal is reinstated.
Once the SCR receives a satisfactory signal again, it will automatically reset
itself for normal operation.
Drayton
Question and Answer IconNeed help?

Do you have a question about the Drayton Digistat RF3 and is the answer not in the manual?

Drayton Digistat RF3 Specifications

General IconGeneral
Frequency868 MHz
Temperature Range5°C to 30°C
DisplayLCD
MountingWall-mounted
WirelessYes
Temperature Control±0.5°C
Programming7-day programmable
Power Supply2 x AA batteries
CommunicationRadio Frequency (RF)
Battery Life2 years

Summary

SCR Receiver

Initial Start Up

Ensure commissioning procedure is carried out according to enclosed instructions for the SCR receiver.

Normal Operating Mode

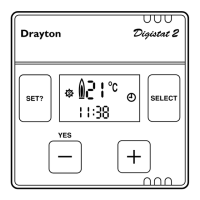
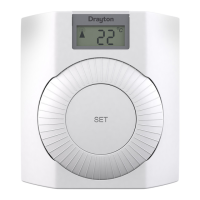
Describes normal operation, including LED indicators for demand and signal reception.

Situations Requiring Attention

Details red LED behavior indicating low batteries or loss of radio signal.

Manual Override

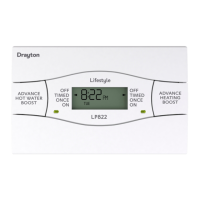
Allows manual switching of heating via the 'OVERRIDE' button in fault situations.

Digistat RF3

System Status Indicators

Explains system status indicators like flame symbol for heating demand.

Setting the Time of Day

Step-by-step instructions for setting the time of day on the Digistat RF3 unit.

Pre-programmed Times and Temperatures

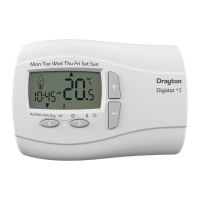
Details the default heating times and temperatures for weekdays and weekends.

Viewing and Changing Factory Settings

Select Weekday Programme

Selects the Monday-to-Friday portion of the pre-programmed settings.

Adjusting Weekday Temperatures

Allows adjustment of weekday heating temperatures at specific times.

Adjusting Weekday Switching Times

Enables modification of weekday heating switching times in 10-minute increments.

Select Weekend Programme

Option to set Saturday-Sunday heating times and temperatures differently from weekdays.

Return to Normal Operation

Procedure to exit settings and return to the normal operating display.

Operating Modes

Mode Selection

Instructions on how to change the operating mode using the SELECT button.

Temperature Override and Battery

Temporary Temperature Override

Temporarily increase or decrease the set temperature without entering SET mode.

Battery Replacement

Guidance on replacing batteries, including timing and memory retention.

Helpful Hints

Provides tips on programming, omissions, reset, and self-revert functions.

Frequency Information

Details product frequency (433 MHz) and compatibility with older units.

Related product manuals