14 15
EN EN
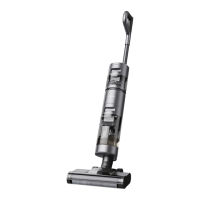
Installing the Dust Cup, Pre-
Filter, and Cyclone Assembly
•
Install the cyclone assembly and pre-
filter into the dust cup.
Fig. E-5
•
Slightly tilt the dust cup so the slot aligns
with the clip on the vacuum. Then gently
push the dust cup until it clicks into
place.
Fig. E-6
Cleaning the Filter
Installing the Filter
It is recommended to clean the filter once
every 4 to 6 months.
•
Remove the dust cup as shown in the
figure.
Fig. E-7
•
Remove the filter from the vacuum by
pulling it down in the direction shown in
the figure.
Fig. E-8
•
Rinse the filter with rotating it 360°.
Lightly tap the filter several times to
remove any debris caught in it.
Fig. E-9
•
Allow the filter to air dry for 24 hours.
Fig. E-10
•
Insert the filter into the vacuum.
Fig. E-11
Note:
1.
Only use clean water to wash the filter.
Do not use detergent.
2.
Do not attempt to clean the filter with
a brush or finger.
•
Reinstall the dust cup.
Fig. E-12
Replacing the Battery Pack
Cleaning the Multi-Surface
Brush
Cleaning the Motorized
Mini-Brush
The vacuum contains a removable
rechargeable lithium-ion battery pack
which has a limited number of recharge
cycles. After extended use, the battery
pack may no longer hold a charge. If this
happens, it means the battery pack has
reached the end of its life cycle and needs
to be replaced.
•
Press down the battery pack release
button and slide the battery pack to the
right, as illustrated, to remove it.
•
Install the new battery pack.
Fig. E-13
•
Turn the lock counterclockwise until it
stops, then remove the brush roller from
the brush.
•
Use a coin as illustrated to rotate the
lock counterclockwise until you hear a
click.
Fig. E-14
Fig. E-18
•
Use scissors to cut o hairs and fibers
tangled on the brush roller. Wipe the
dust from the notch and brush cover
with a dry cloth or paper towel.
Fig. E-15
•
After unlocking the motorized mini-
brush, remove the brush roller, then
rinse and clean it.
Fig. E-19
•
Whenitisdirty,rinsethebrushrollerwith
cleanwateruntilitisclean.
Fig. E-16
•
Stand the brush roller upright in a well-
ventilated area for at least 24 hours until it
is fully dry.
Fig. E-20
•
Stand the brush roller upright for at least
24 hours until it is fully dry.
Fig. E-17
•
Once the brush roller is dry, reinstall it
by following the disassembly steps in
reverse.
Fig. E-21
Specifications
Vacuum Cleaner
Model VPV11A
Rated Power 370 W
Rated Voltage 25.2 V
Charging Time approximately 4 hours
Multi-Surface Brush
Model VMR1
Rated Power 40 W
Rated Voltage 25.2 V
Motorized Mini-Brush
Model VPA1
Rated Power 20 W
Rated Voltage 25.2 V
Charger
Model ZD012M300065EU
Input
100-240 V
50/60 Hz
0.5 A
Output 30 V
0.65 A
Average Active
Eciency
85.36%
Eciency at Low
Load (10%)
75.35%
No-load Power
Consumption
0.1 W
Rechargeable Lithium-Ion Battery Pack
Model V2316-7S1P-SCA
Nominal Voltage 25.2 V
Nominal Capacity 2500 mAh
Rated Capacity 2300 mAh
Energy 57.96 Wh
 Loading...