5
•Followthedust-relatednationalrequirementsforthematerials
youņwantņtoņworkņwith.
•Besuretoolisswitchedoffwhenpluggingin.
DURING USE
•Alwayskeepthecordawayfrommovingparts.
•Neverusethetoolwhencordorbase-plate(=protectiveguard)is
damaged;ņhaveņitņreplacedņbyņaņqualifiedņperson.
•Keephandsandngersawayfromrouterbitwhentoolis
switchedņon.
•Incaseofelectricalormechanicalmalfunction,immediately
switchņoffņtheņtoolņandņdisconnectņtheņplug.
•Incasetherouterbitisblocked,resultinginjerkingforcesonthe
tool,ņimmediatelyņswitchņoffņtheņtool.
•Incaseofcurrentinterruptionorwhentheplugisaccidentally
pulledņout,ņimmediatelyņswitchņoffņtheņtoolņinņorderņtoņpreventņ
uncontrolledņrestarting.
•Donotapplysomuchpressureonthetoolthatitcomestoa
standstill.
ENVIRONMENT
DISPOSAL
Themachine,accessoriesandpackagingshouldbesortedfor
environmentalĶfriendlyņrecycling.
ONLY FOR EC COUNTRIES
Doņnotņdisposeņofņpowerņtoolsņintoņhouseholdņwaste!
AccordingņtheņEuropeanņGuidelineņ2002/96/ECņforņWasteņ
ElectricalņandņElectronicņEquipmentņandņitsņimplementationņ
intoņnationalņright,ņpowerņtoolsņthatņareņnoņlongerņusableņ
mustņbeņcollectedņseparatelyņandņdisposedņofņinņanņ
environmentallyņcorrectņmanner.
APPLICATION ADVICE
•Usetheappropriaterouterbits.
•Forcutsparallelwiththesideofyourworkpieceusearipfence.
•Protectyourselfagainsttheeffectsofvibrationbymaintaining
theņtoolņandņitsņaccessories,ņkeepingņyourņhandsņwarm,ņandņ
organizingņyourņworkņpatterns.
ASSEMBLY
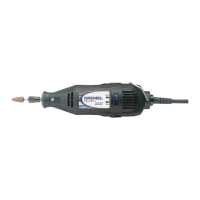
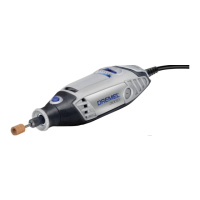
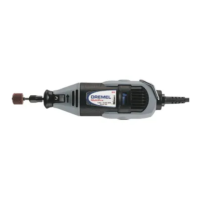
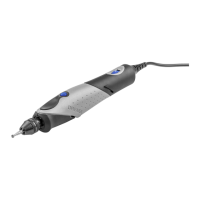
ATTACHMENT FOR USE WITH DREMEL ROTARY TOOL MODELS 300,
395, 398, 400, 4000.
ATTENTION:ņReadņentireņinstructionņmanualņcarefullyņbeforeņusingņyourņ
DremelShaper/RouterTable.Retaininstructionsforfuturereference.
ThisattachmentwillconvertDremelRotaryToolstoaShaper/Router
tableņforņedgeņforming,ņrouting,ņgrooving,ņshaping,ņsanding,ņedges,ņ
jointing,ņetc.
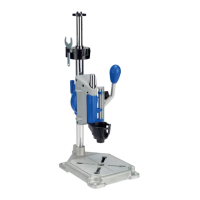
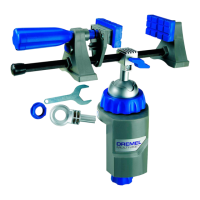
SeeFigure1:
BaseA
CarriageņBoltB
ToolHolderC
LargeņKnobD
DepthņAdjustmentņScrewE
NutņĶņSquareF
DepthņBracketG
BracketņScrewH
PinI
MountingņScrewJ
ThumbNutK
GuardL
SleeveM
ClampņScrewņNutN
Washerņ#9O
Washerņ4,8ņmmP
FenceQ
WedgeņClampņScrewR
WedgeS
MOUNT TABLE TO WORKBENCH
TheSHAPER/ROUTERTABLEcomesassembledreadytomountonthe
workbench.ņAfterņdeterminingņtableņlocation,ņpredrillņtheņbenchņusingņaņ
3,2ņmmņdiameterņdrillņatņtheņfourņmountingņholeņlocations.ņSecureņtableņ
toņtheņbenchņusingņtheņ4ņwoodņscrews,ņandņwashers.ņ(Includedņwithņtheņ
Shaper/RouterTable.)
SeeFigure2:
4ņWoodņScrewsņ&ņWashersA
Useņ50ņmmņxņ100ņmmņasņalternativeņmountingņoptionB
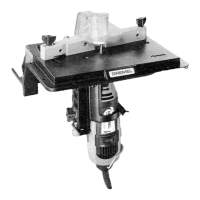
INSTALL ROTARY TOOL TO TABLE
SeeFigure3:
GuardA
FenceB
On/offņswitchņmustņfaceņforwardņsoņleftĶtoĶrightņmotionņwillņturnņC
toolņoff.
DepthņAdjustmentņScrewD
ClampņKnobE
Makeņsureņtheņpowerņcordņofņtheņrotaryņtoolņisņunpluggedņandņ1.ņ
installņtheņrequiredņrouterņbit.
Loosenņtheņclampņknobņandņadjustņtheņheightņofņtheņtoolņholderņtoņ2.ņ
theņlowestņposition.
Moveņtheņrotaryņtoolņfromņtheņundersideņinņtheņtoolņholderņandņ3.ņ
turnņtheņnutņonņtopņofņtheņtoolņholderņtoņfixateņtheņrotaryņtool.ņUseņ
theņopenņendņspannerņtoņfastenņtheņnut.
OPERATING INSTRUCTIONS
CHANGING ROUTER BITS
Loosenņtheņclampņknobņandņadjustņtheņheightņofņtheņtoolņholderņtoņ1.ņ
theņlowestņposition.
Rotateņtheņrotaryņtoolņsoņtheņshaftņlockņbuttonņcanņbeņoperatedņ2.ņ
throughņanņopeningņinņtheņtoolņholder.
Applyņtheņshaftņlockņbuttonņandņloosenņtheņrouterņbit.3.ņ
Removeņtheņrouterņbitņthroughņtheņtableņandņinstallņanotherņrouterņ4.ņ
bit.
Applyņtheņshaftņlockņbuttonņandņfixateņtheņrouterņbit.5.ņ
CUTTING DEPTH ADJUSTMENT
Loosenņtheņclampņknobņandņturnņtheņdepthņadjustmentņknobņtoņsetņ
cuttingņdepth.ņDepthņofņcutņwillņbeņtheņamountņtheņbitņextendsņaboveņ
theņshaper/routerņtable.
SeeFigure4:
LargeņKnobA
DepthņofņCutB
TableC
DepthņAdjustmentņScrewD
ToolHolderAssemblyE
Adjustmentņmarkingsņonņtheņsideņofņtheņtoolņholderņfacingņoutwardņareņ
markedņinņinchesņandņmillimeters.ņViewņtheņmarkingsņpriorņtoņstartingņ
yourproject.Turnthedepthadjustmentknobtosetdesireddepth.To
ensureņproperņsettings,ņroutņandņmeasureņcutņonņscrapņmaterial.
SeeFigure5:Depth Adjustment Markings
Inchesņinņ1/8ņinchņincrementsA
Millimetersņinņ5ņmmņincrementsB
 Loading...